Steam-Controller-Guide
Steam Controller (2015) Teardown Guide
For soldered components see the Soldering Guide after taking the board out.
Tools Needed
- Long Torx T6 screwdriver
- Pry tools (preferably plastic to avoid damaging something)
- Tweezers / steady hands
- Clean and organized workspace (eg. silicone work mat)
- Flathead screwdriver and pliers for taking apart the triggers
- Hairdryer / heat gun, spudger and soldering iron for taking apart the trackpads
Tips & Tricks
- Place screws and parts grouped together
- Some parts during disassembly can fall out, work somewhere where they can’t get lost easily
Disassembly
Explanation
- Magenta: things to look out for
- Red: short screw
- Yellow: long screw
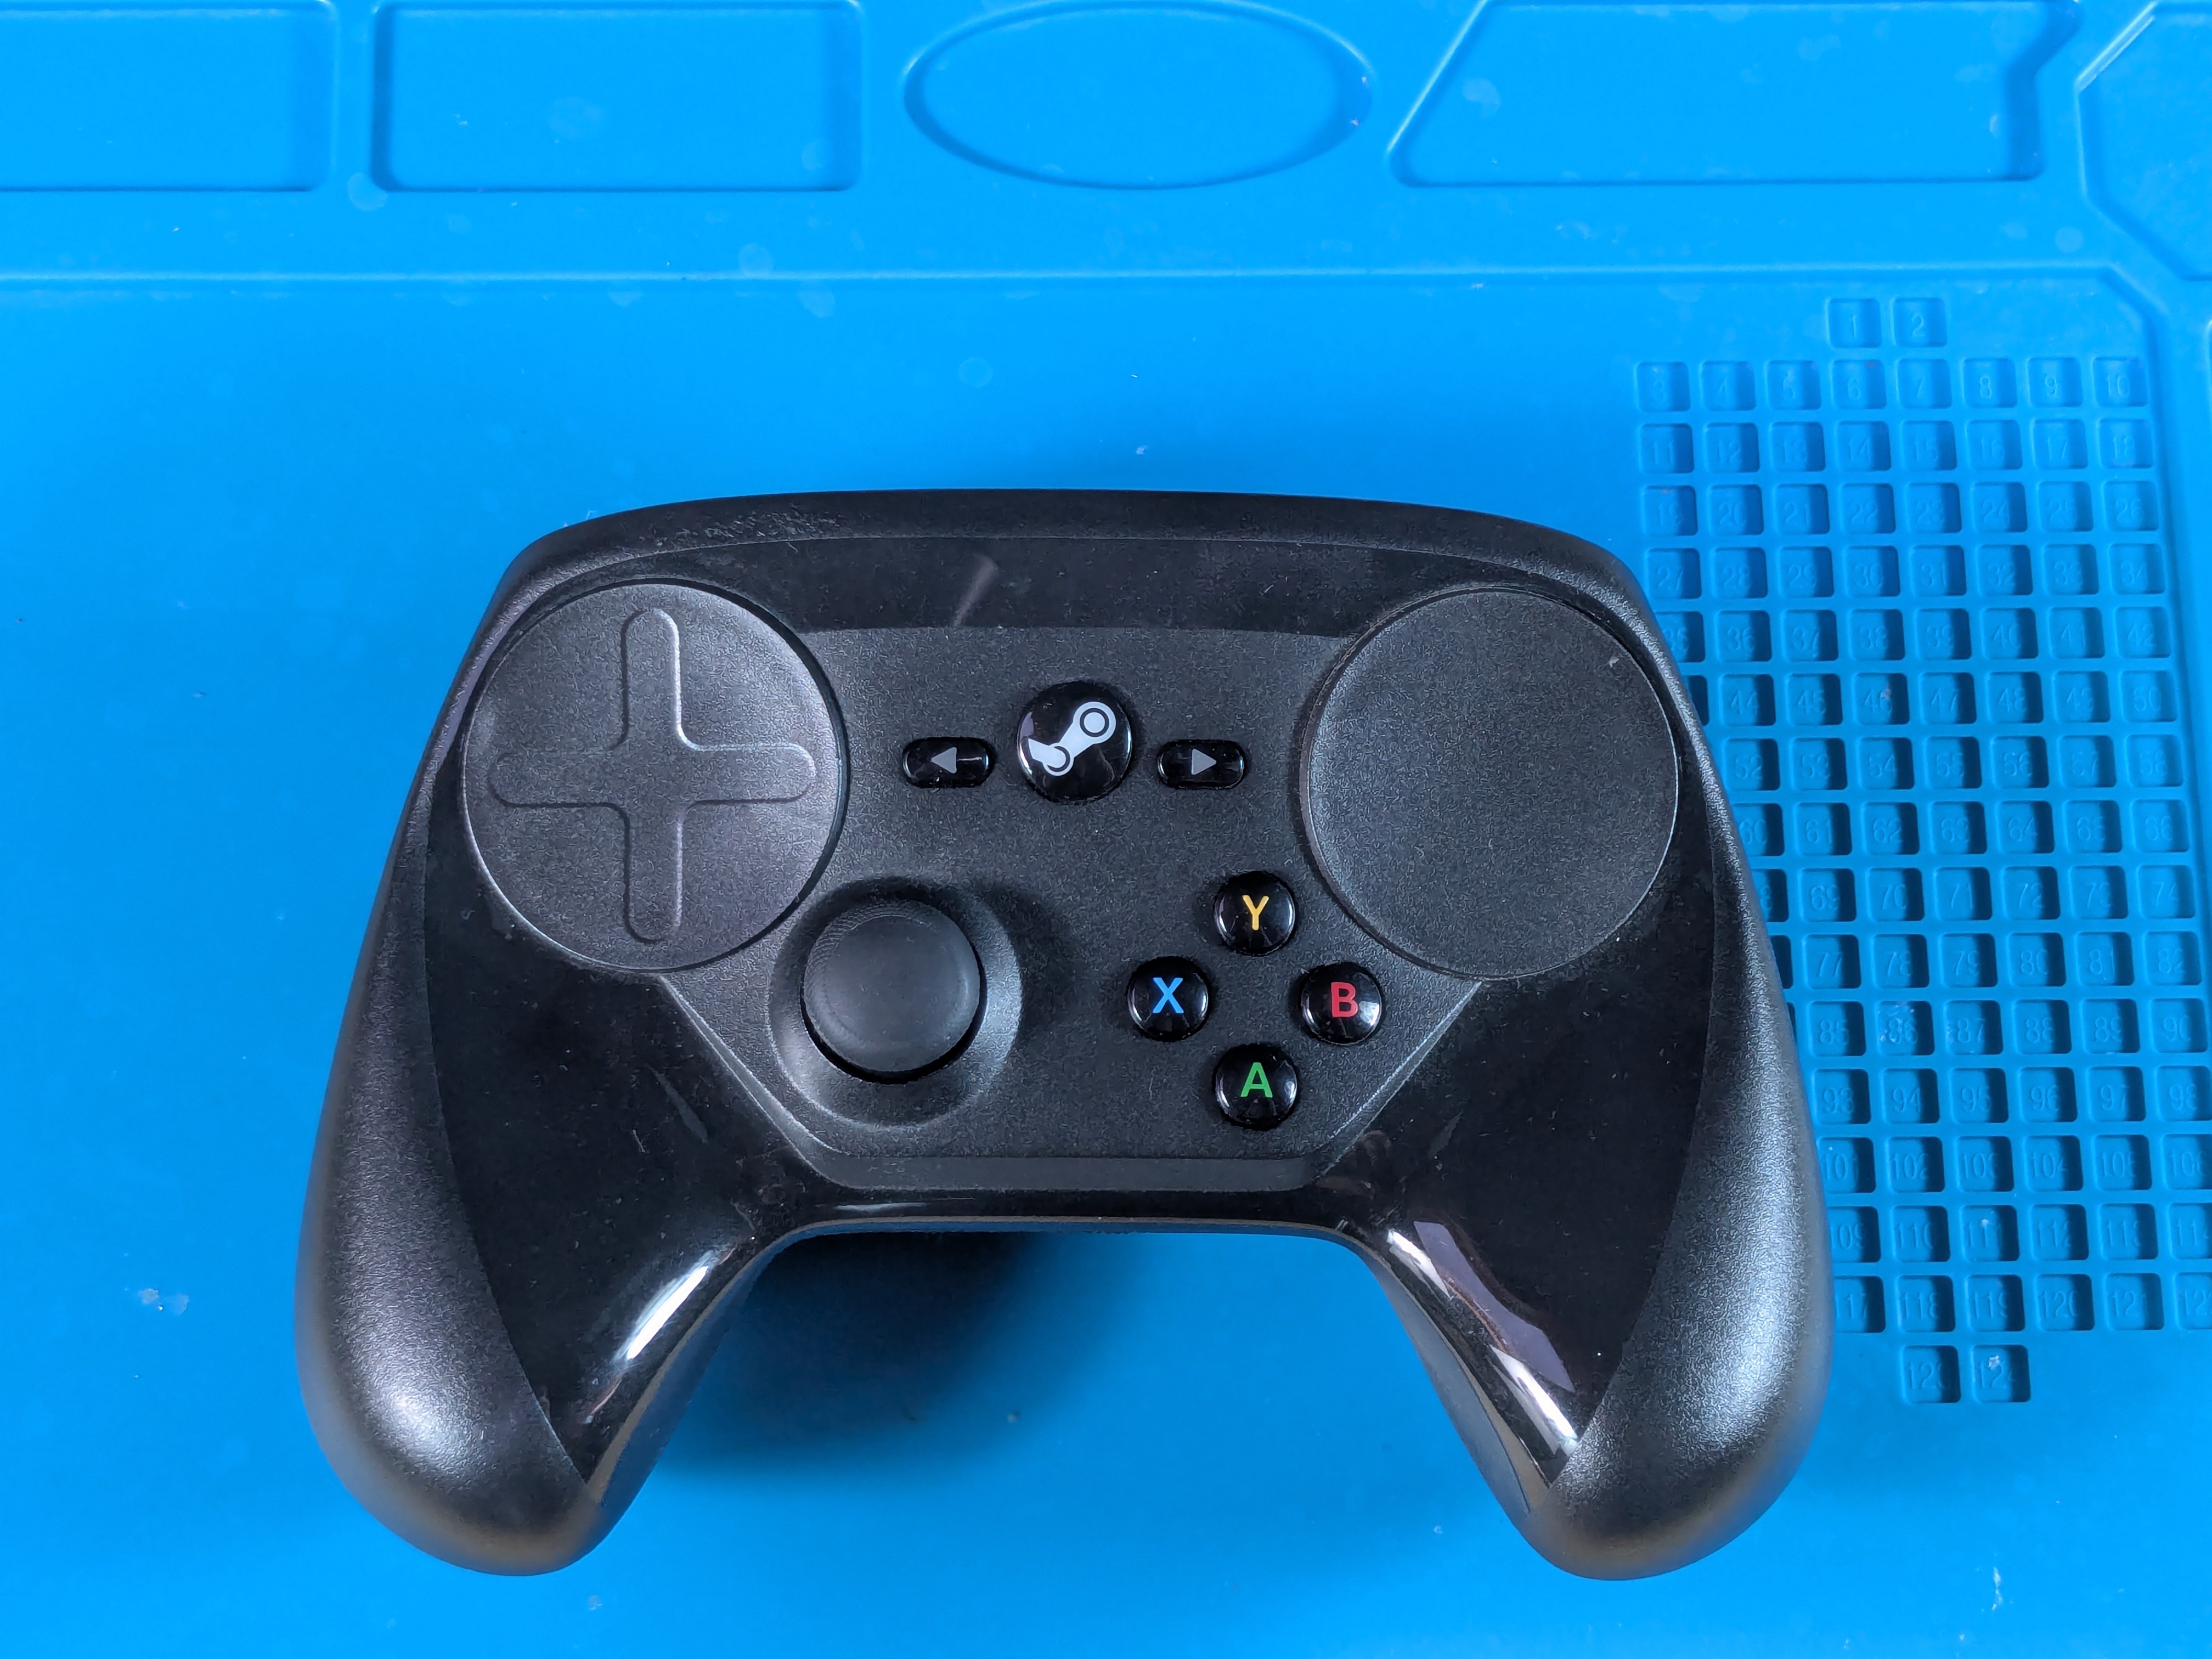
Steam Controller
Front Side
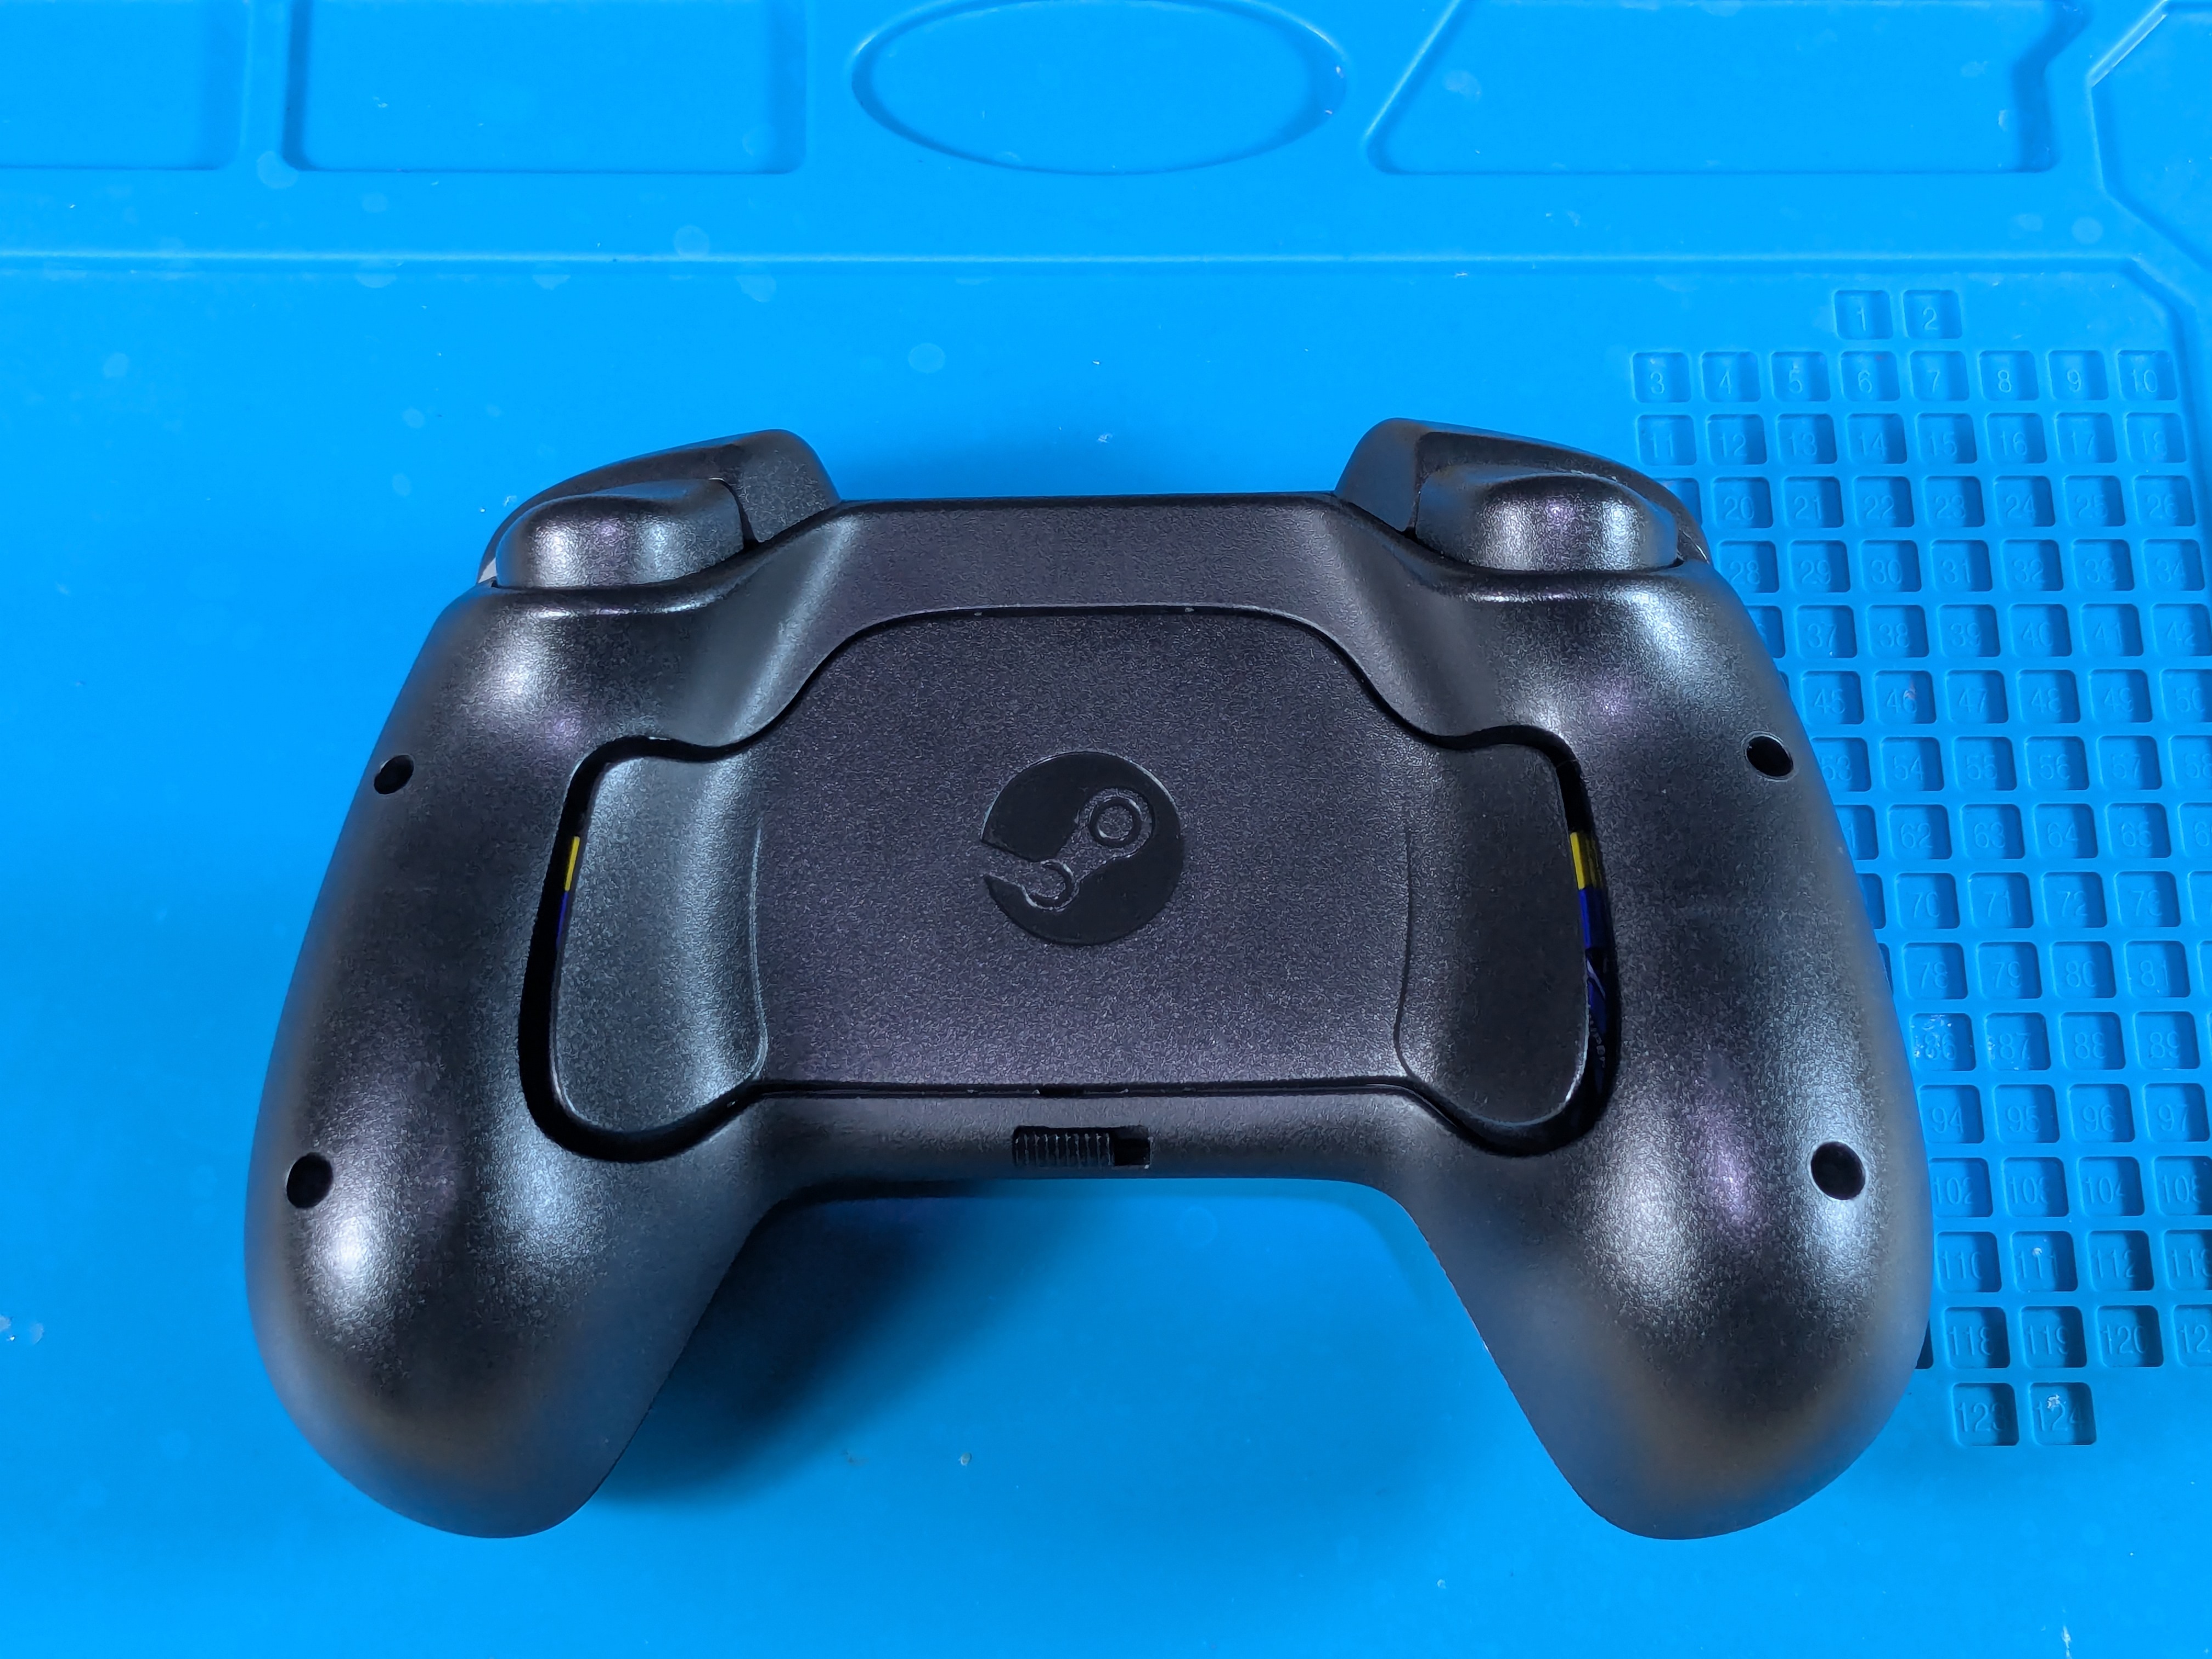
Back Side
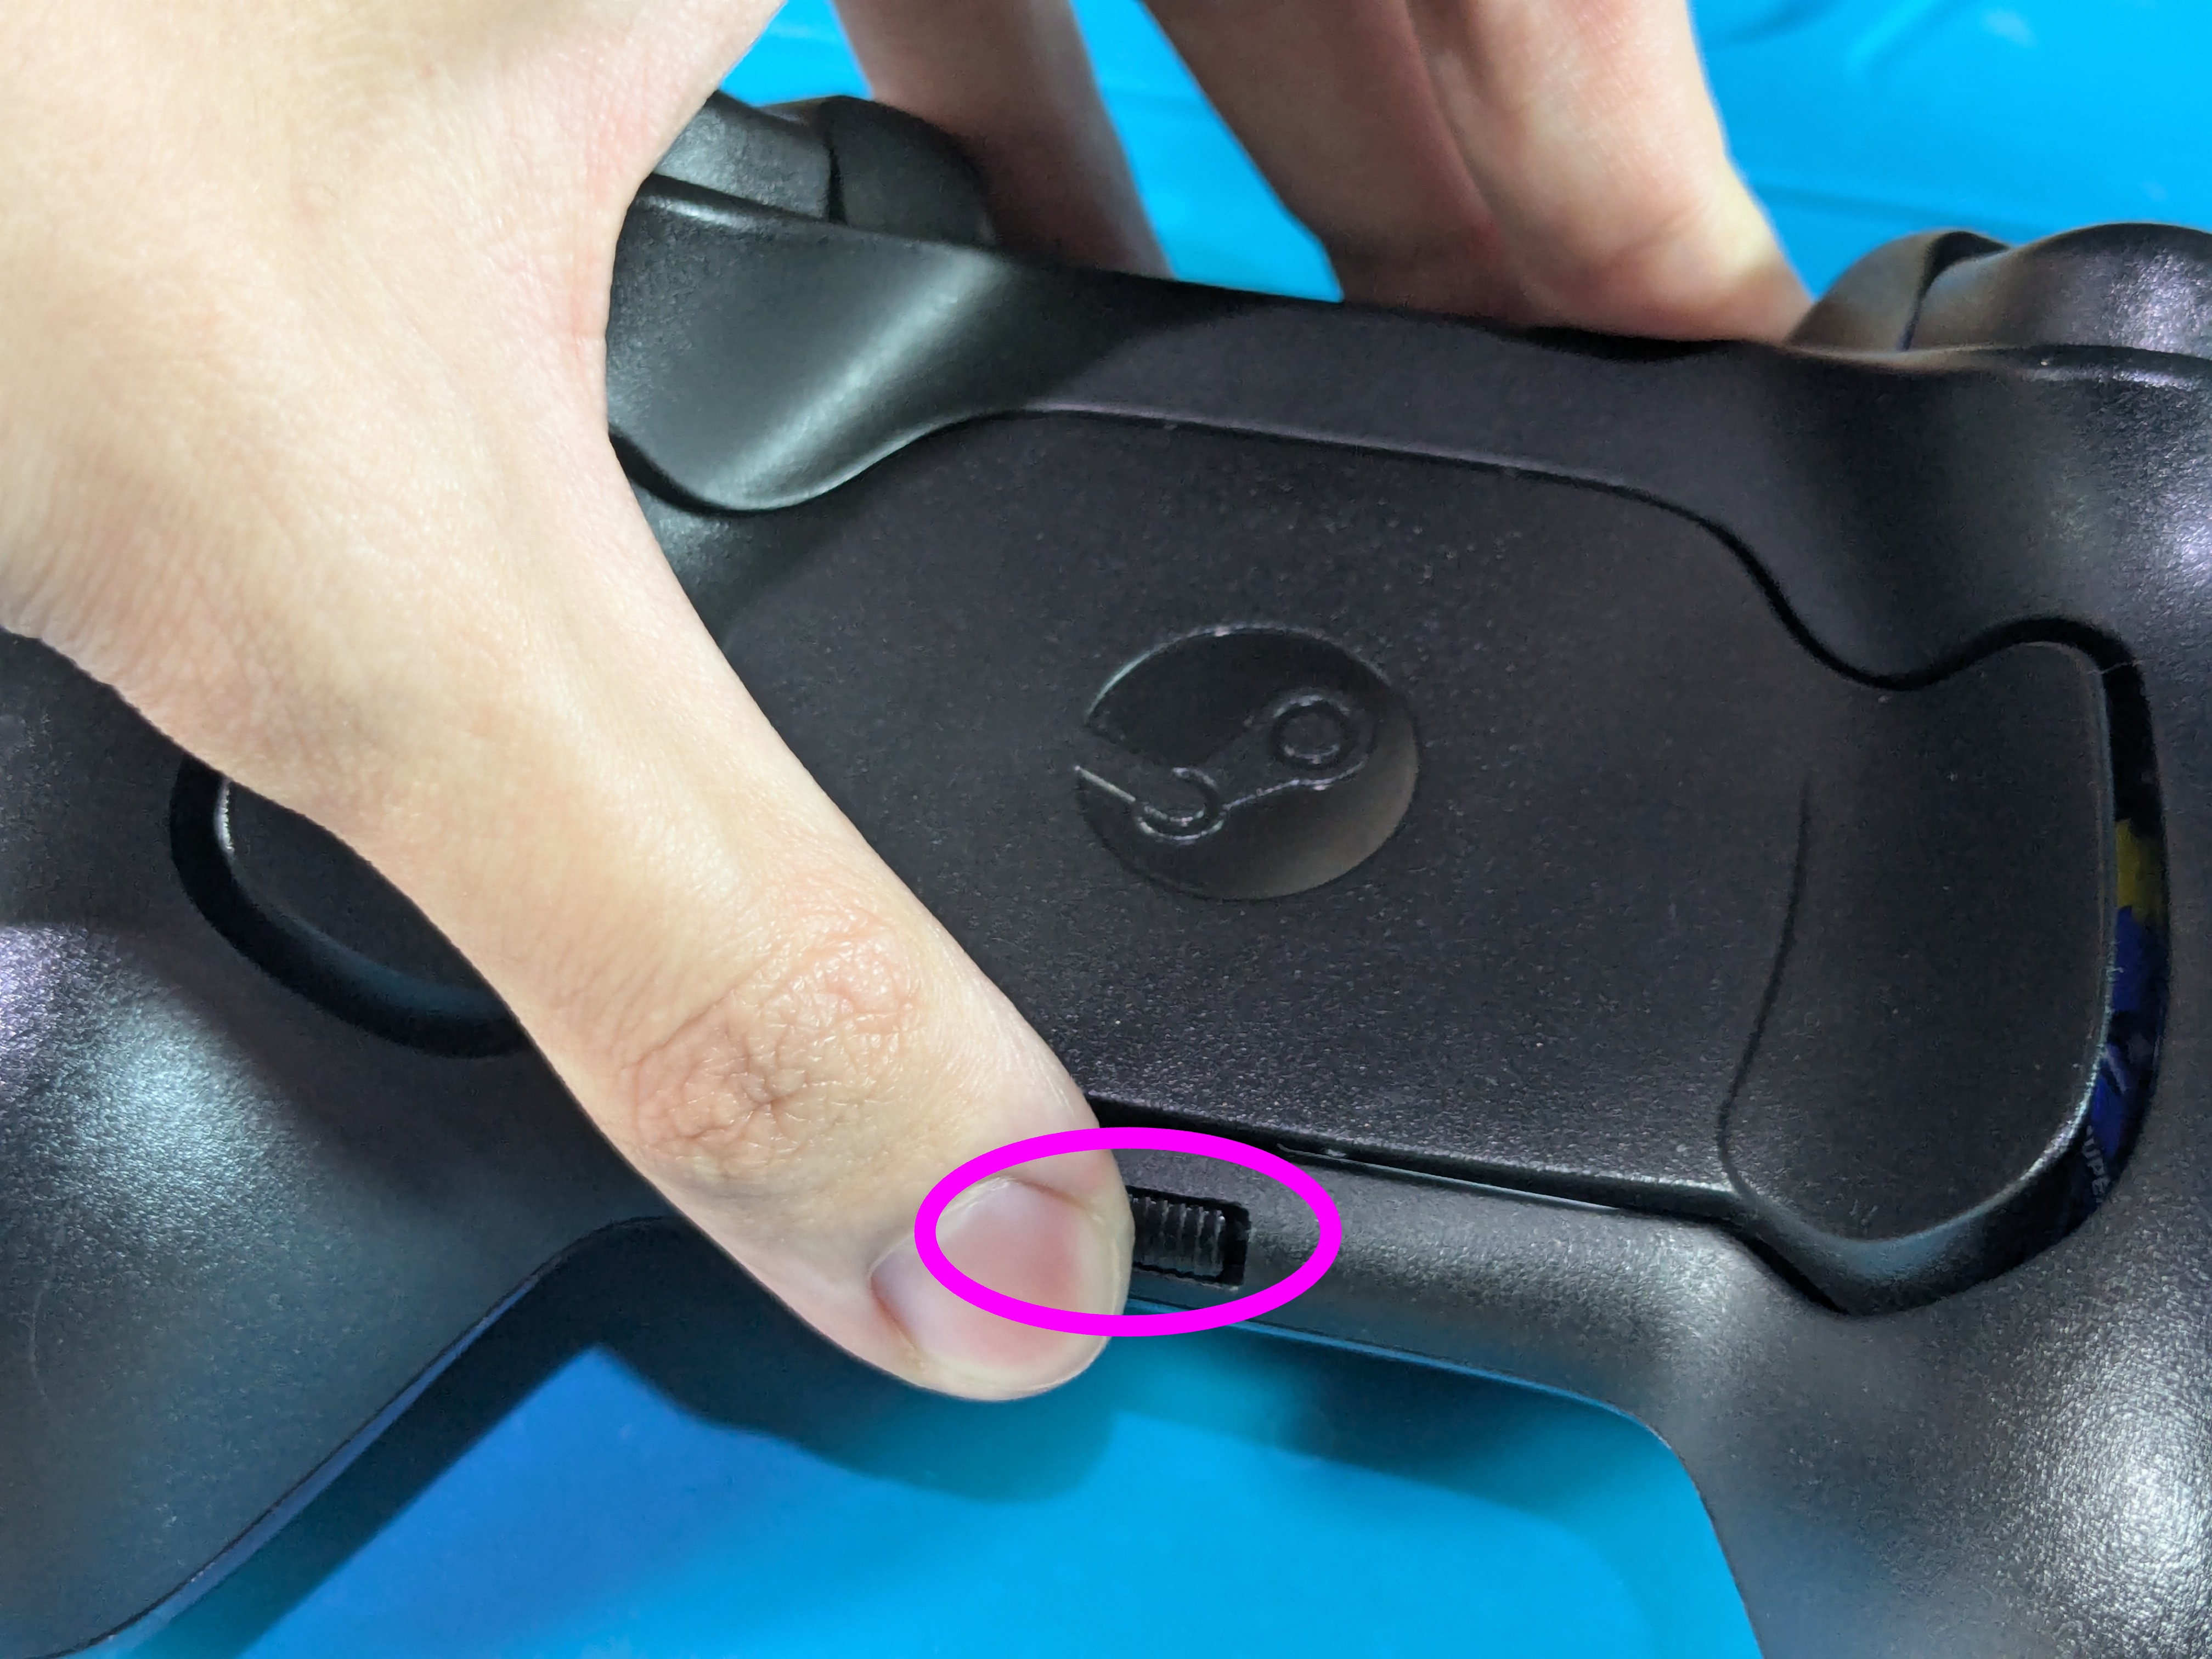
Taking Off The Back Shell
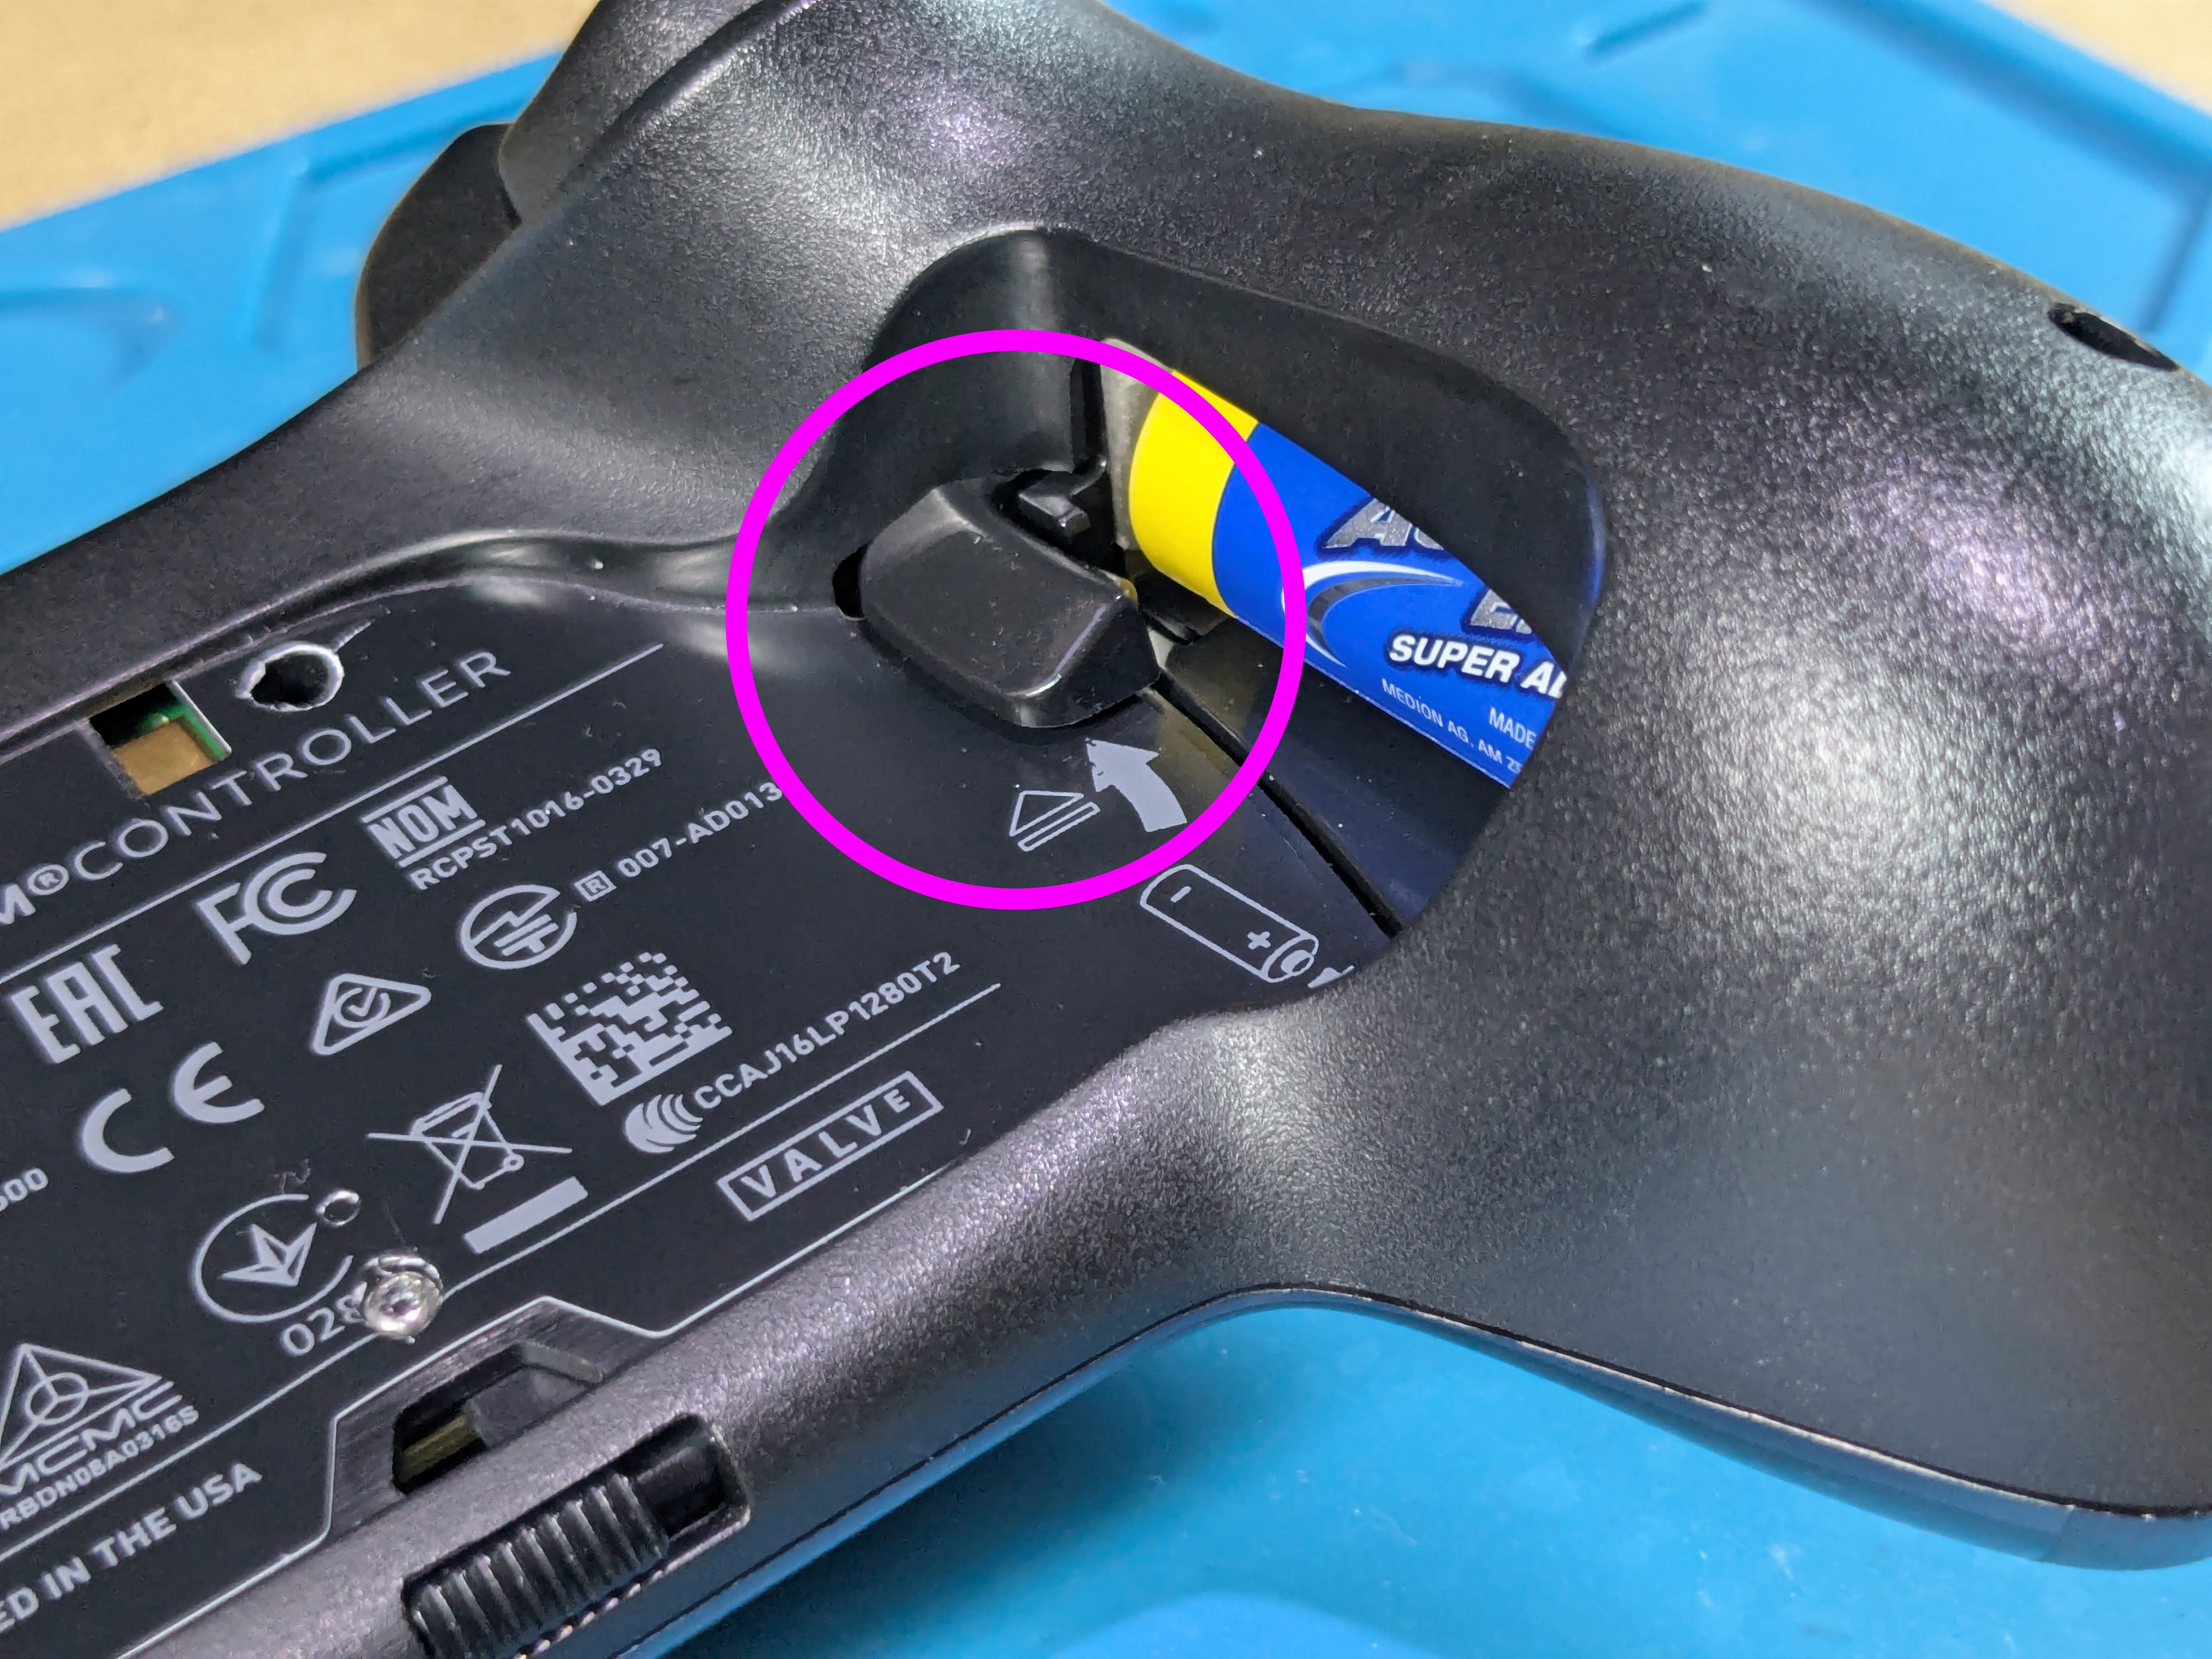
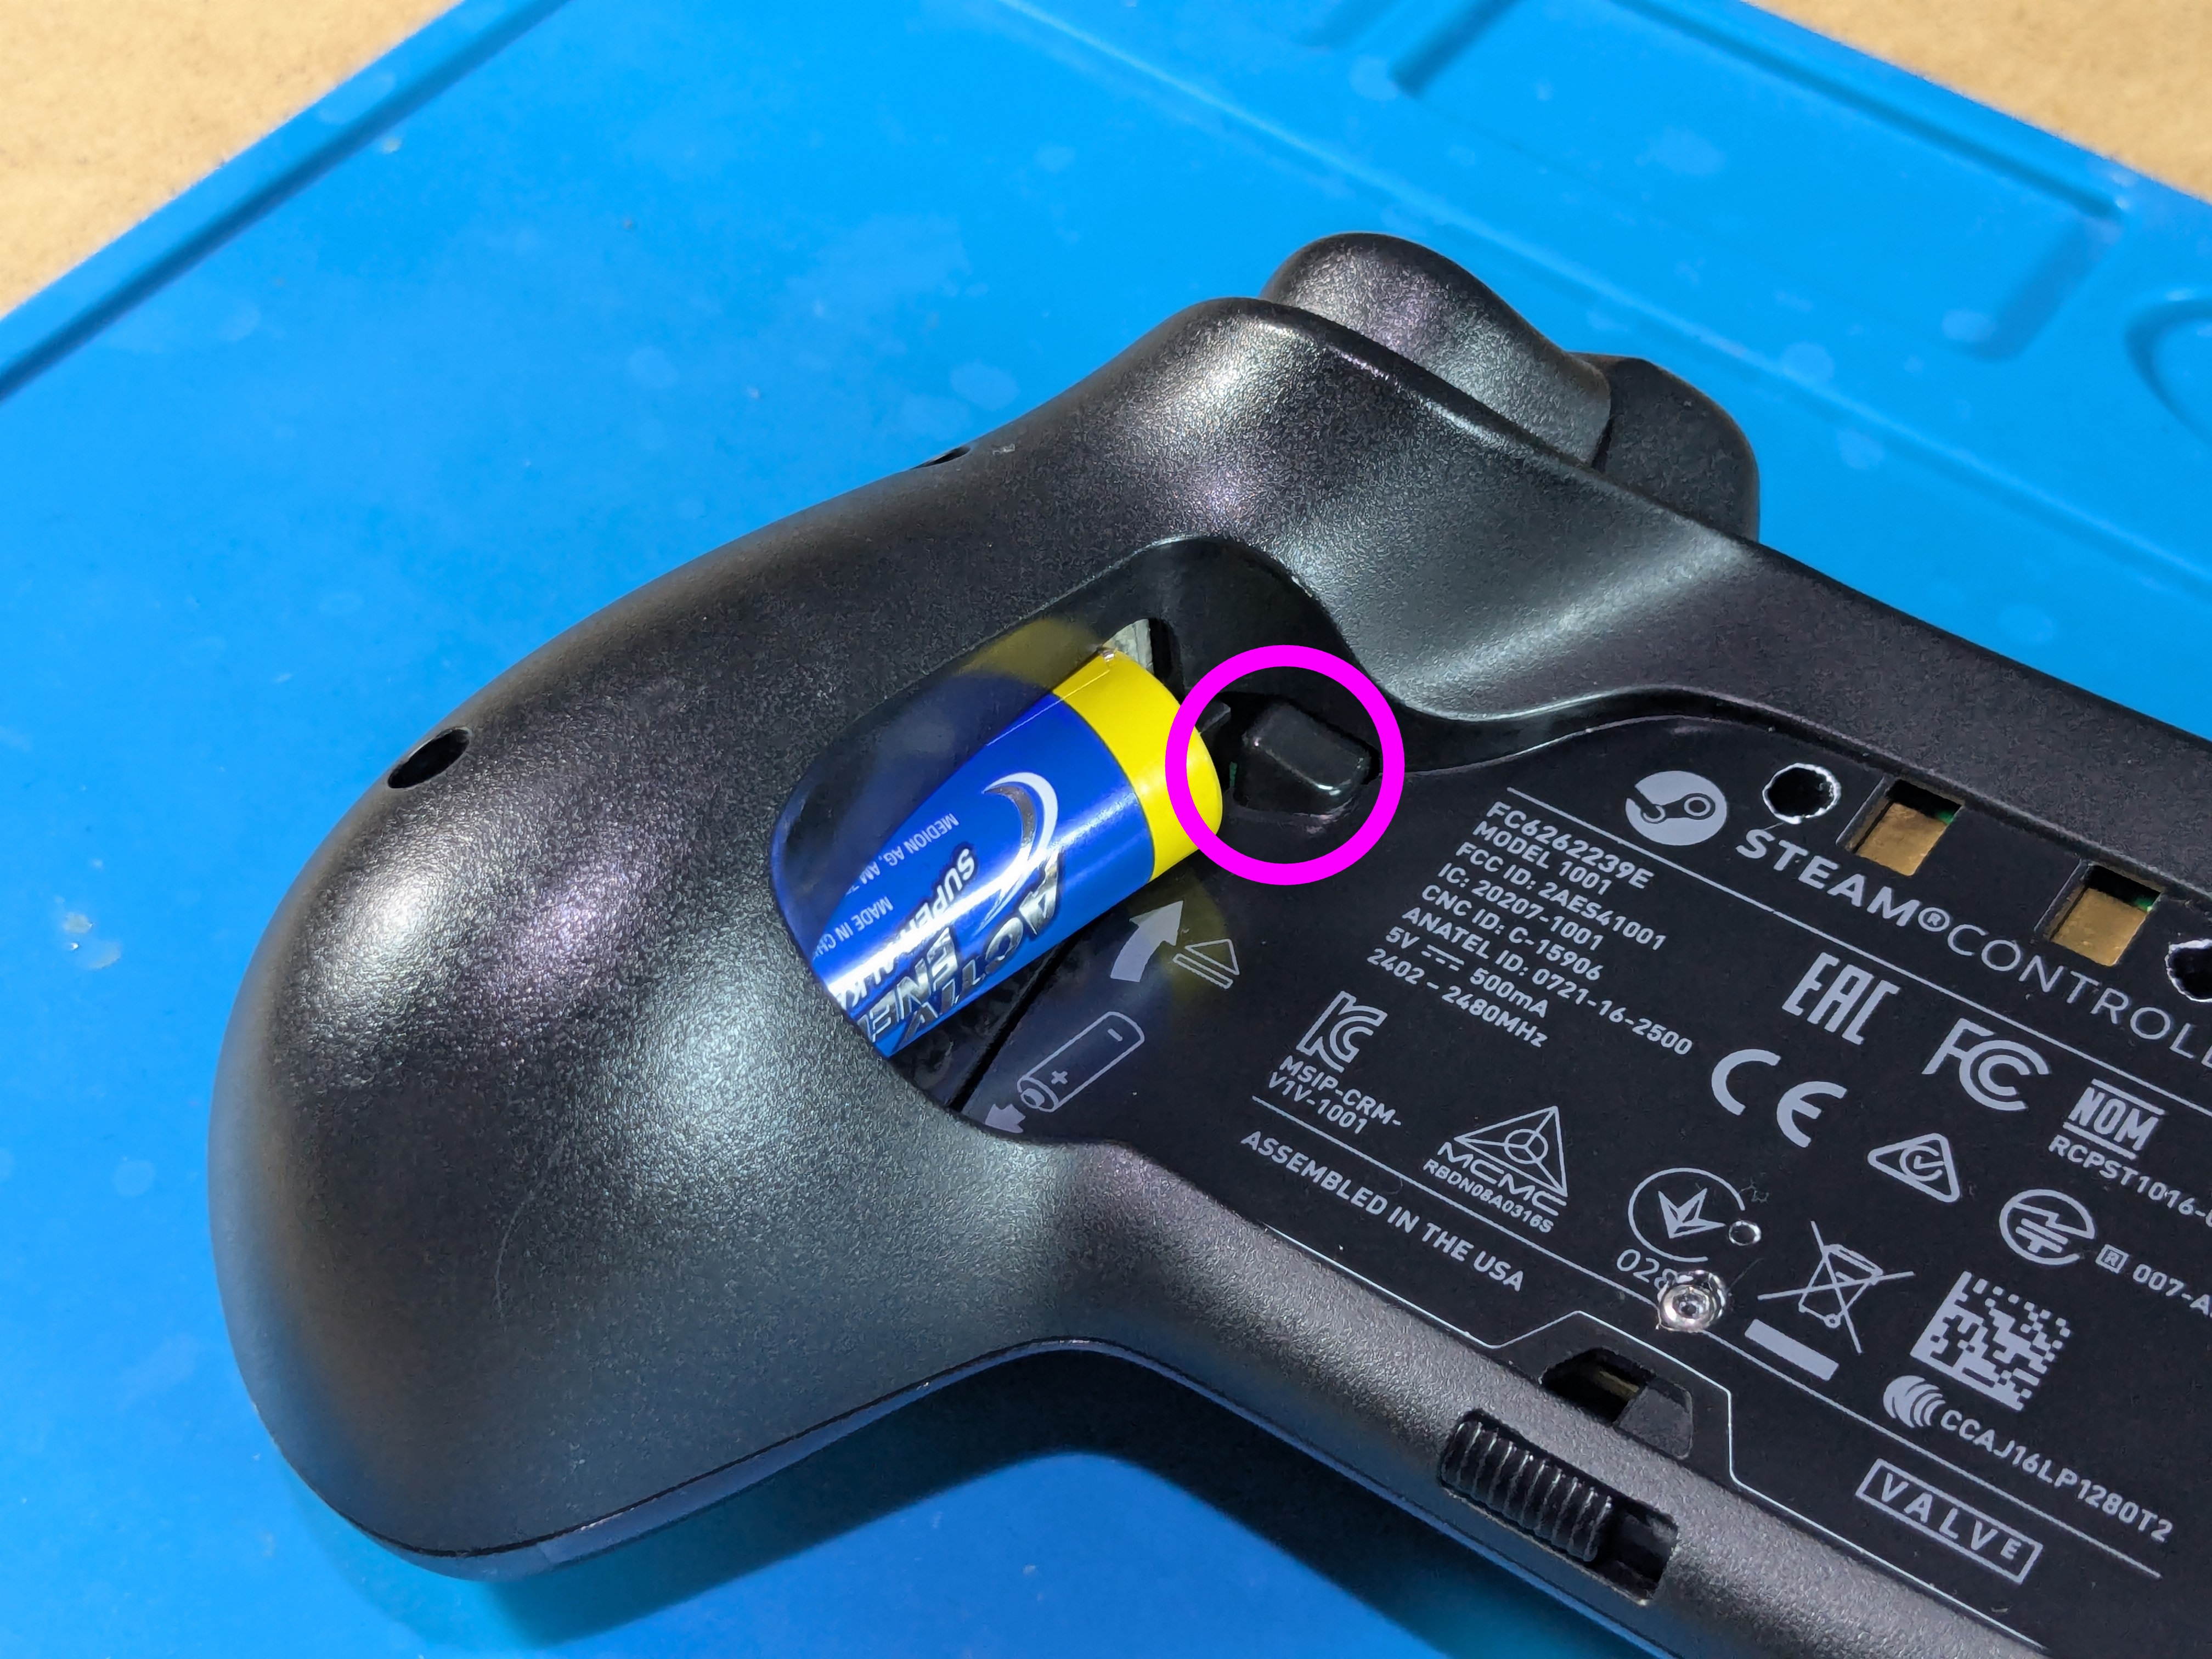
Taking Off The Backplate
- Push the slider towards the left grip of the controller, the backplate should “pop off”
- Sometimes the slider can get stuck, try moving it backwards and forwards
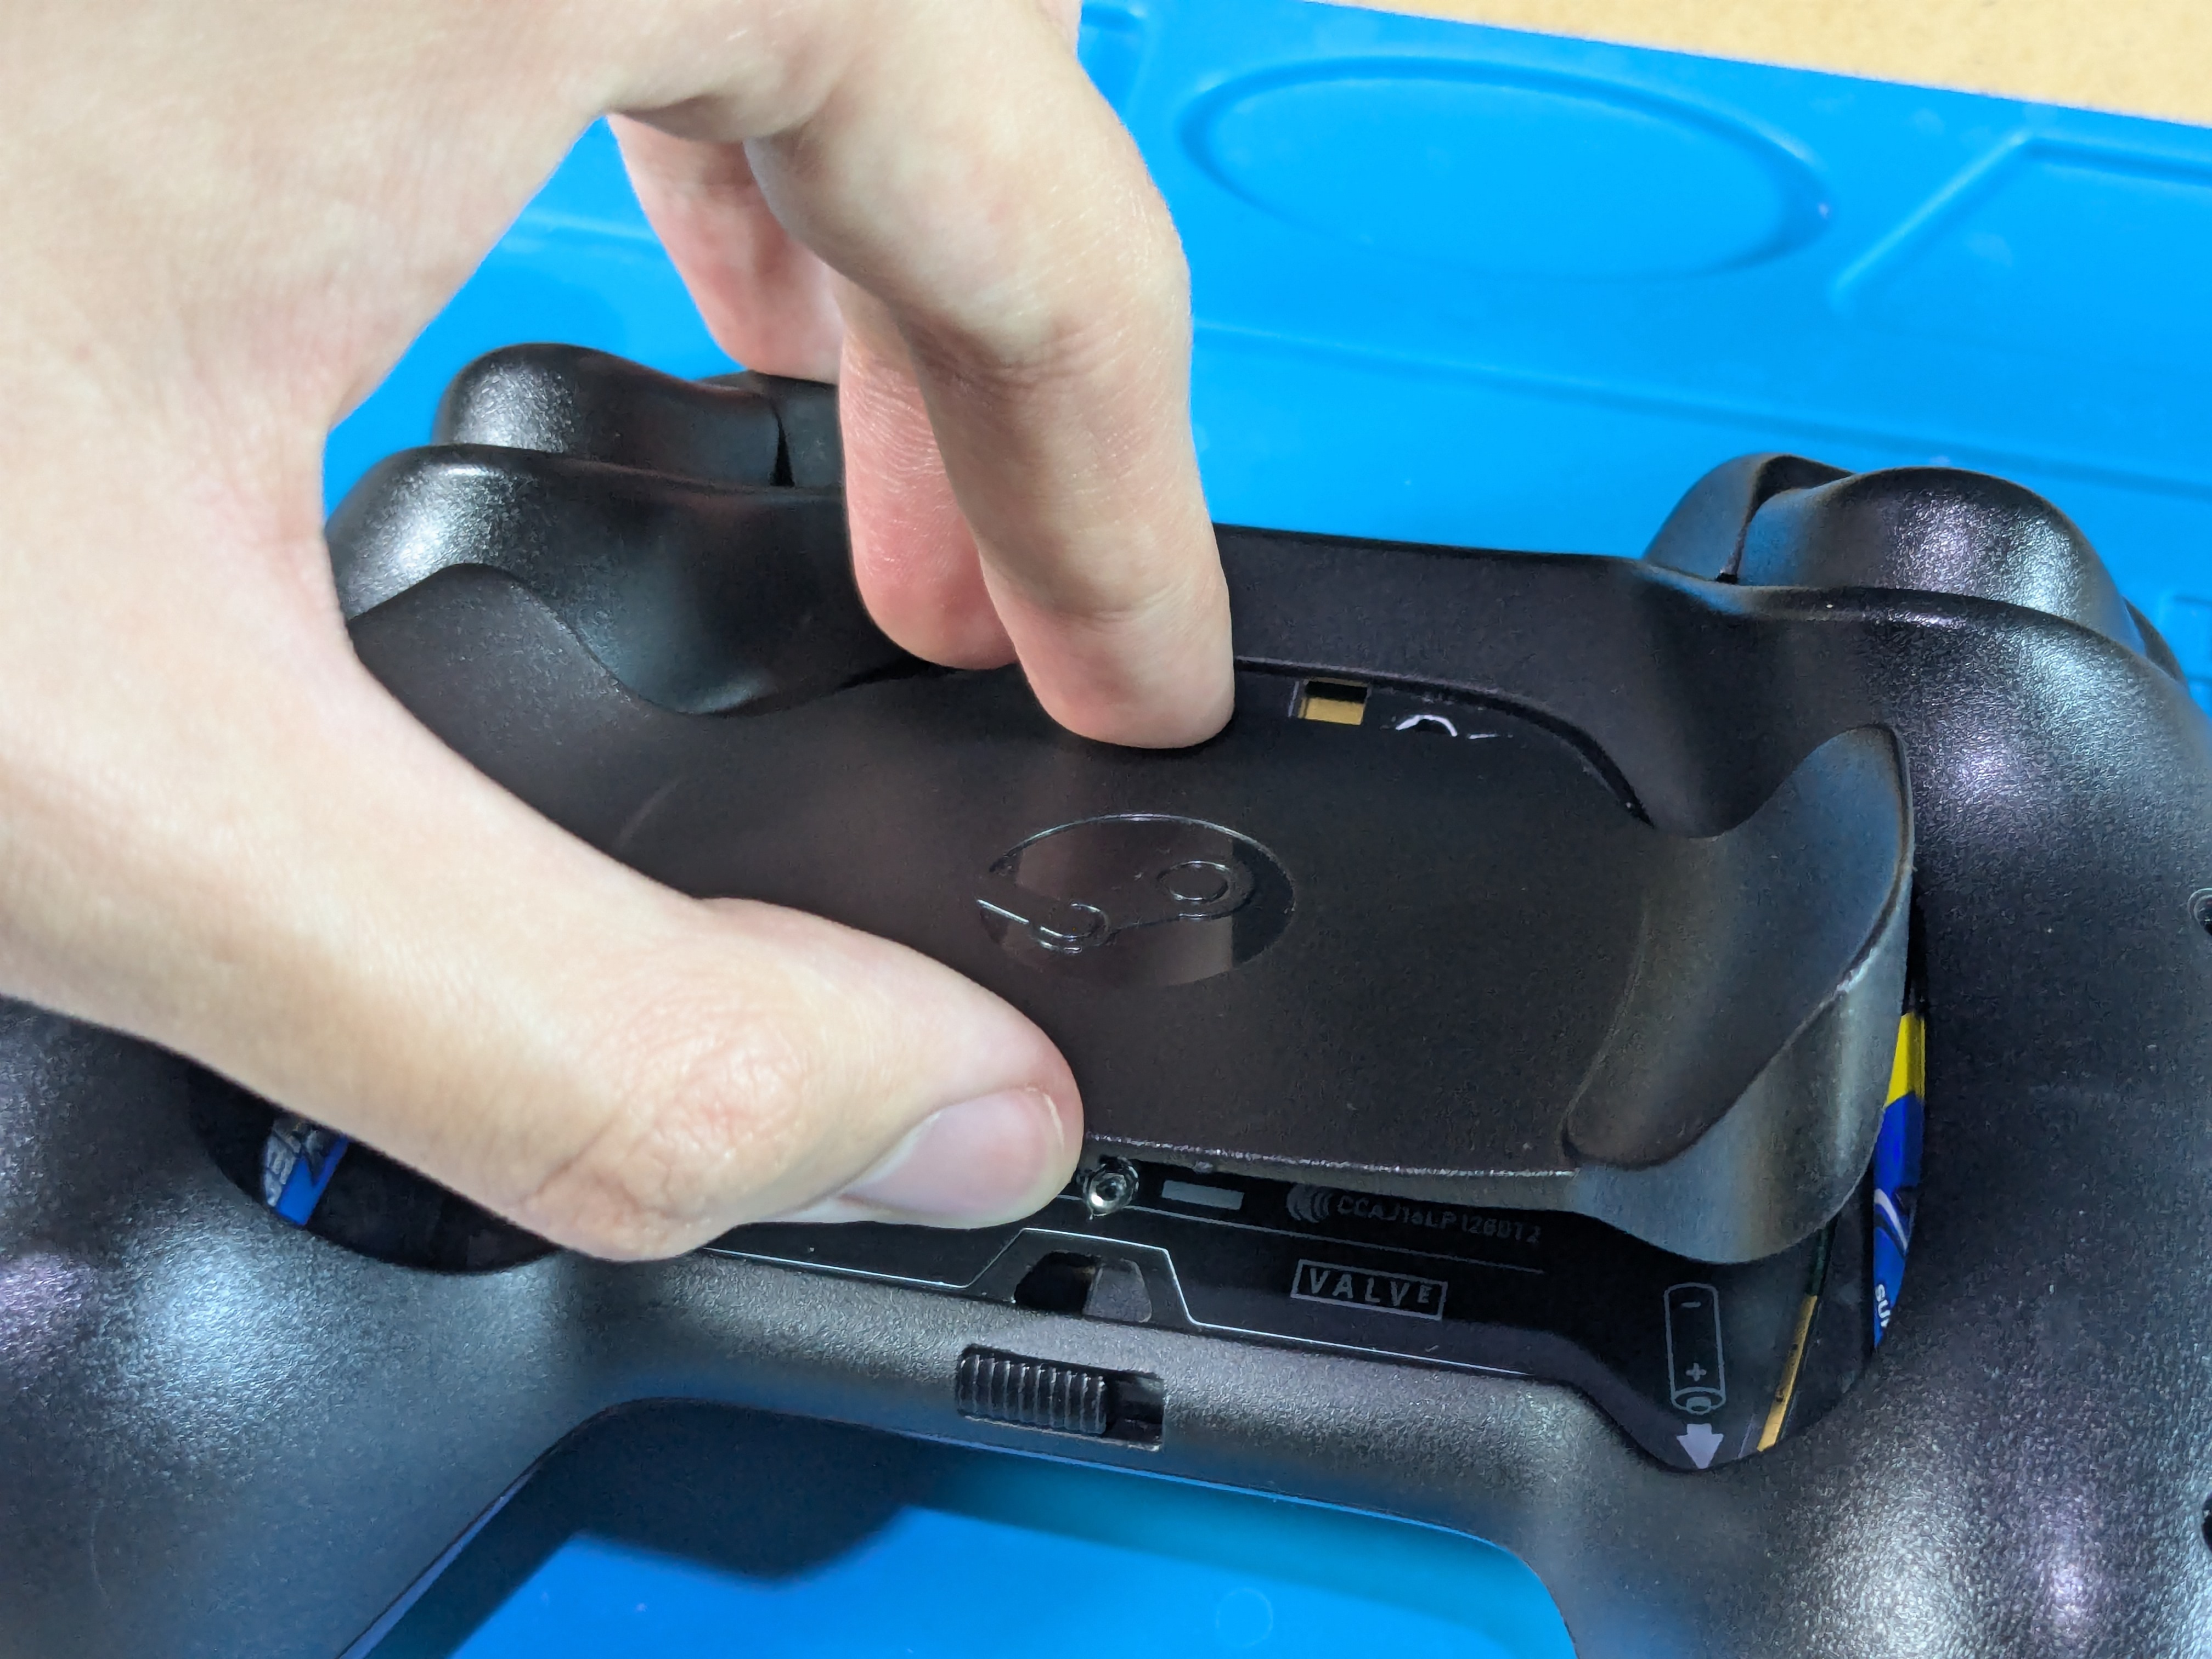
Taking Out The Batteries
- Push in the battery holder levers and then take out the batteries
- If the batteries are stuck, try prying outwards with fingers on the top of the batteries


Back Shell Screw Locations
- The screws in the middle (2 small, 1 long) are hidden by the sticker from the factory
- Either try taking off the sticker in one piece or pierce through it with a screwdriver / exacto knife
- These screws may get stuck in the back shell until the sticker is removed around the top holes
- The outer (4 small) screws are deep in the controller and require a long screwdriver

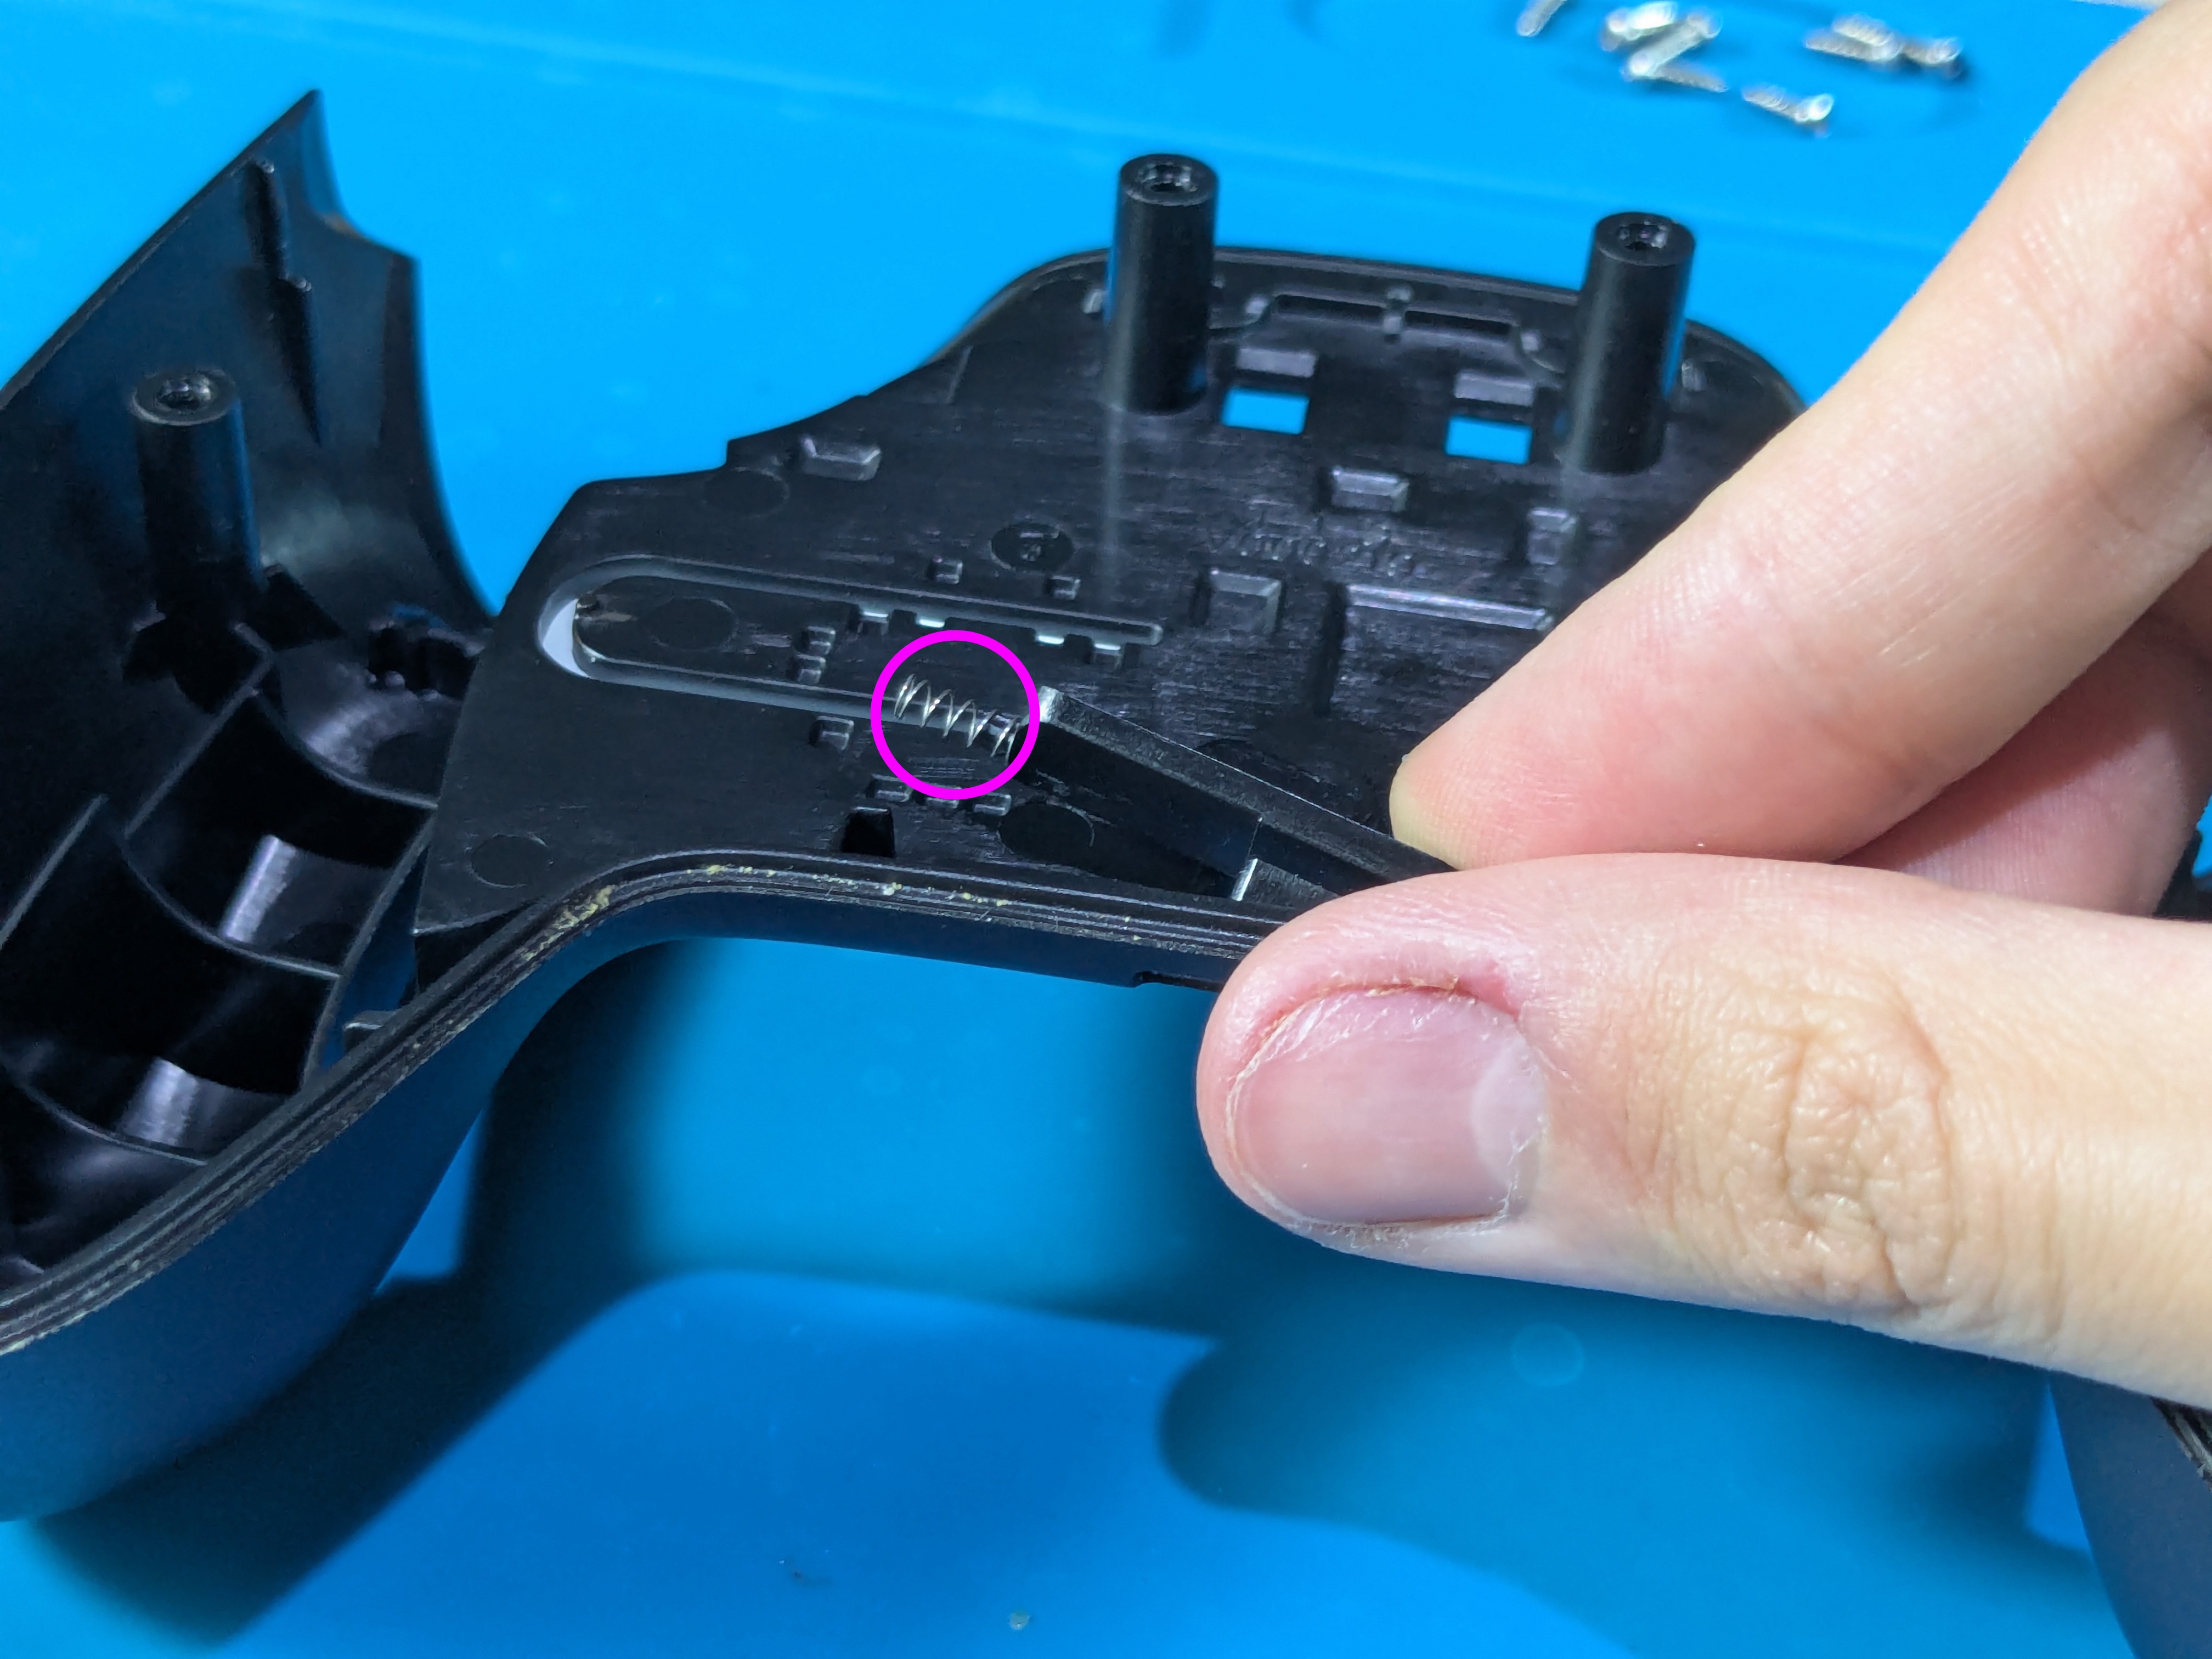
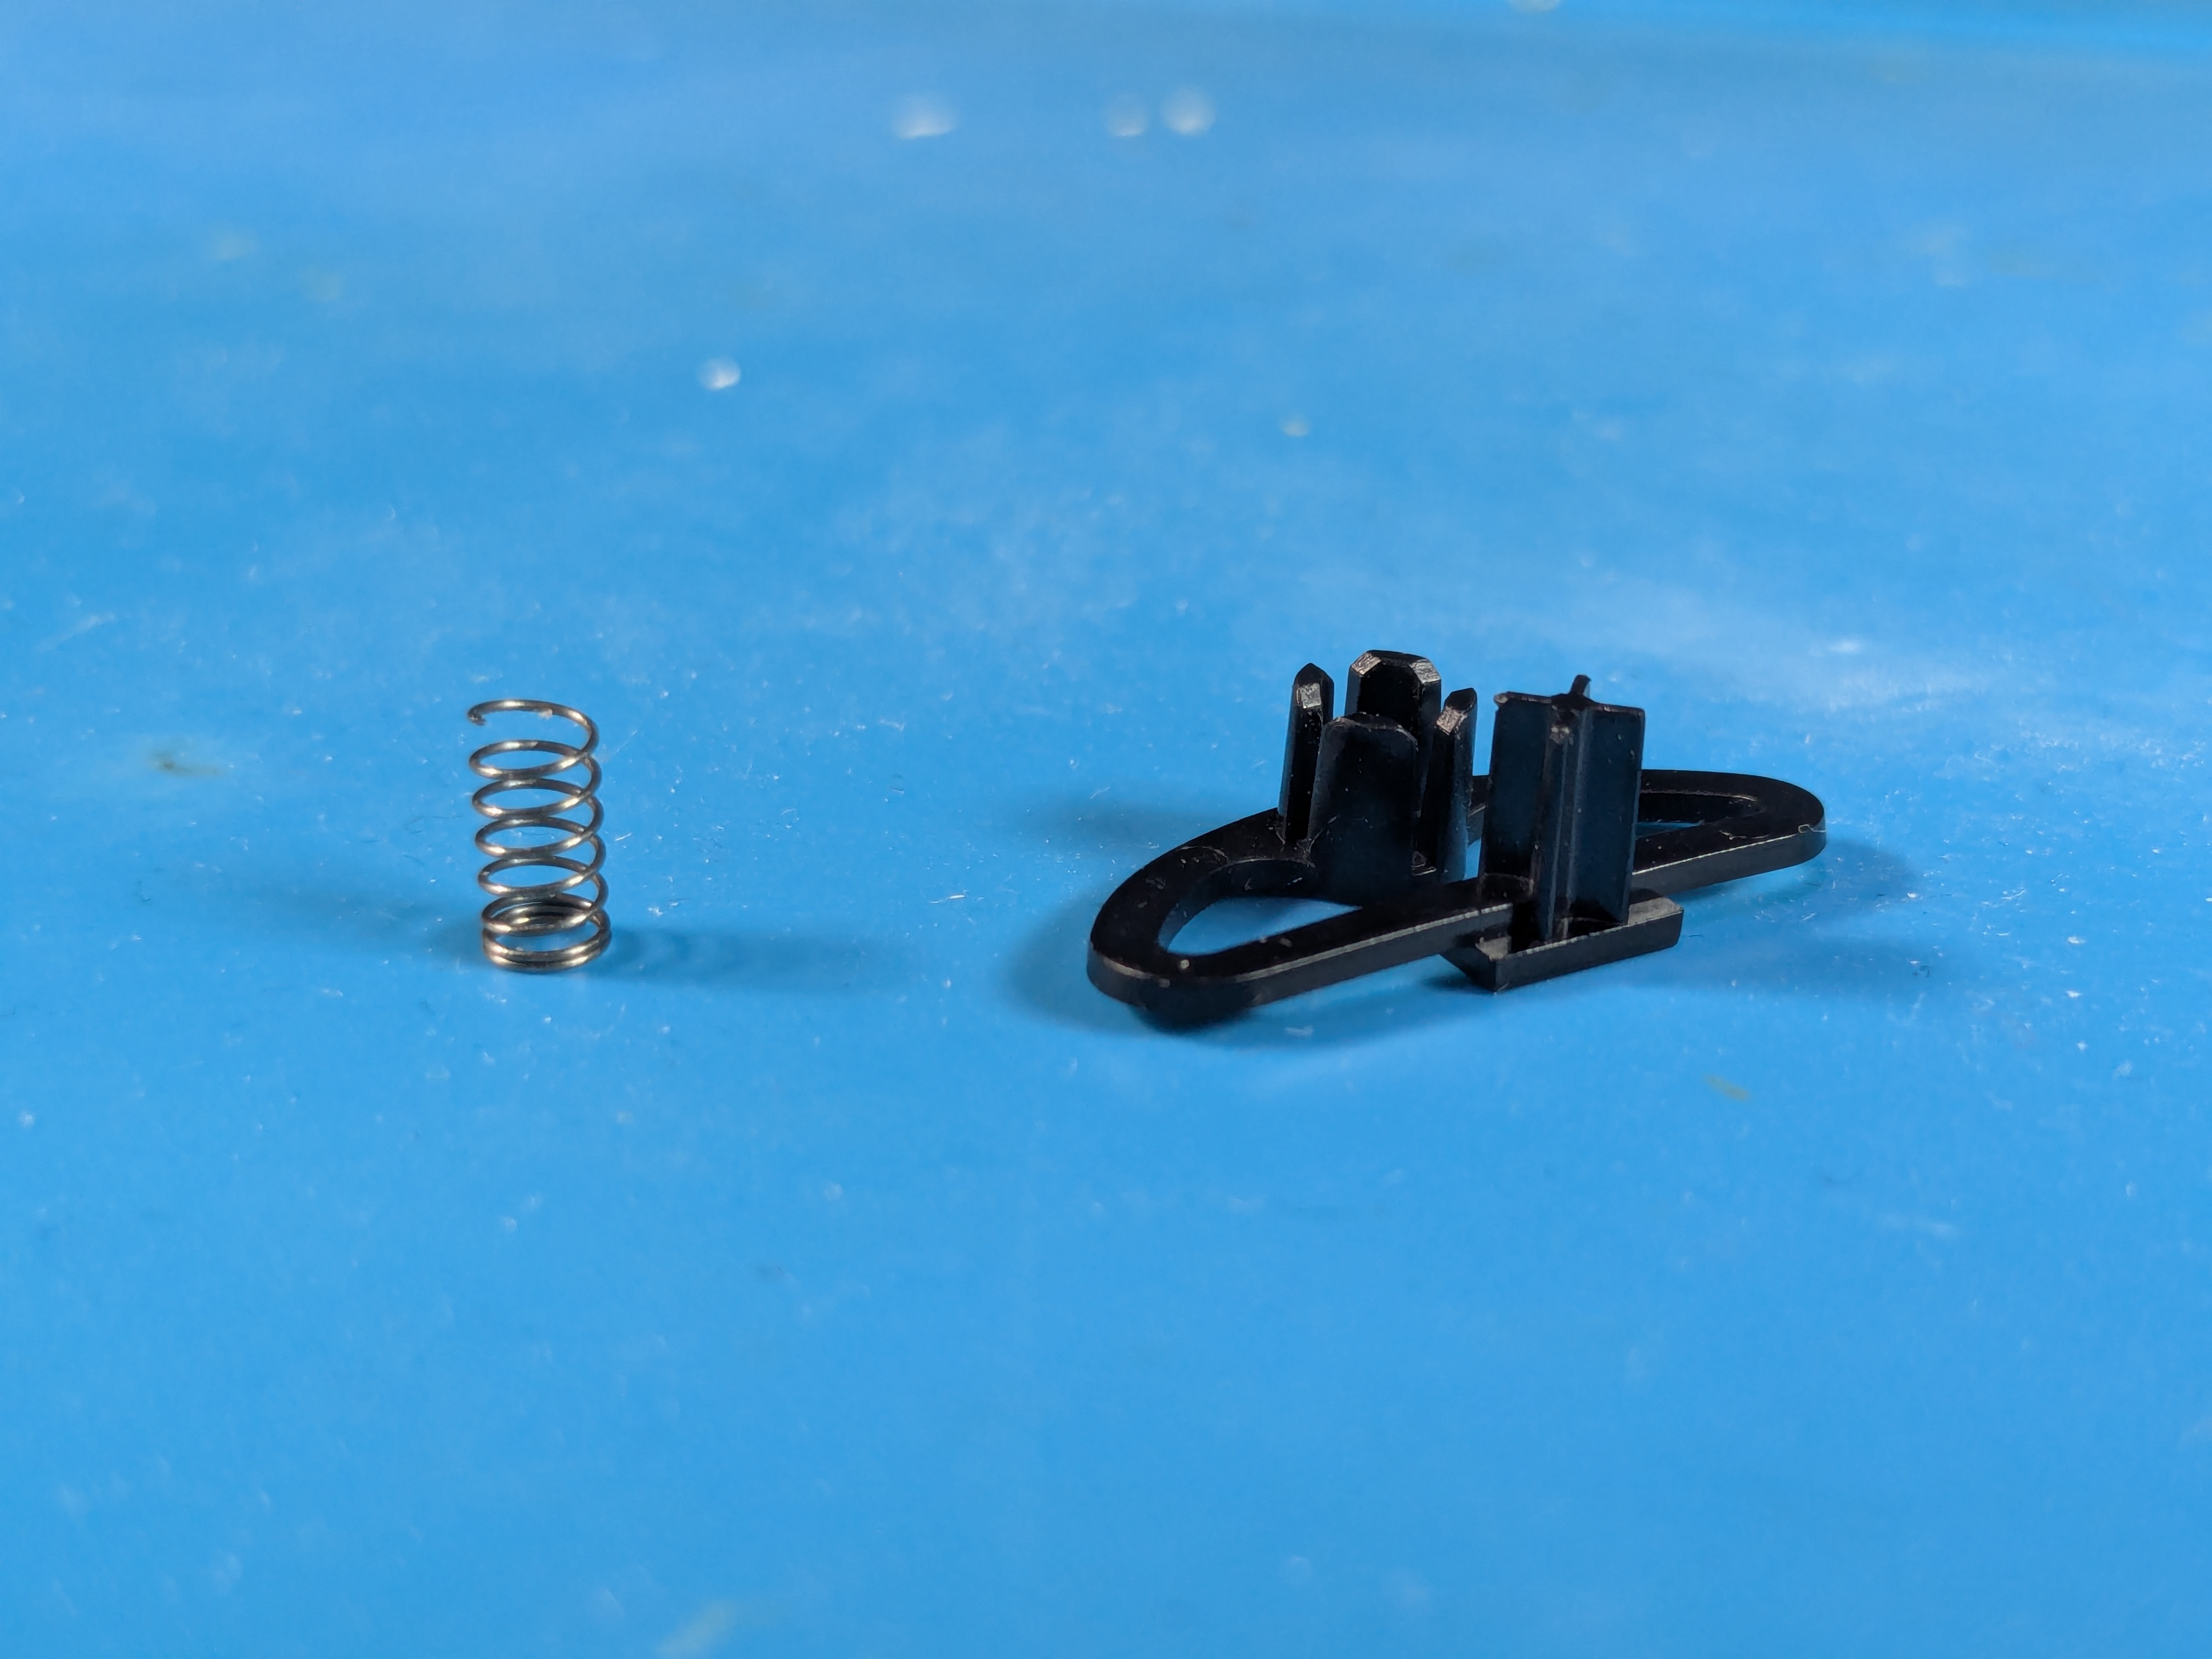
Slider In The Back Shell
- The back shell has the slider to take off the backplate, make sure not to lose the plastic piece and the spring attached to it
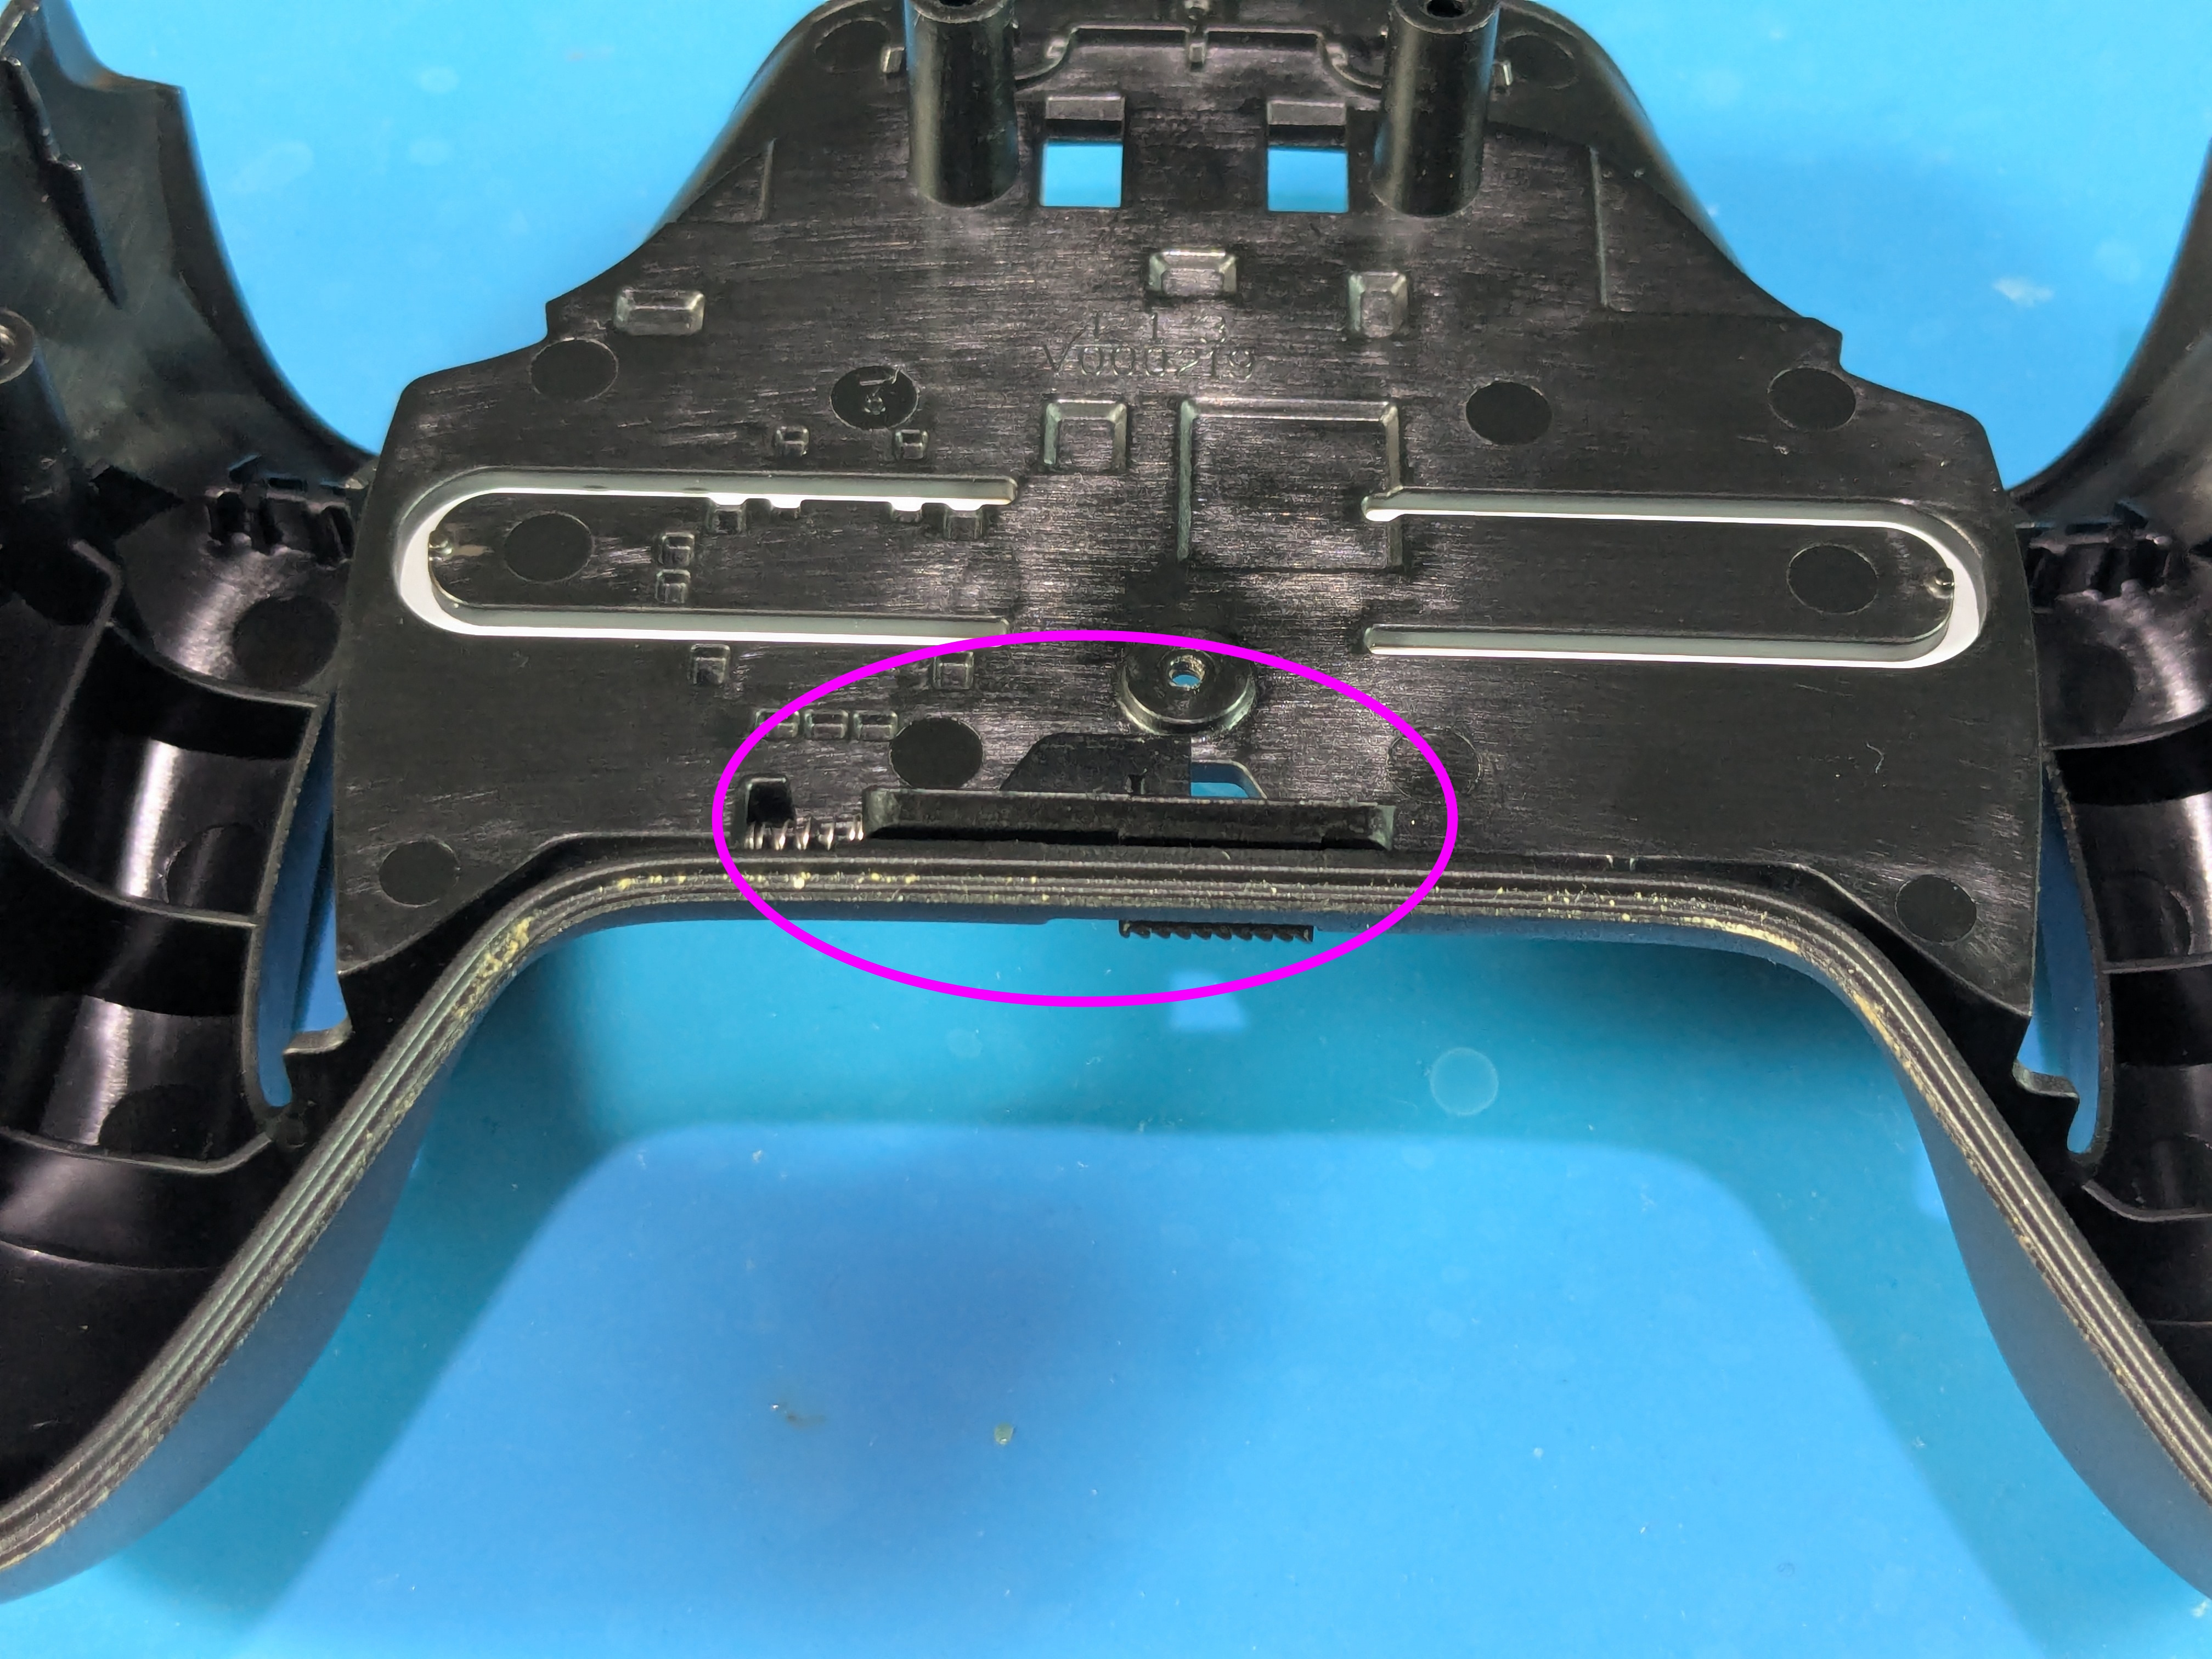
- To take it out, push inwards from the edge that doesn’t have the spring so it lifts up
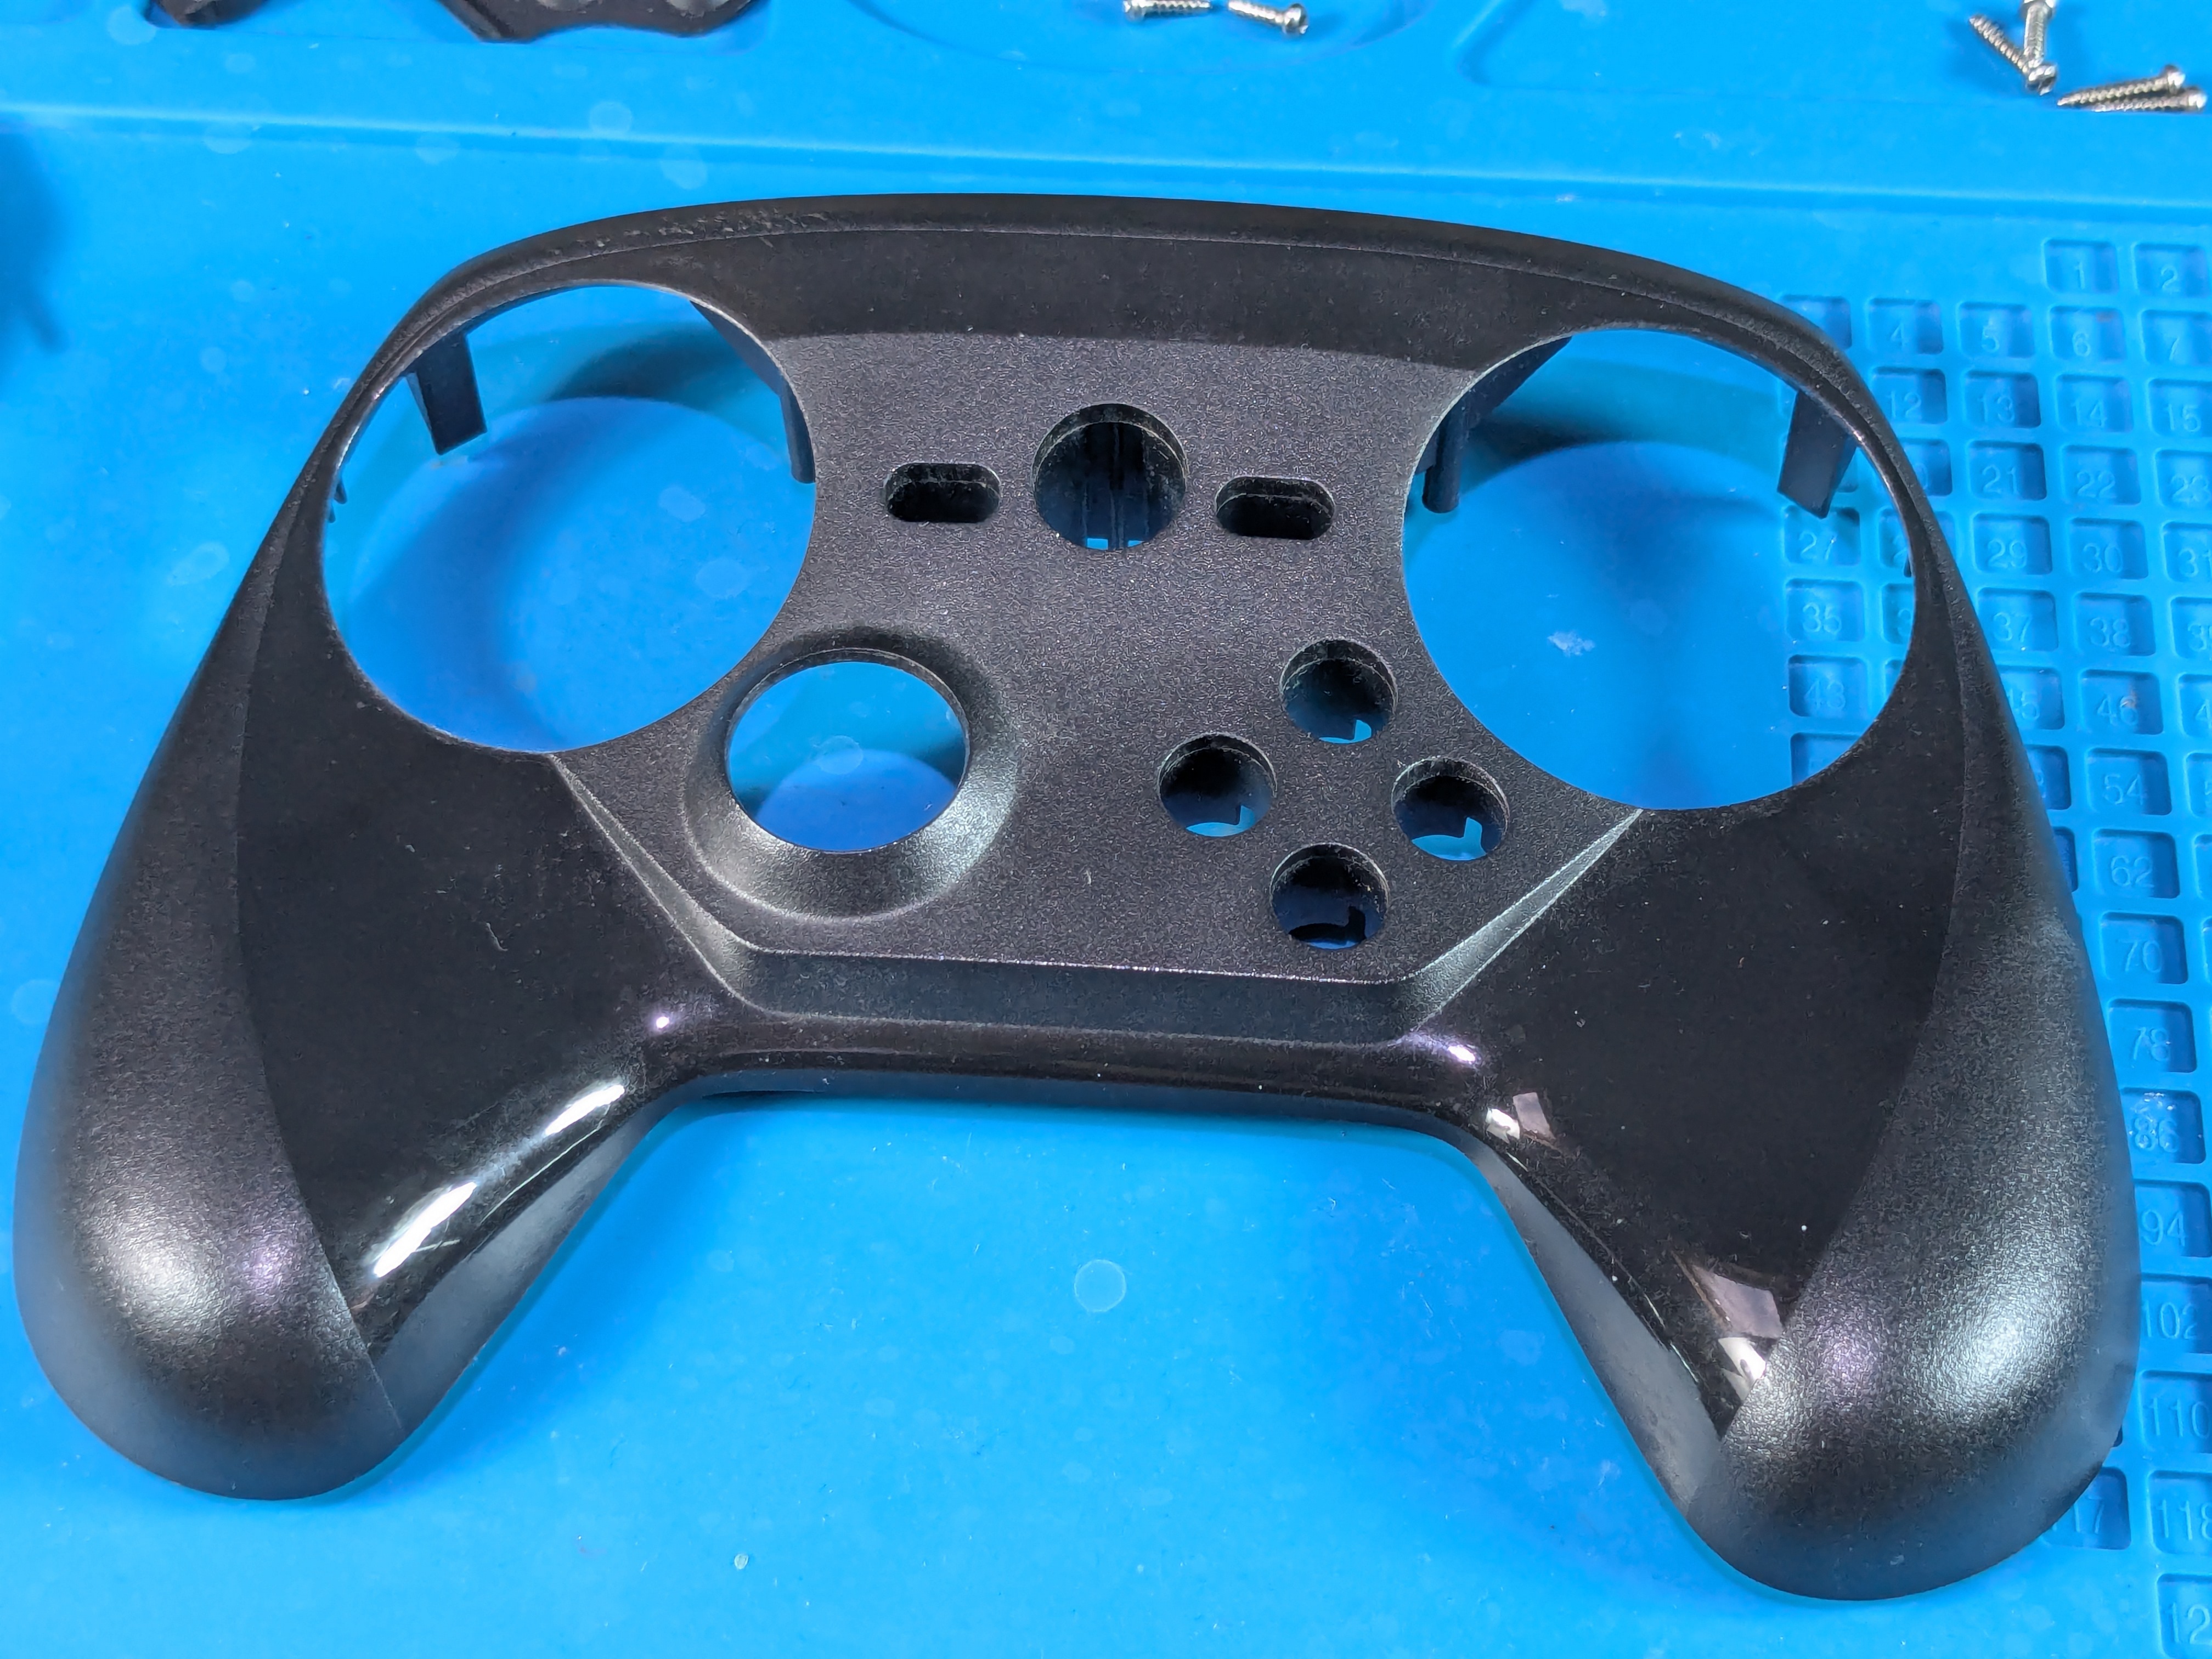
Taking Off The Front Shell
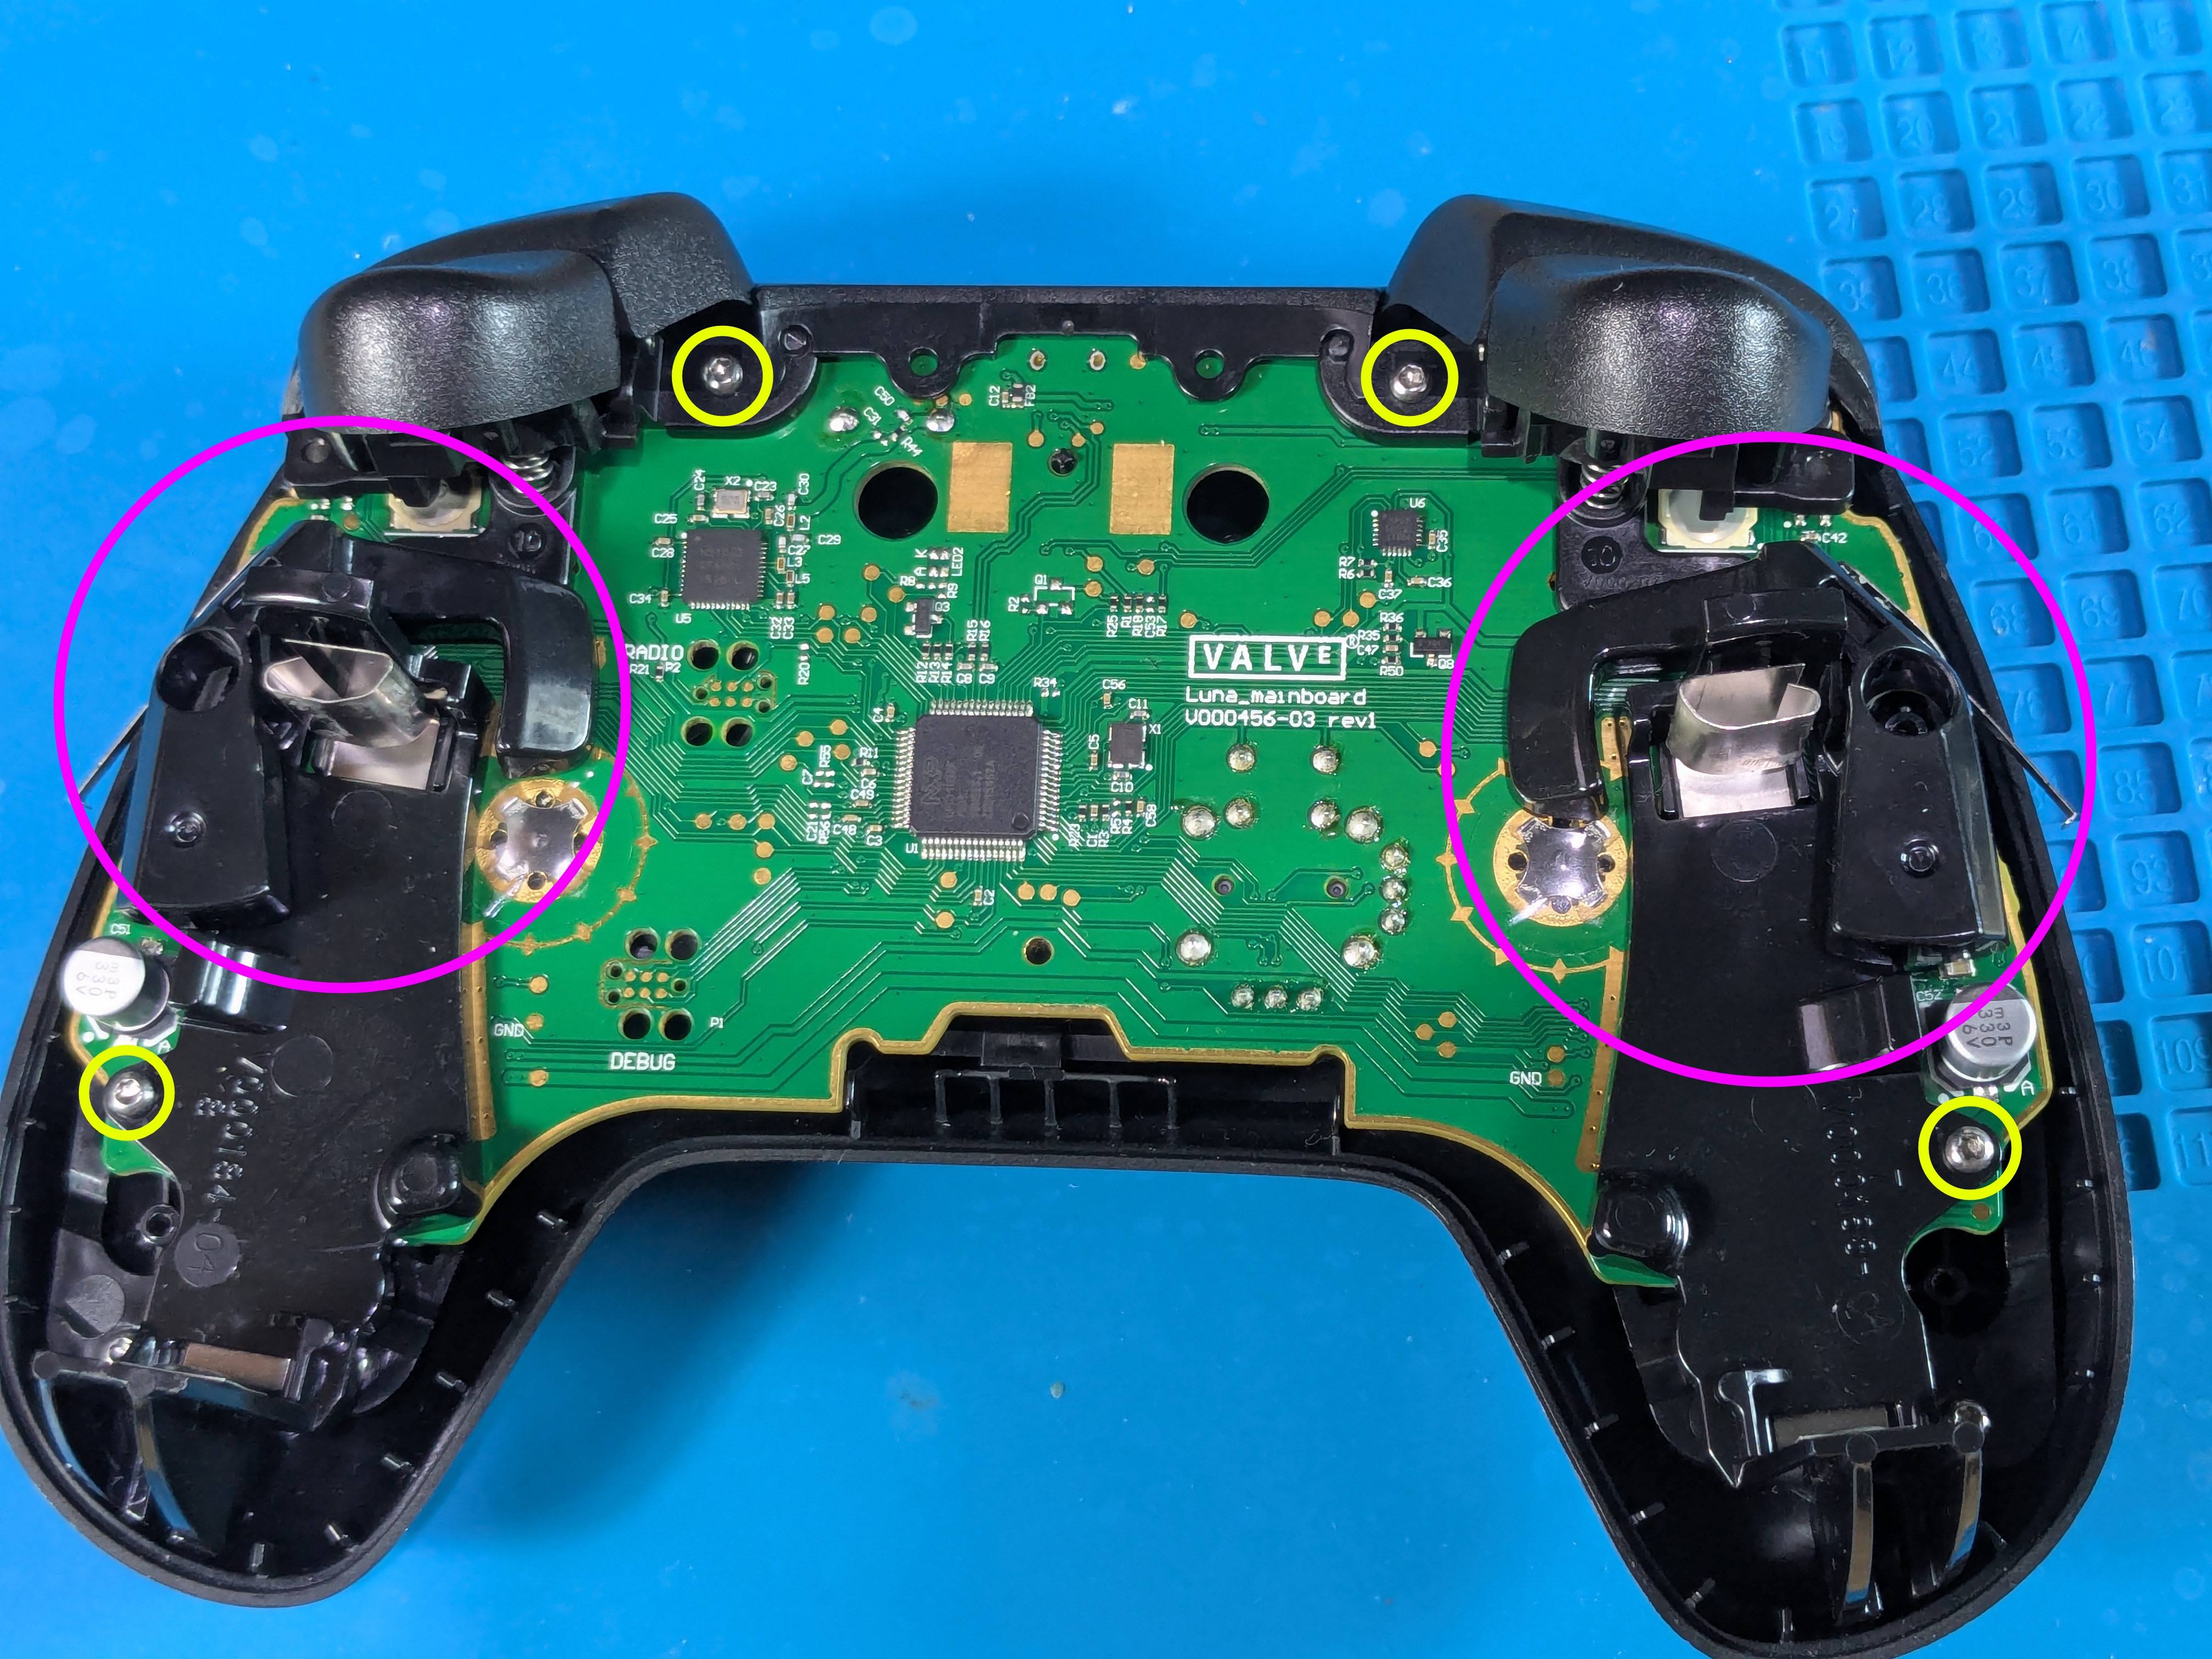
Battery Holder Levers And Front Shell Screw Locations
- The back shell holds the battery holder levers in place, take them off if they haven’t fallen off already
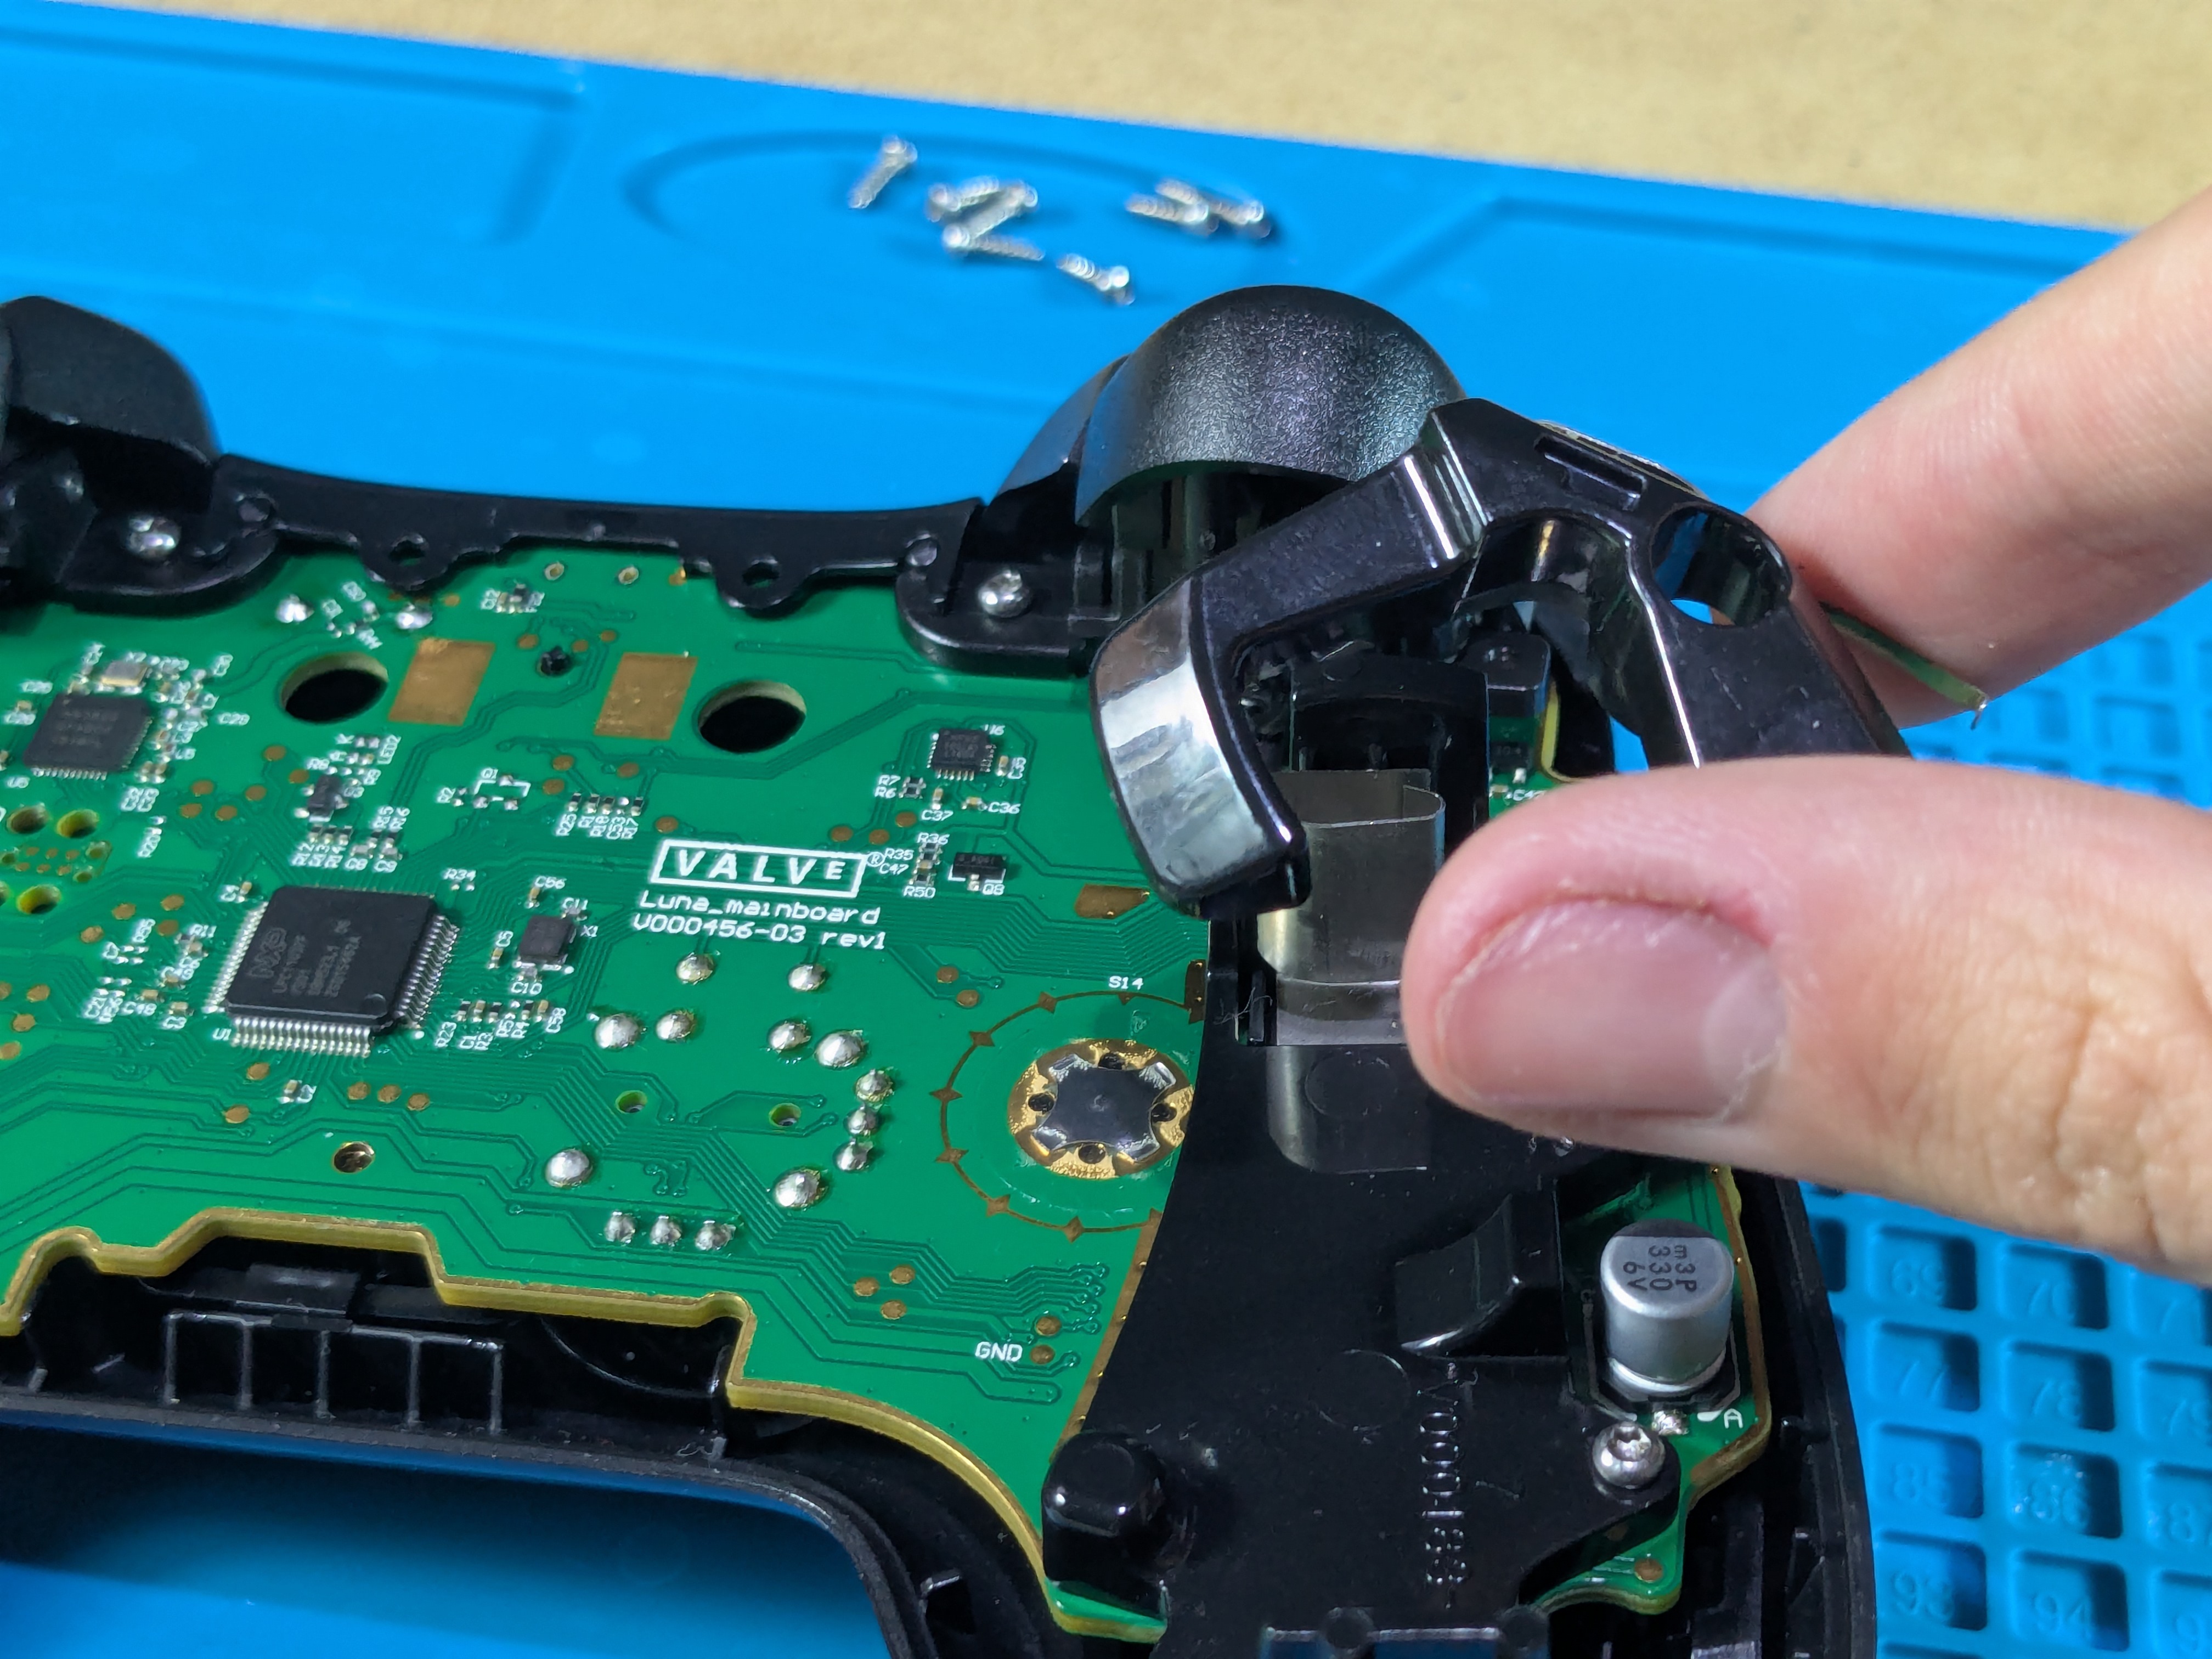
- Take out the (4 long) screws and then slowly lift the board away from the front shell
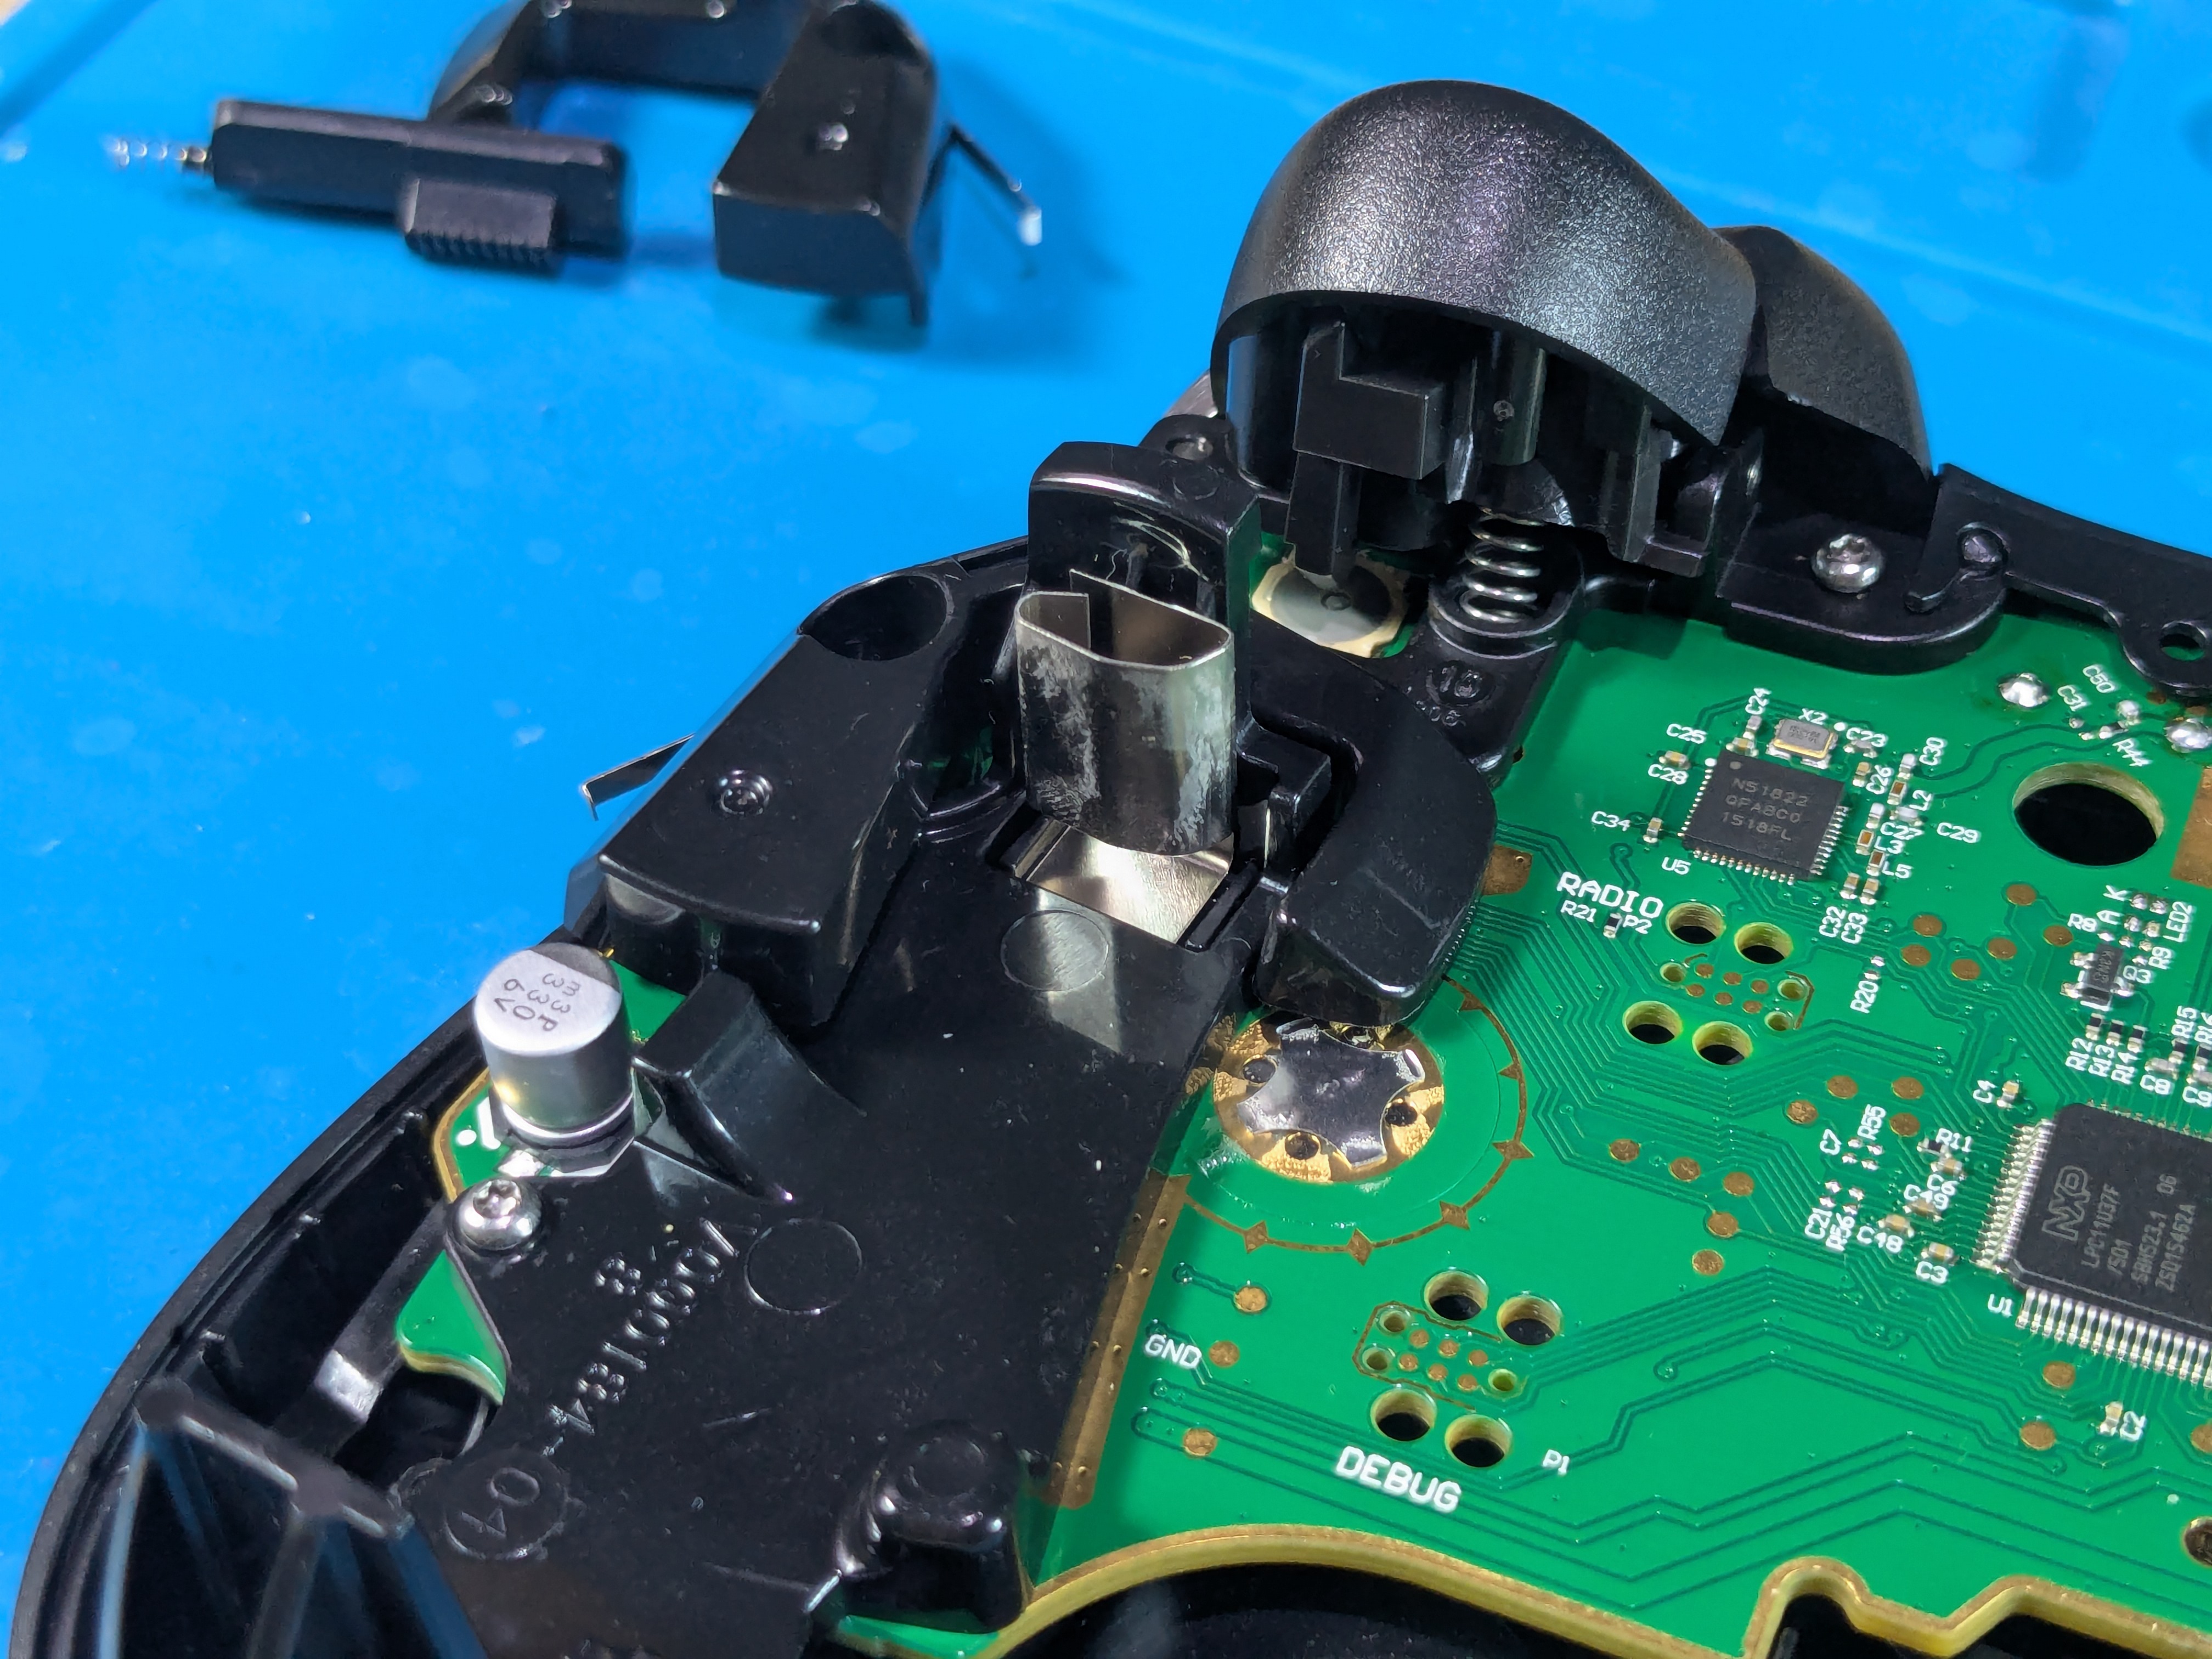
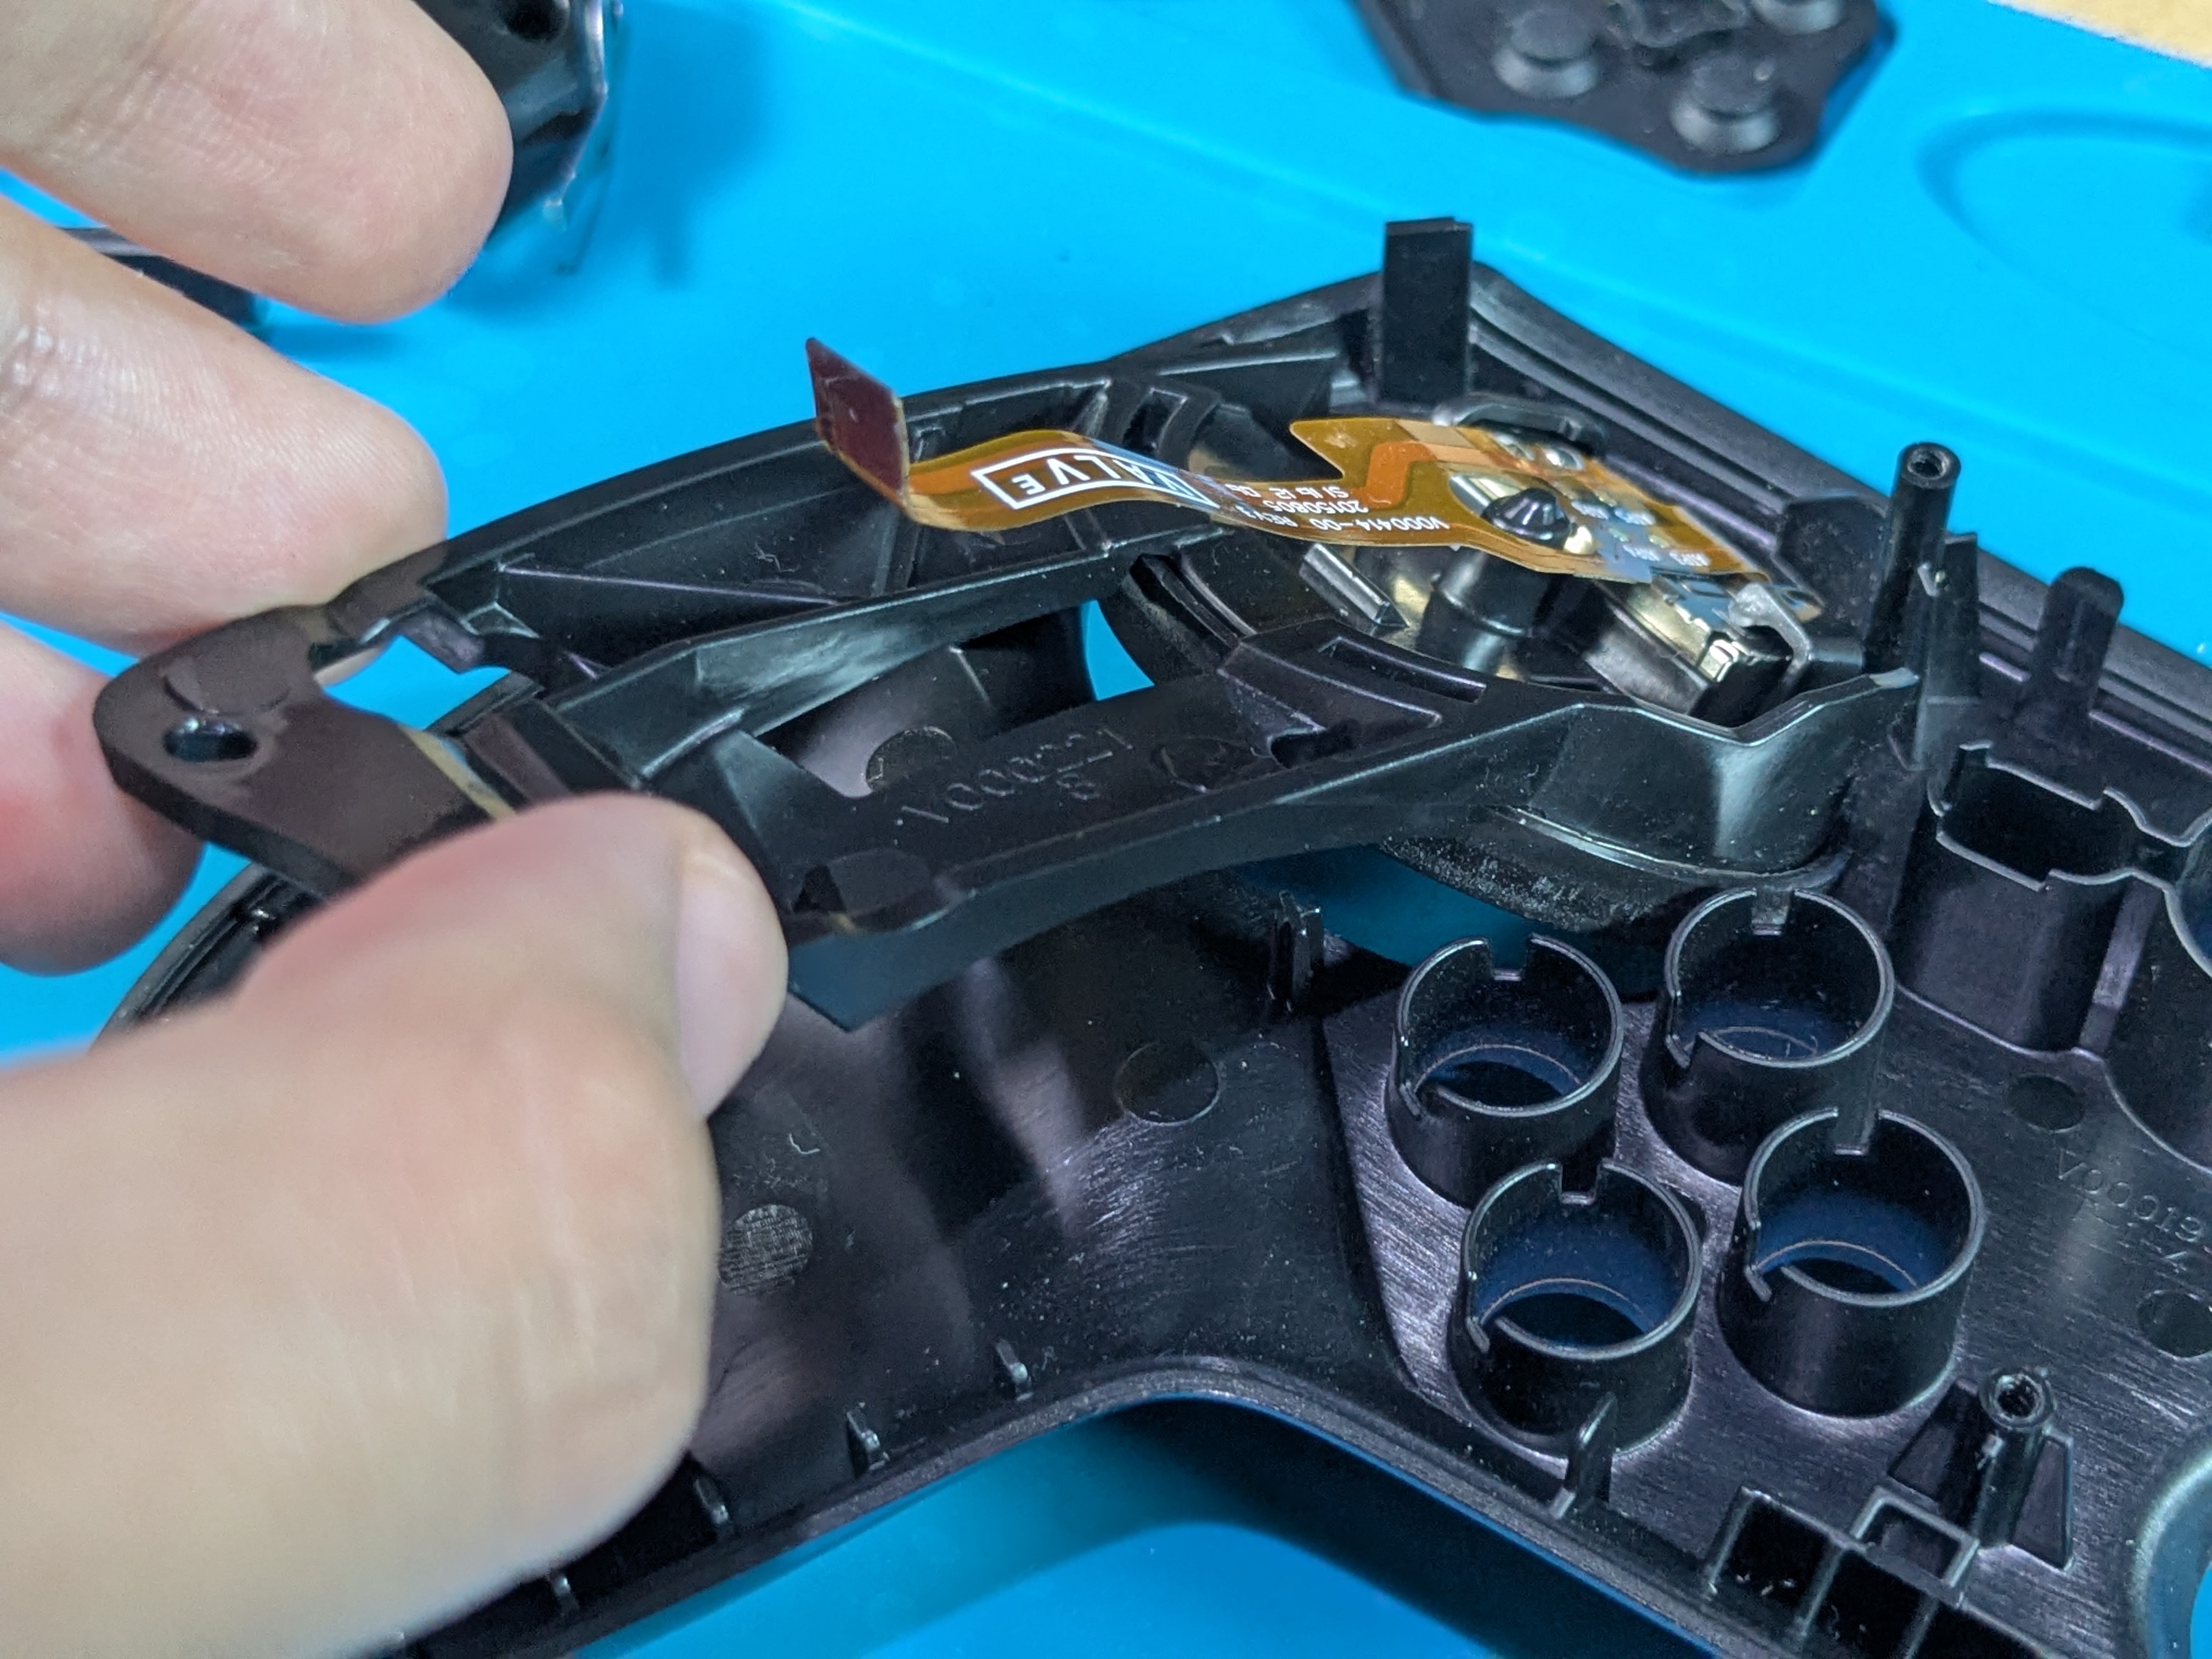
Trackpad Ribbon Cables And Front Buttons Warning
- Disconnect the trackpad ribbon cables from the board with hands or tweezers
- Be careful, after this point the buttons in the front can fall out

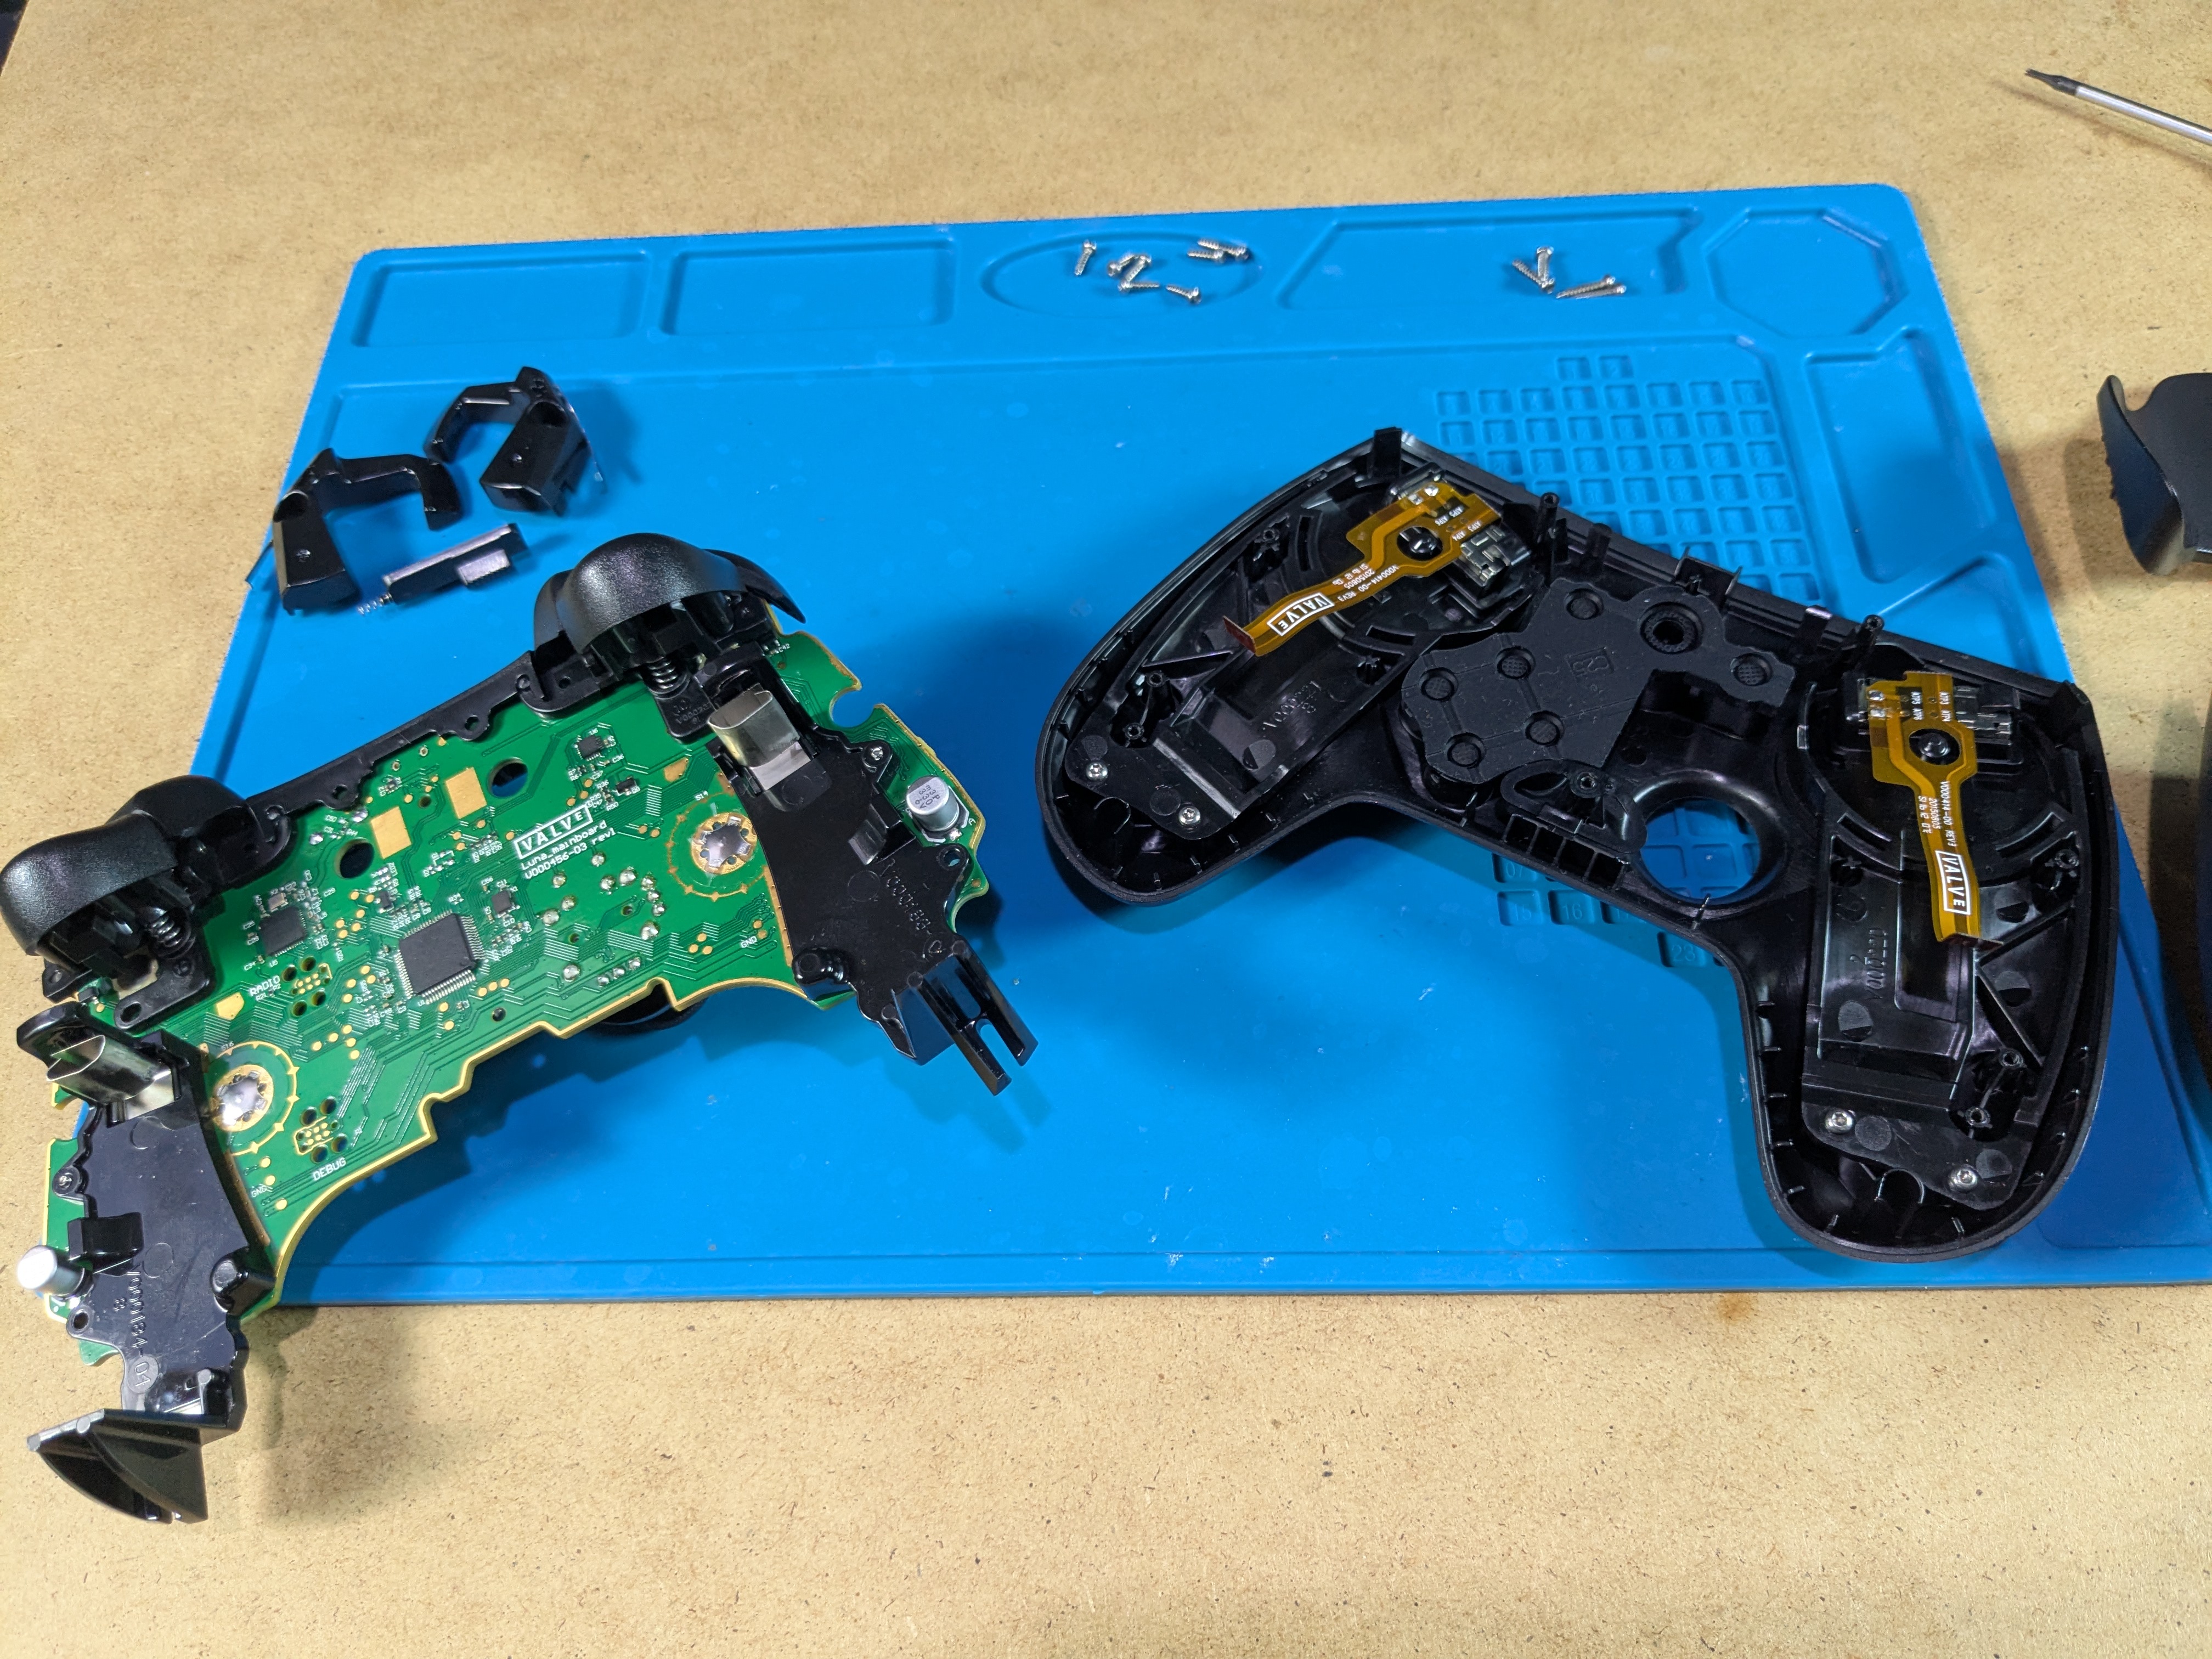
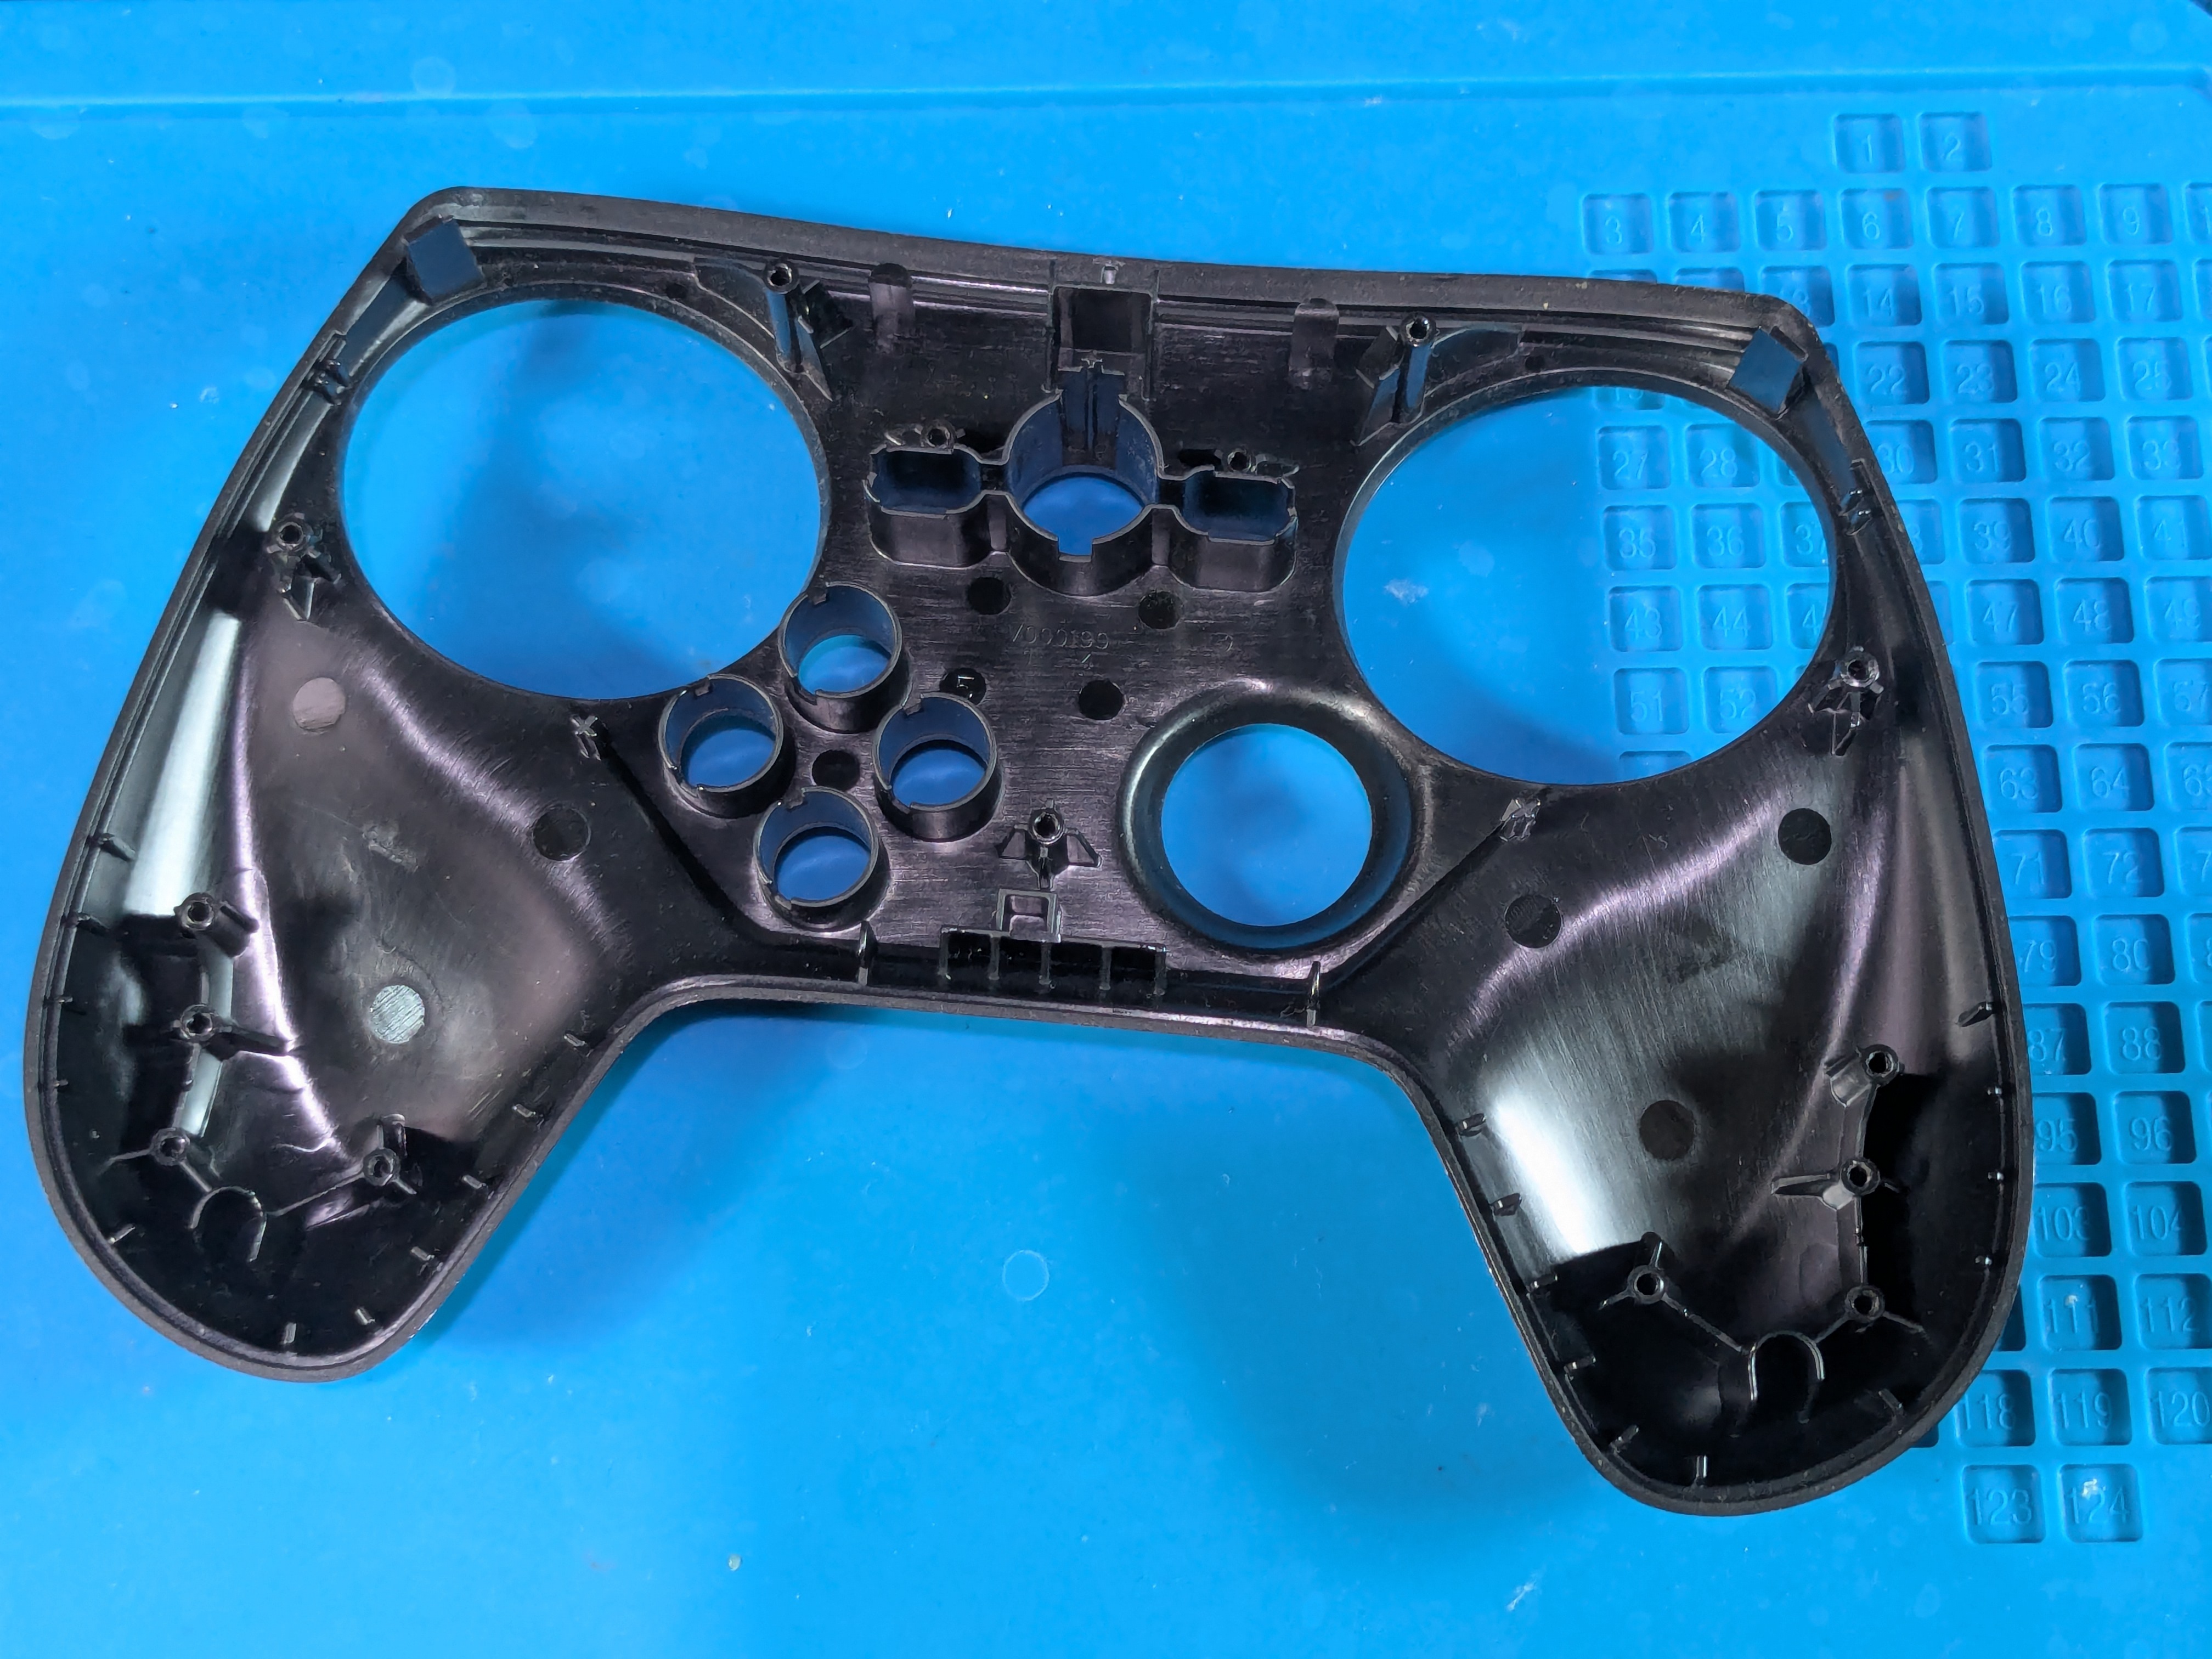
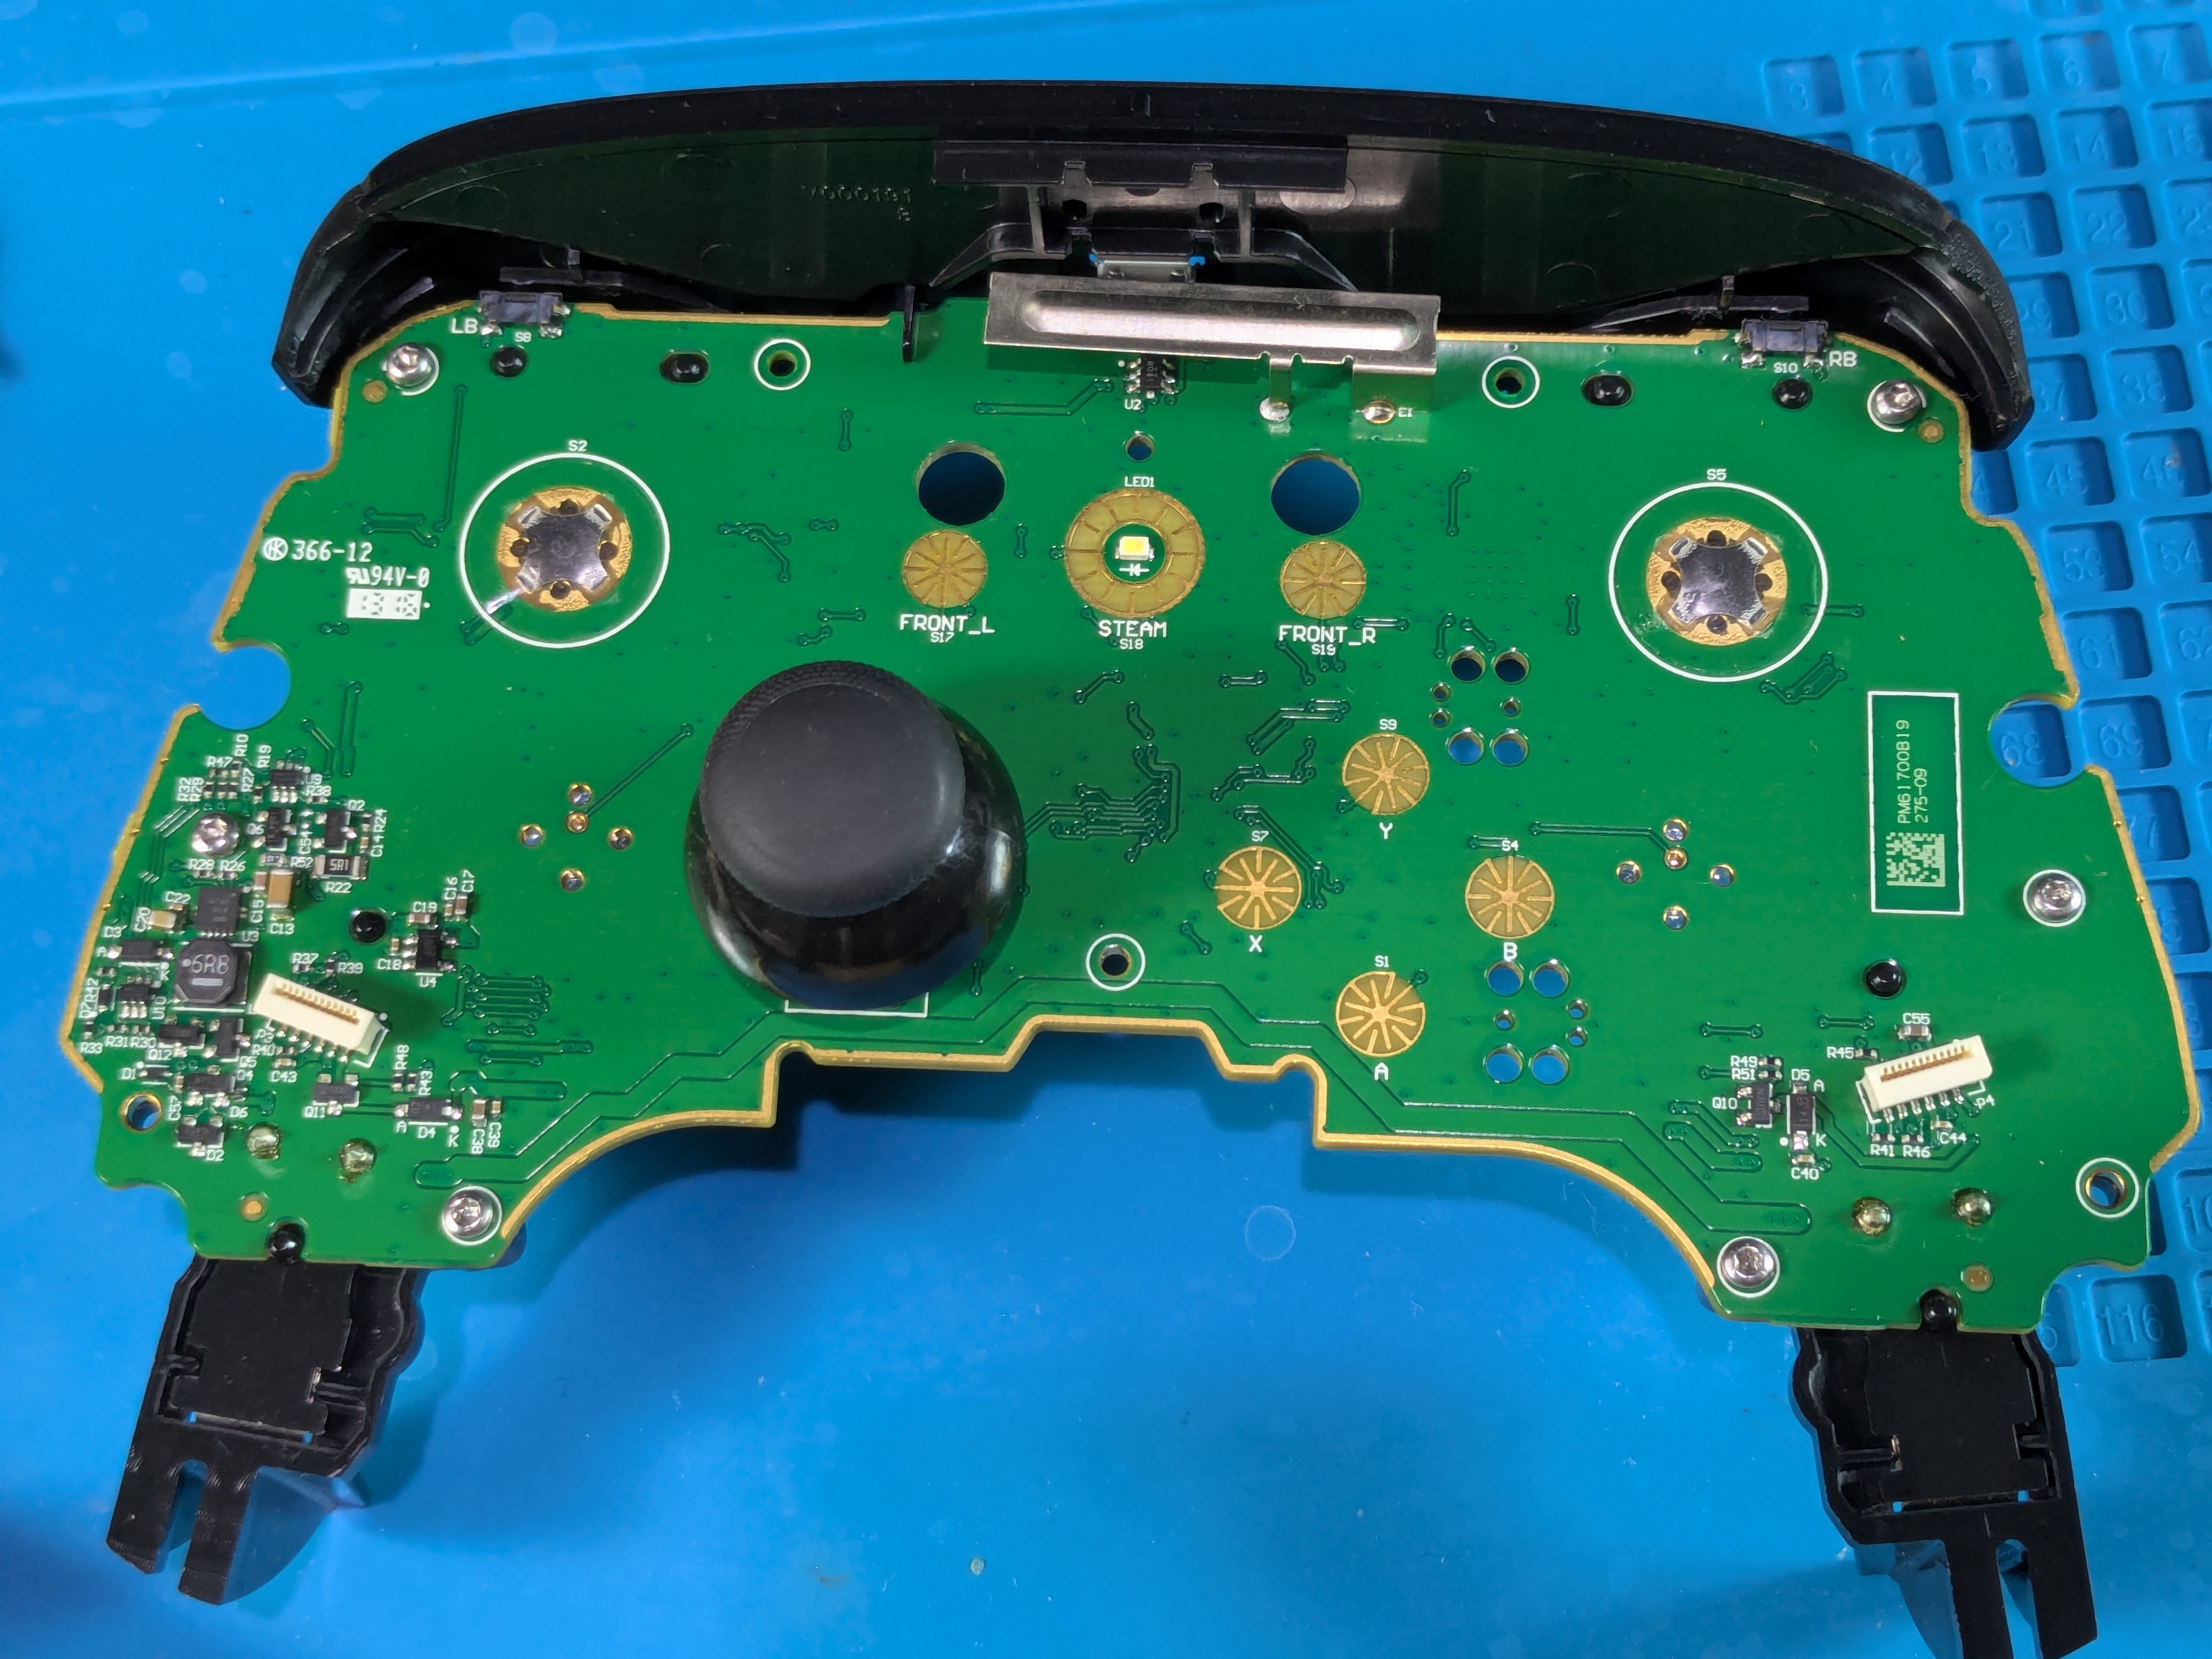
Board And Front Shell Separated
Taking Out The Membrane, Plastic Piece And Front Buttons
Membrane
- Take off the membrane to reveal the front buttons

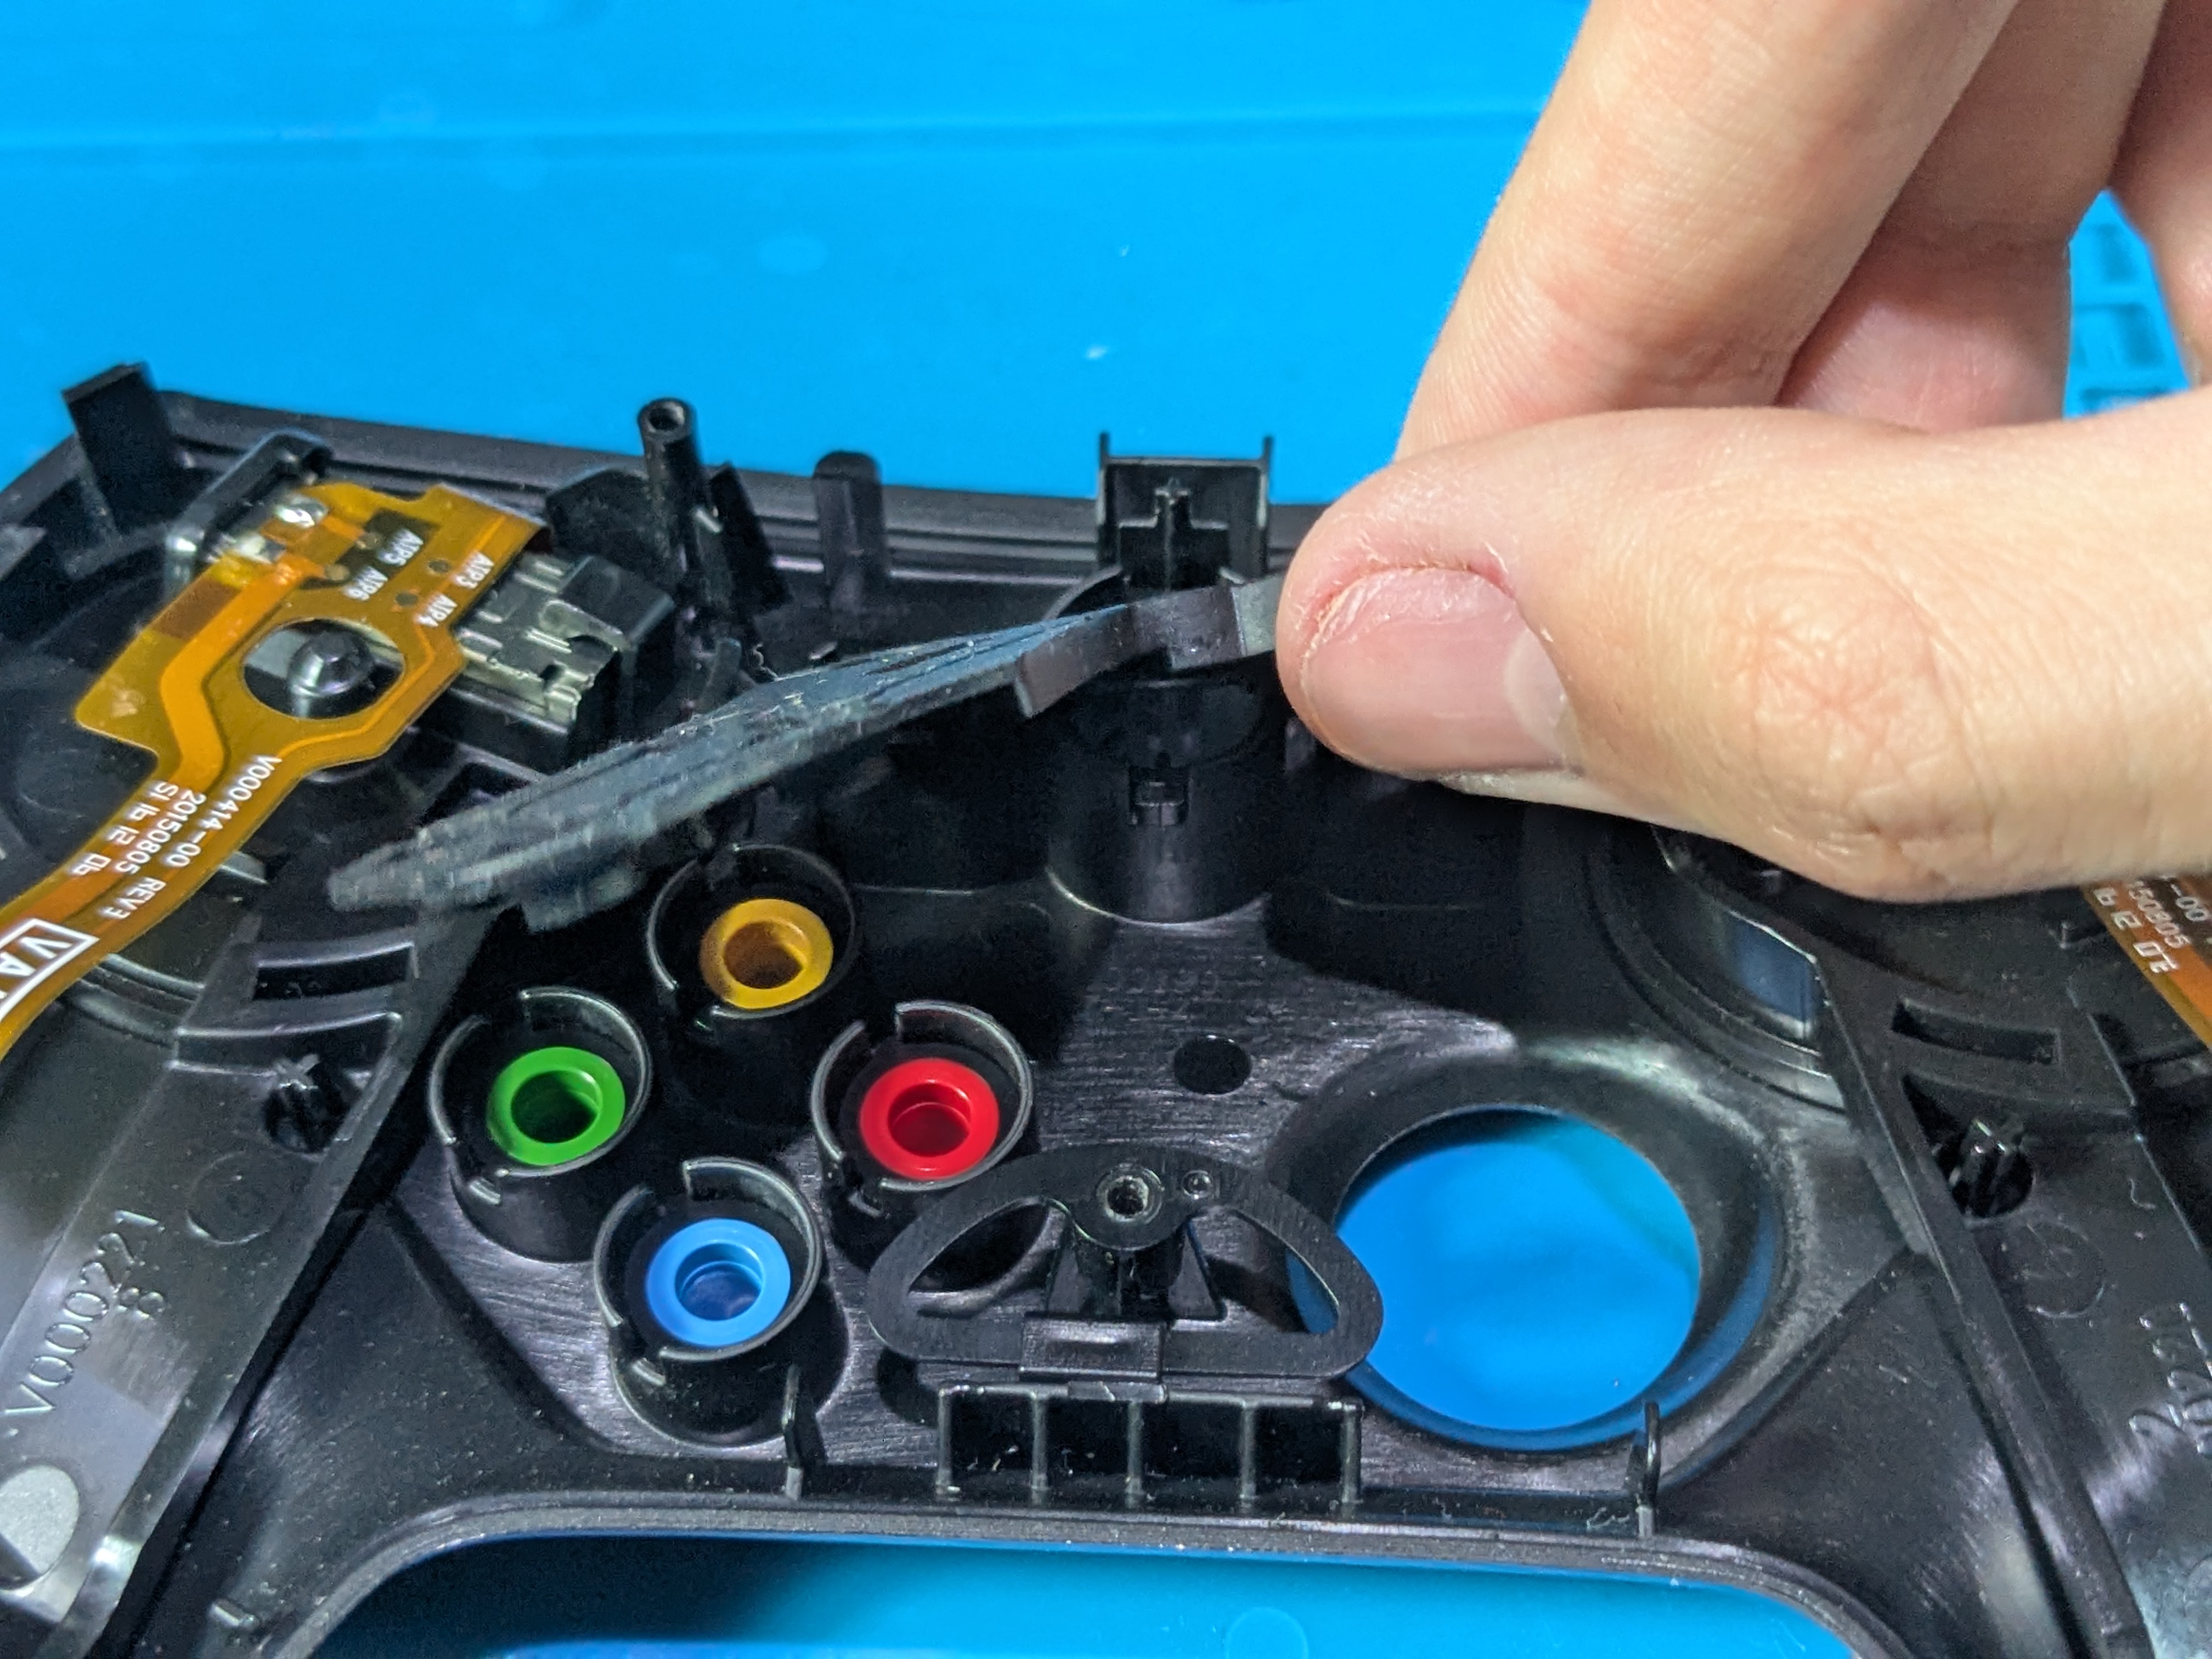
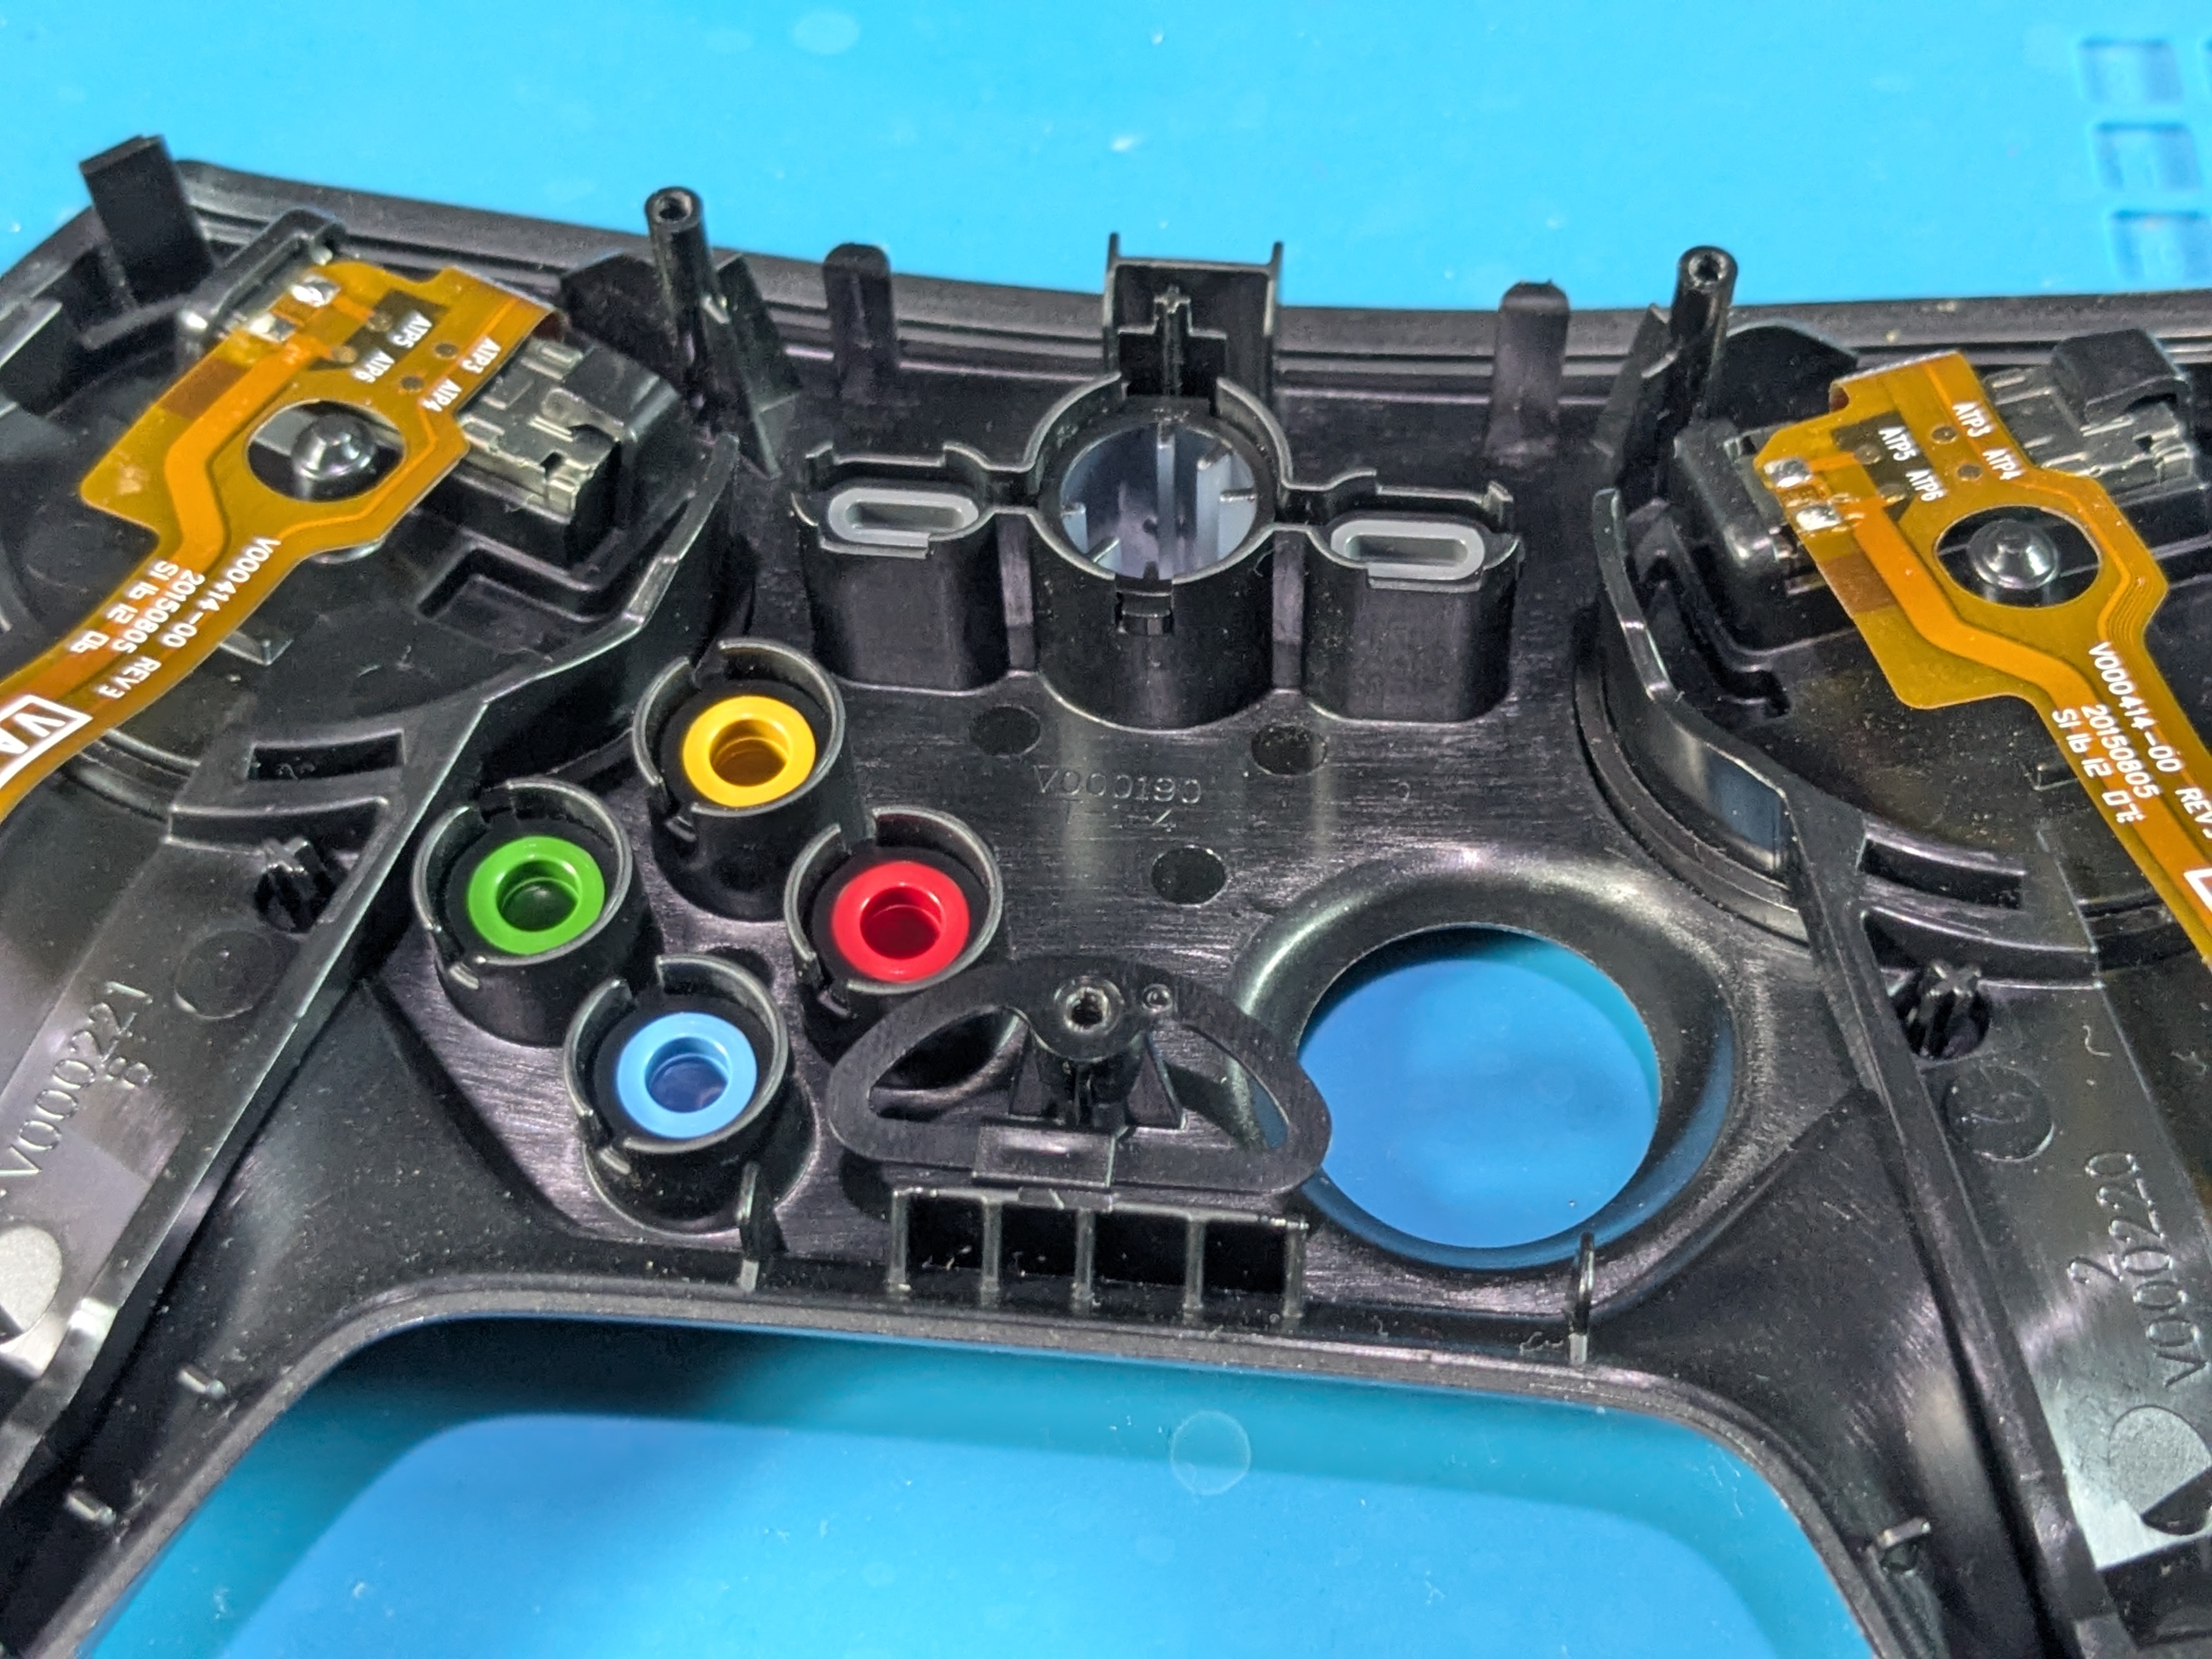
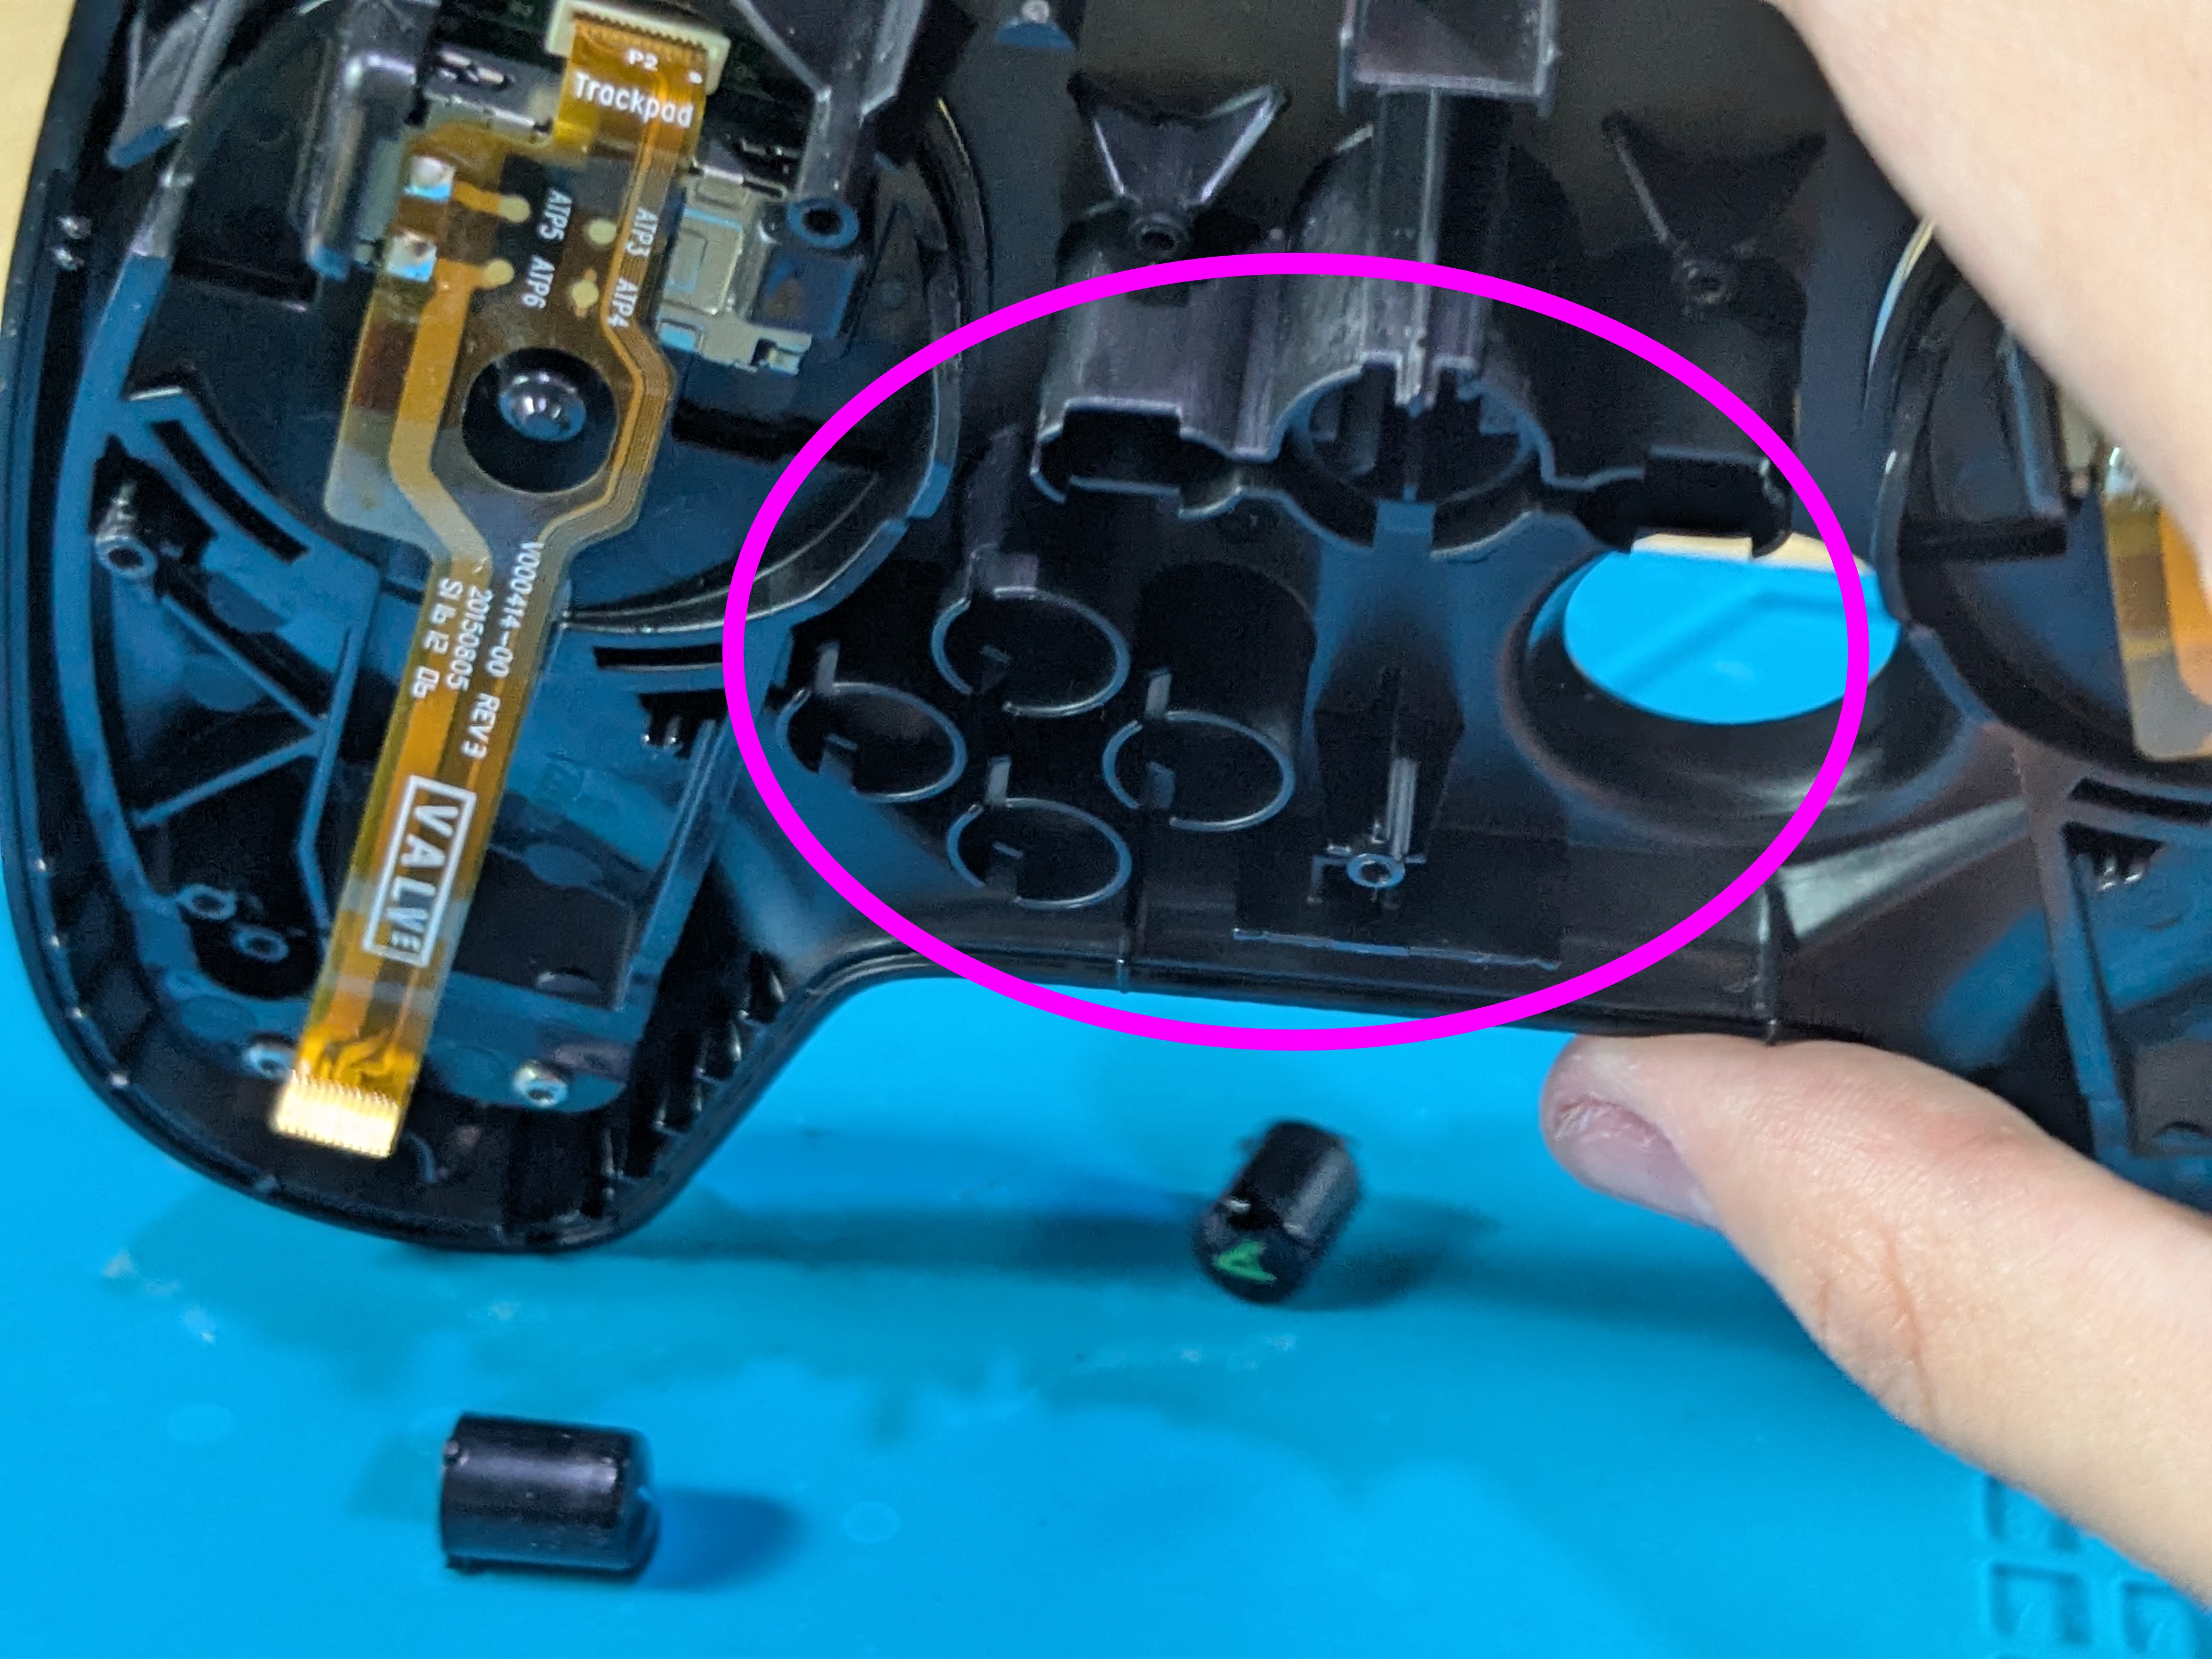
Plastic Piece
- Take out the plastic piece by pulling it carefully upwards
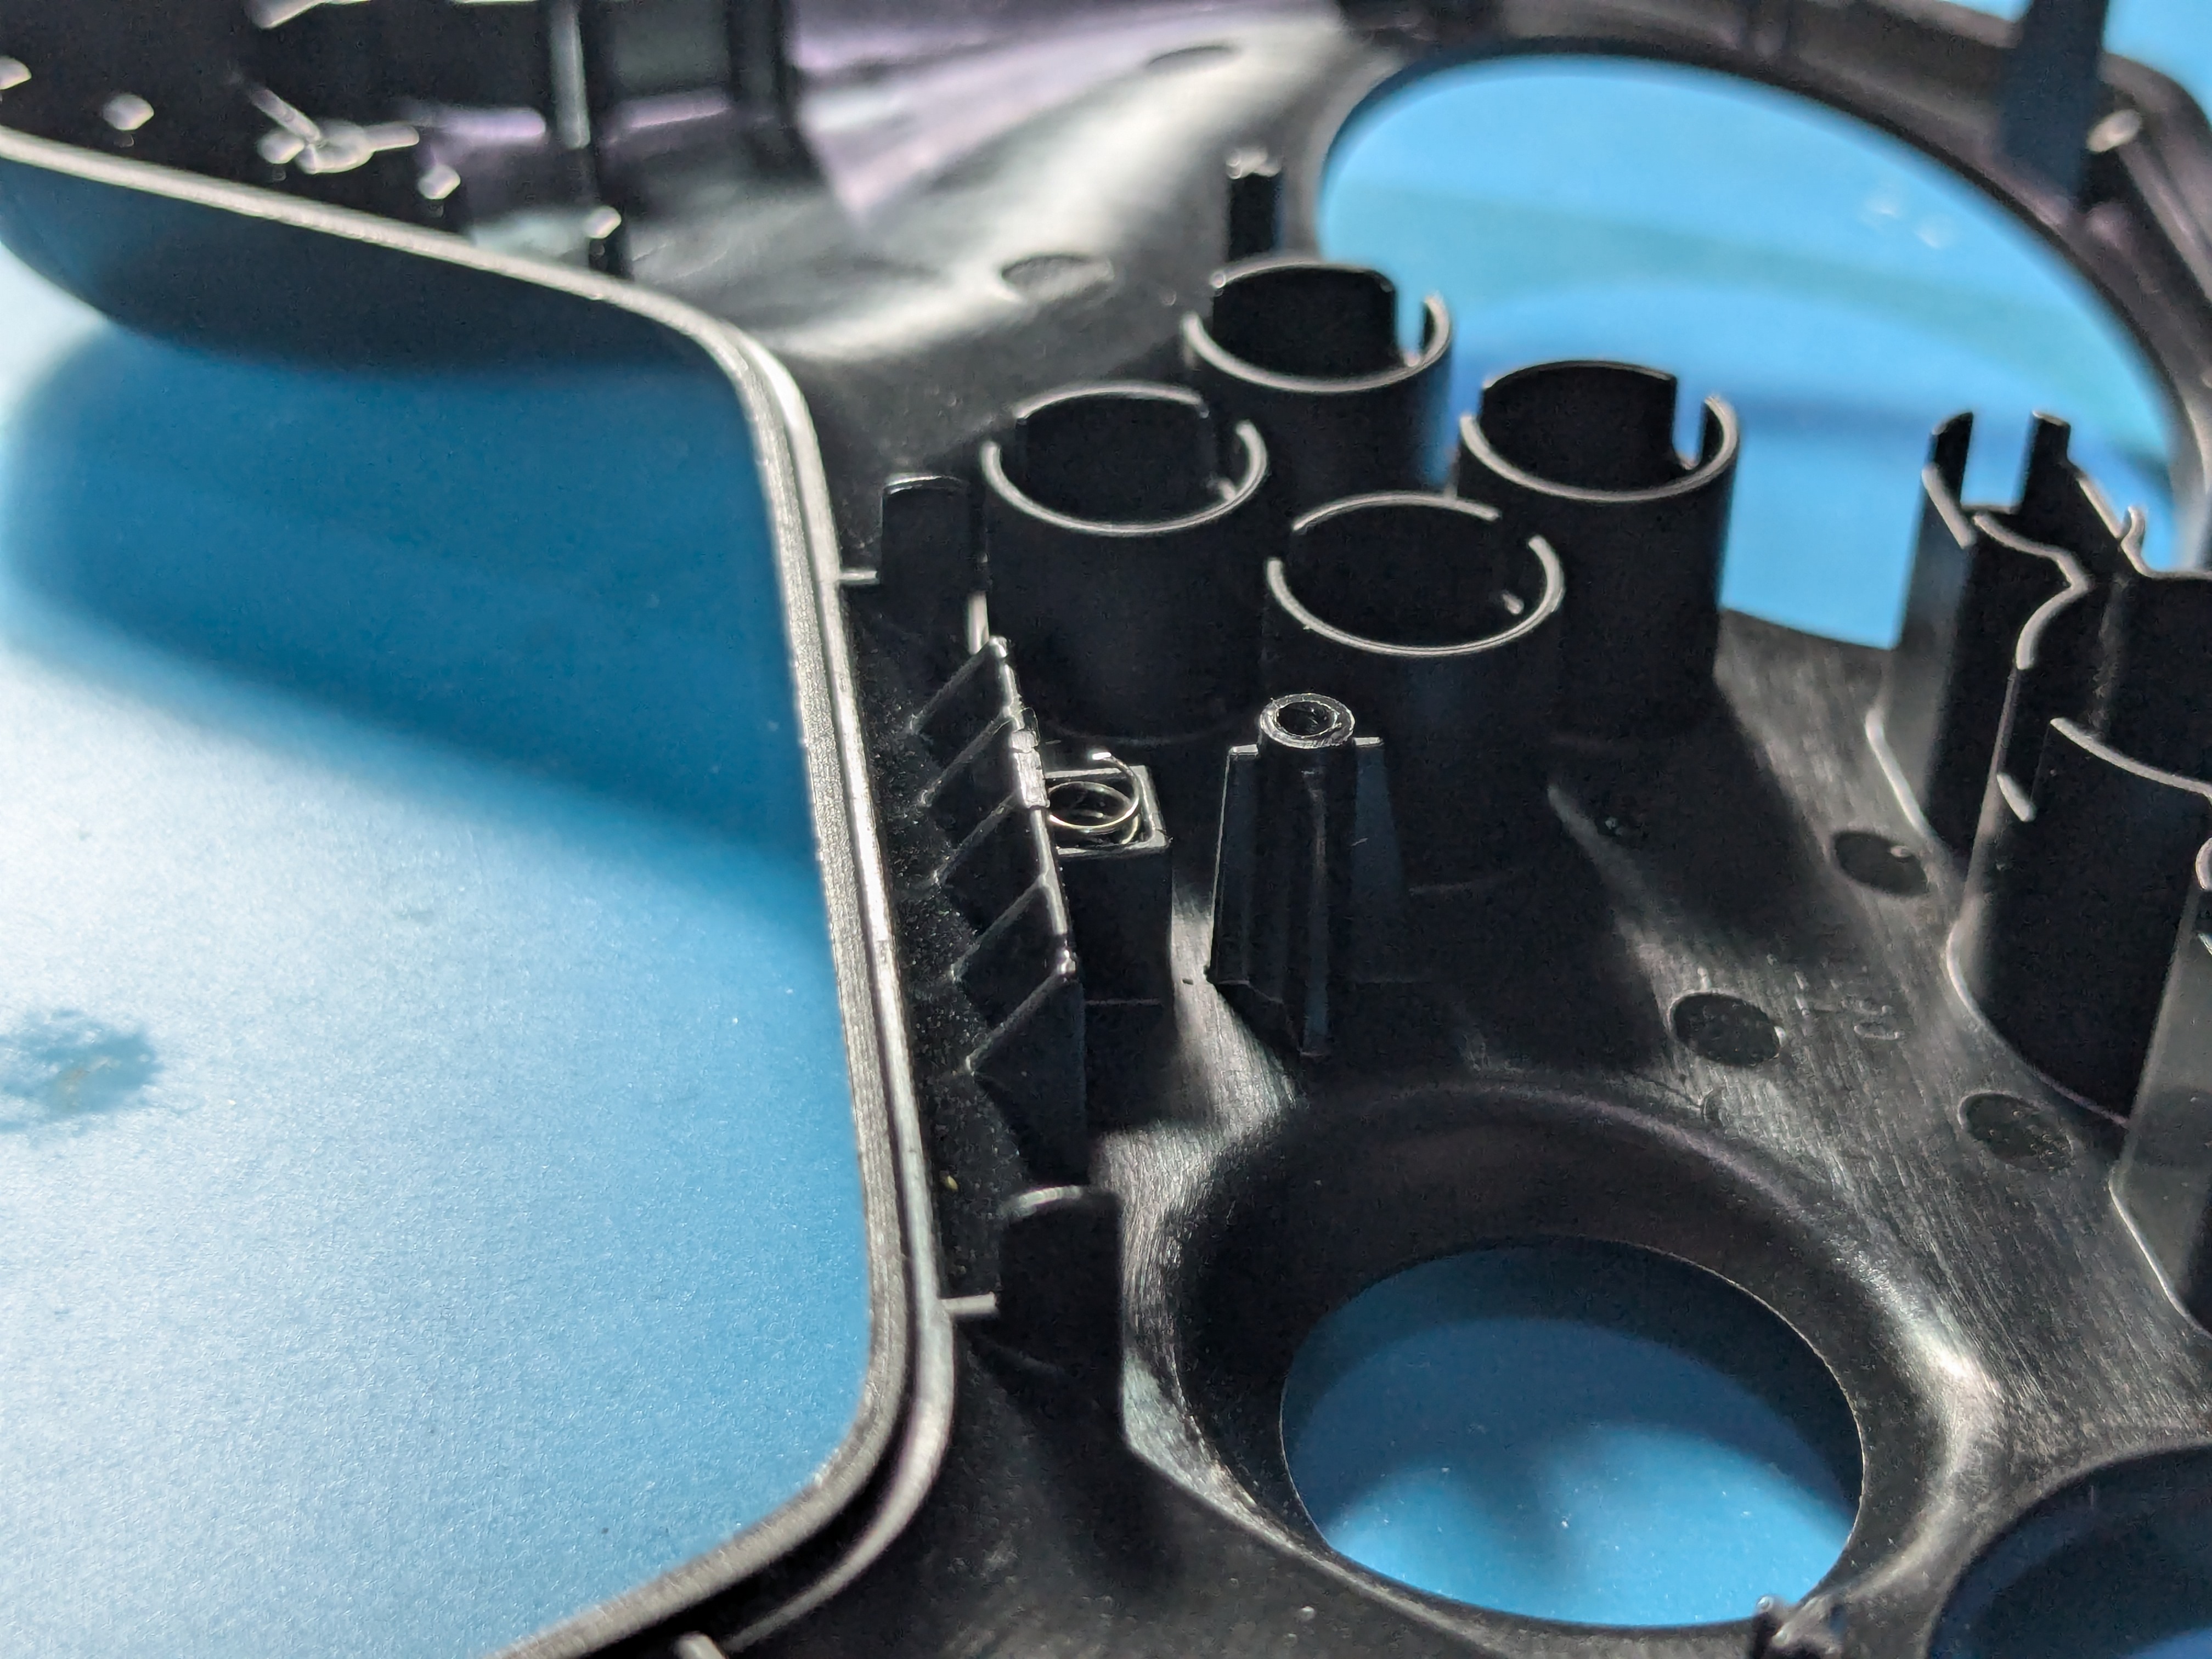
- Beware that there should be a spring underneath it in the square hole, put it in a safe place

- Correction:
- The images below aren’t showing the original spring as it was lost (most likely during my first disassembly)
- If you need a replacement you can most likely use a spring from a pen and cut it roughly to the same size as the square hole it goes into
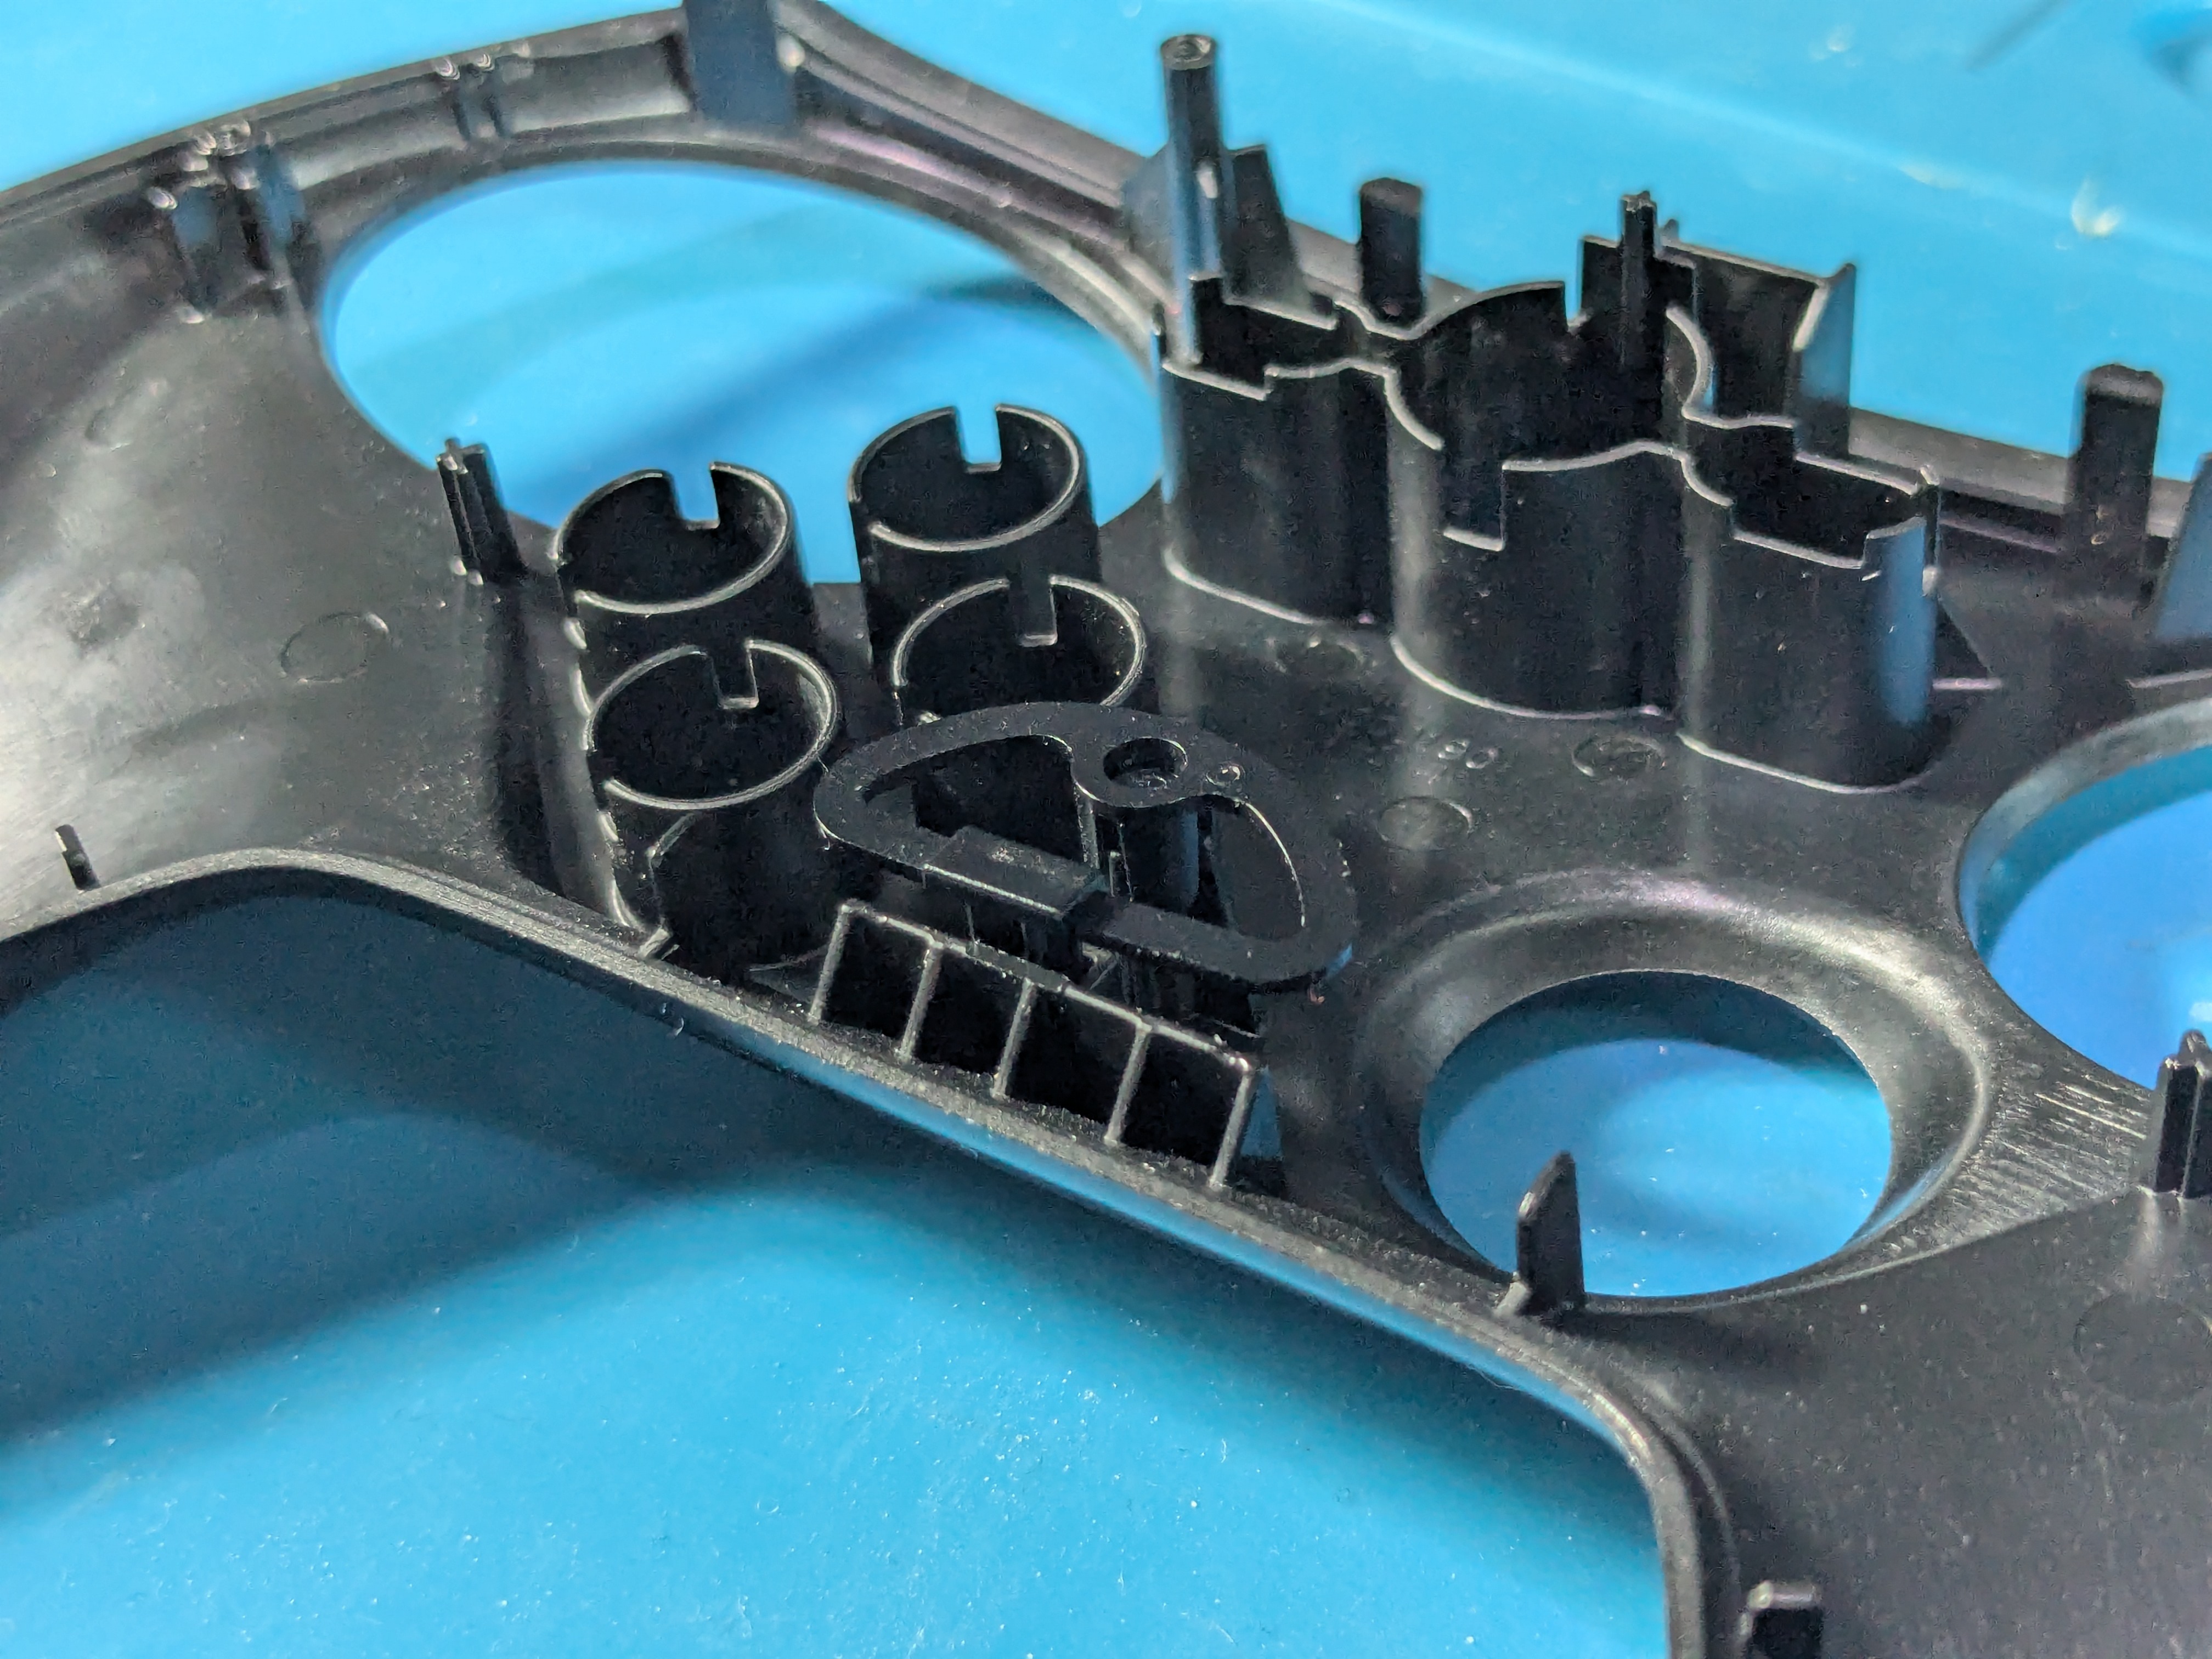

Front Buttons
- Slowly tilt the front shell or push the front buttons inwards from the outside to take them out
Taking Out The Trackpads
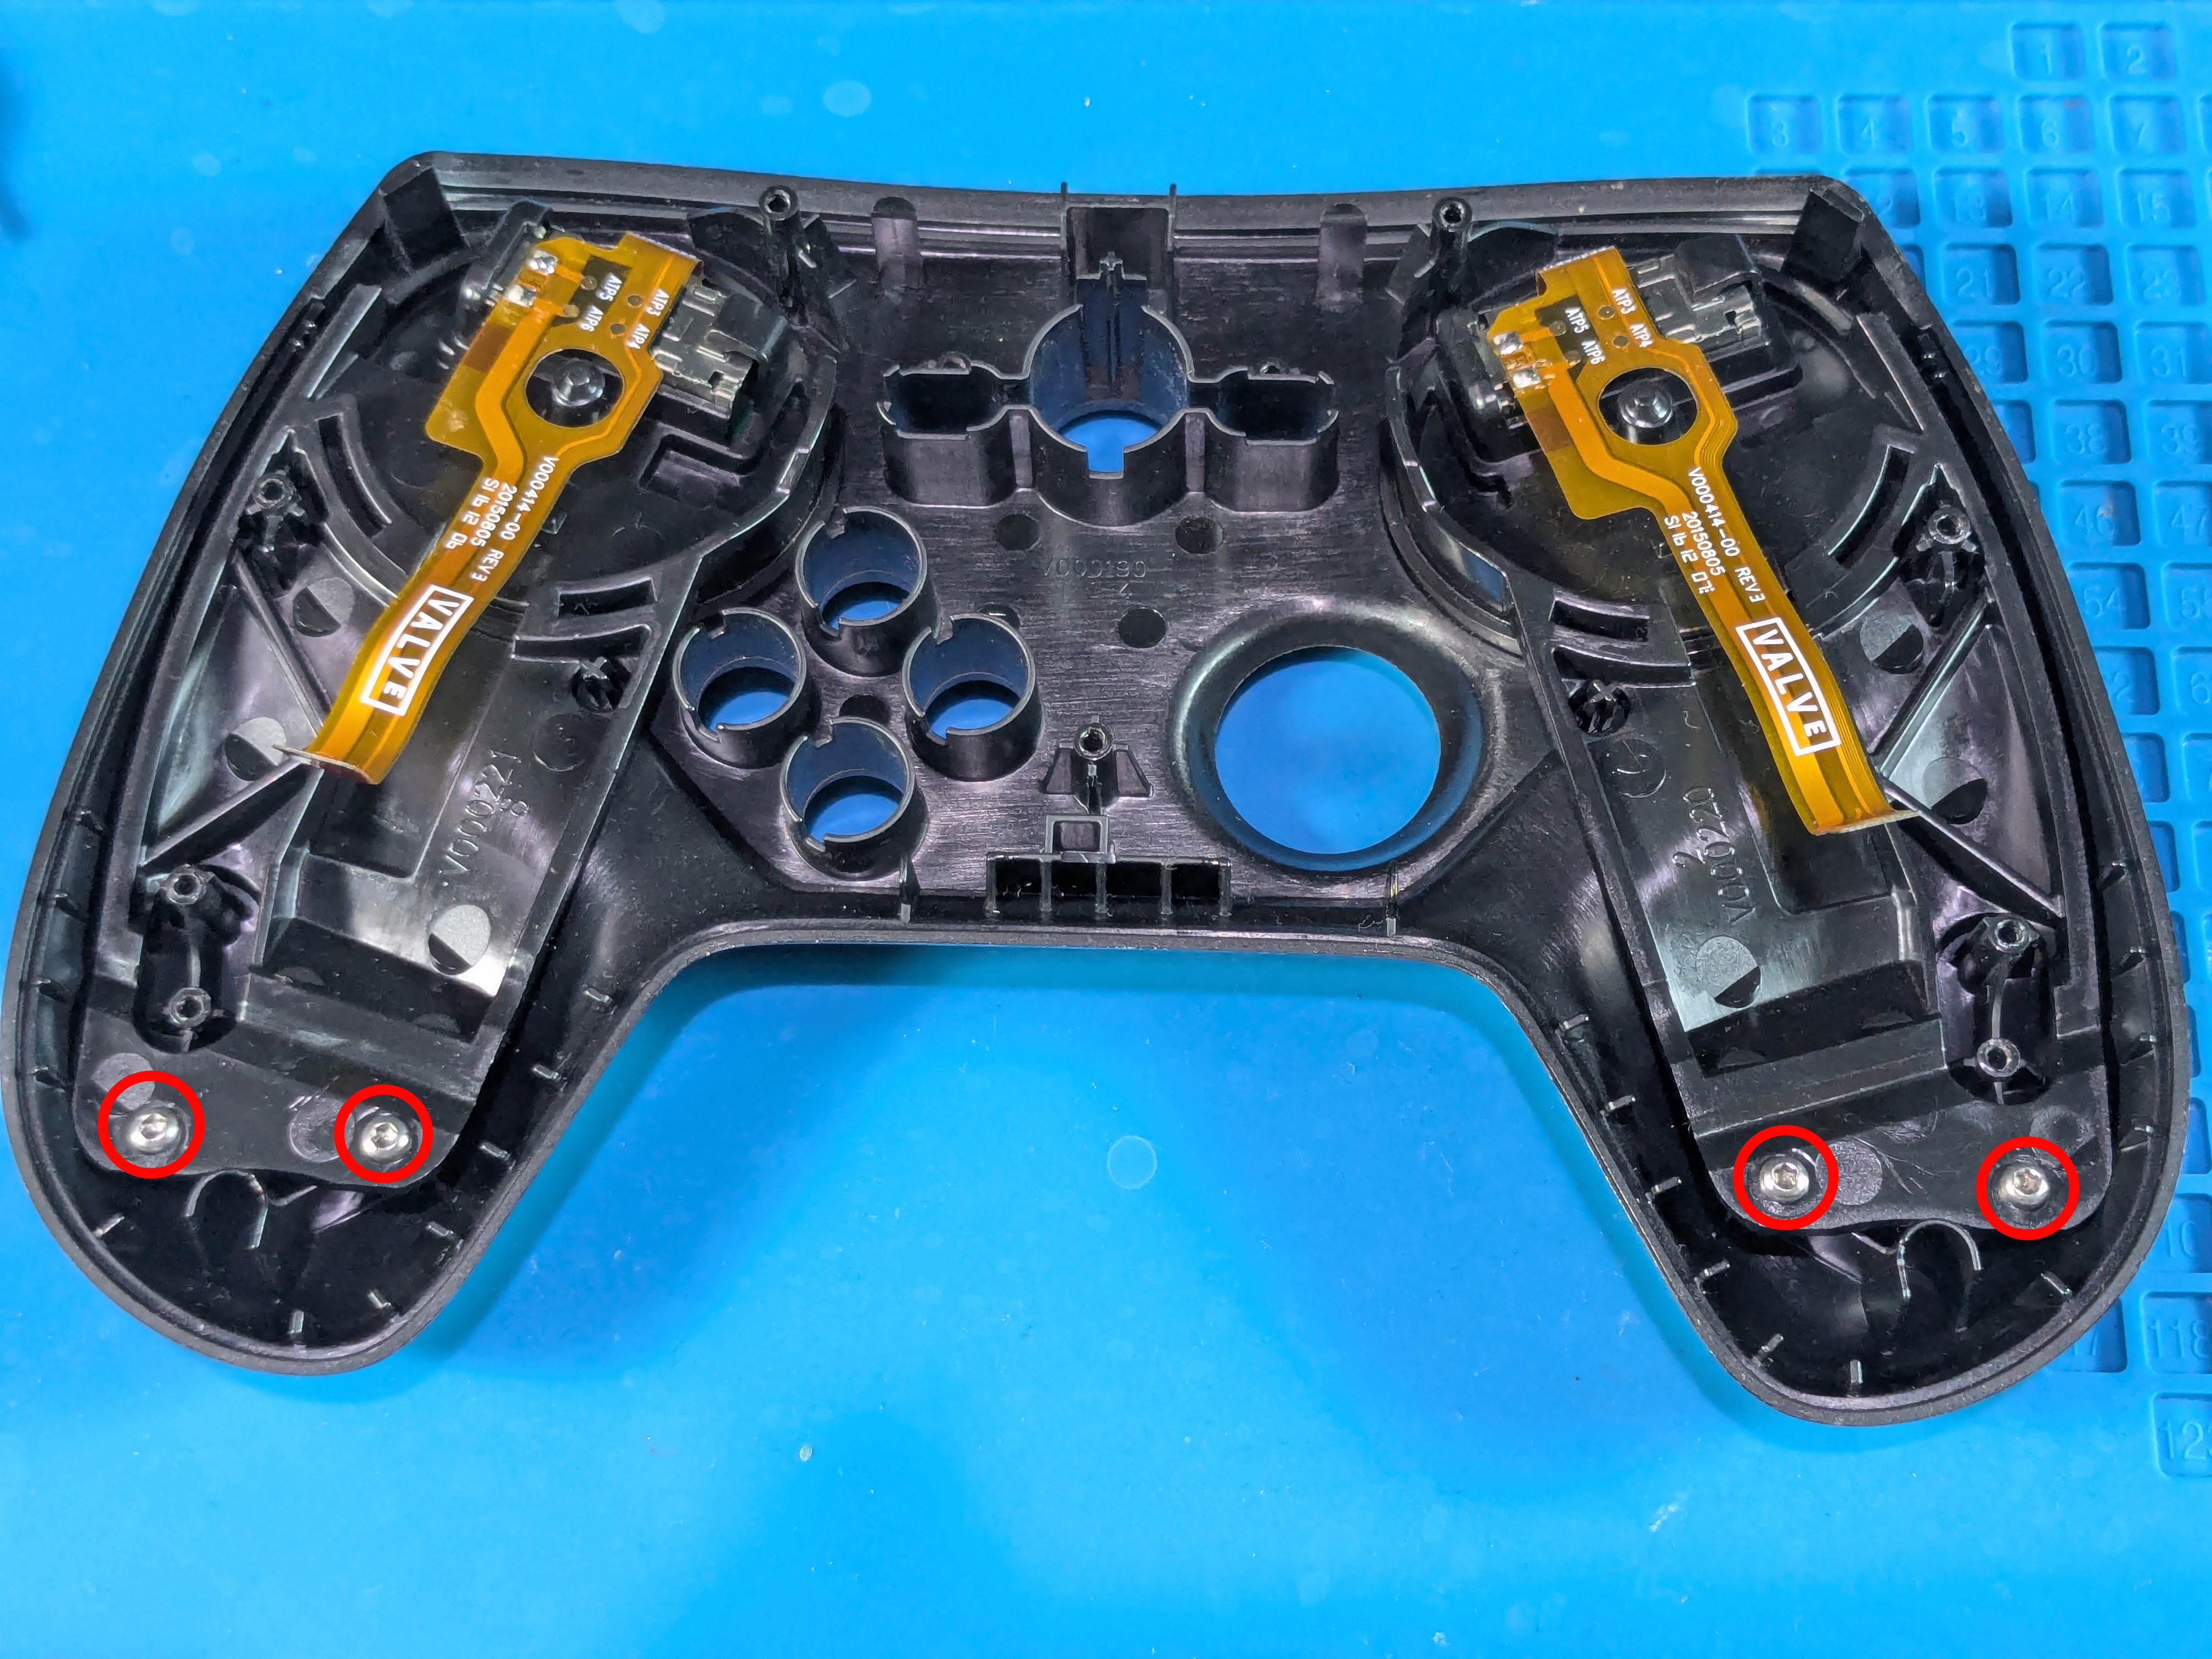
Trackpads Screw Locations
- The trackpads are only held in by (2+2 small) screws at this point
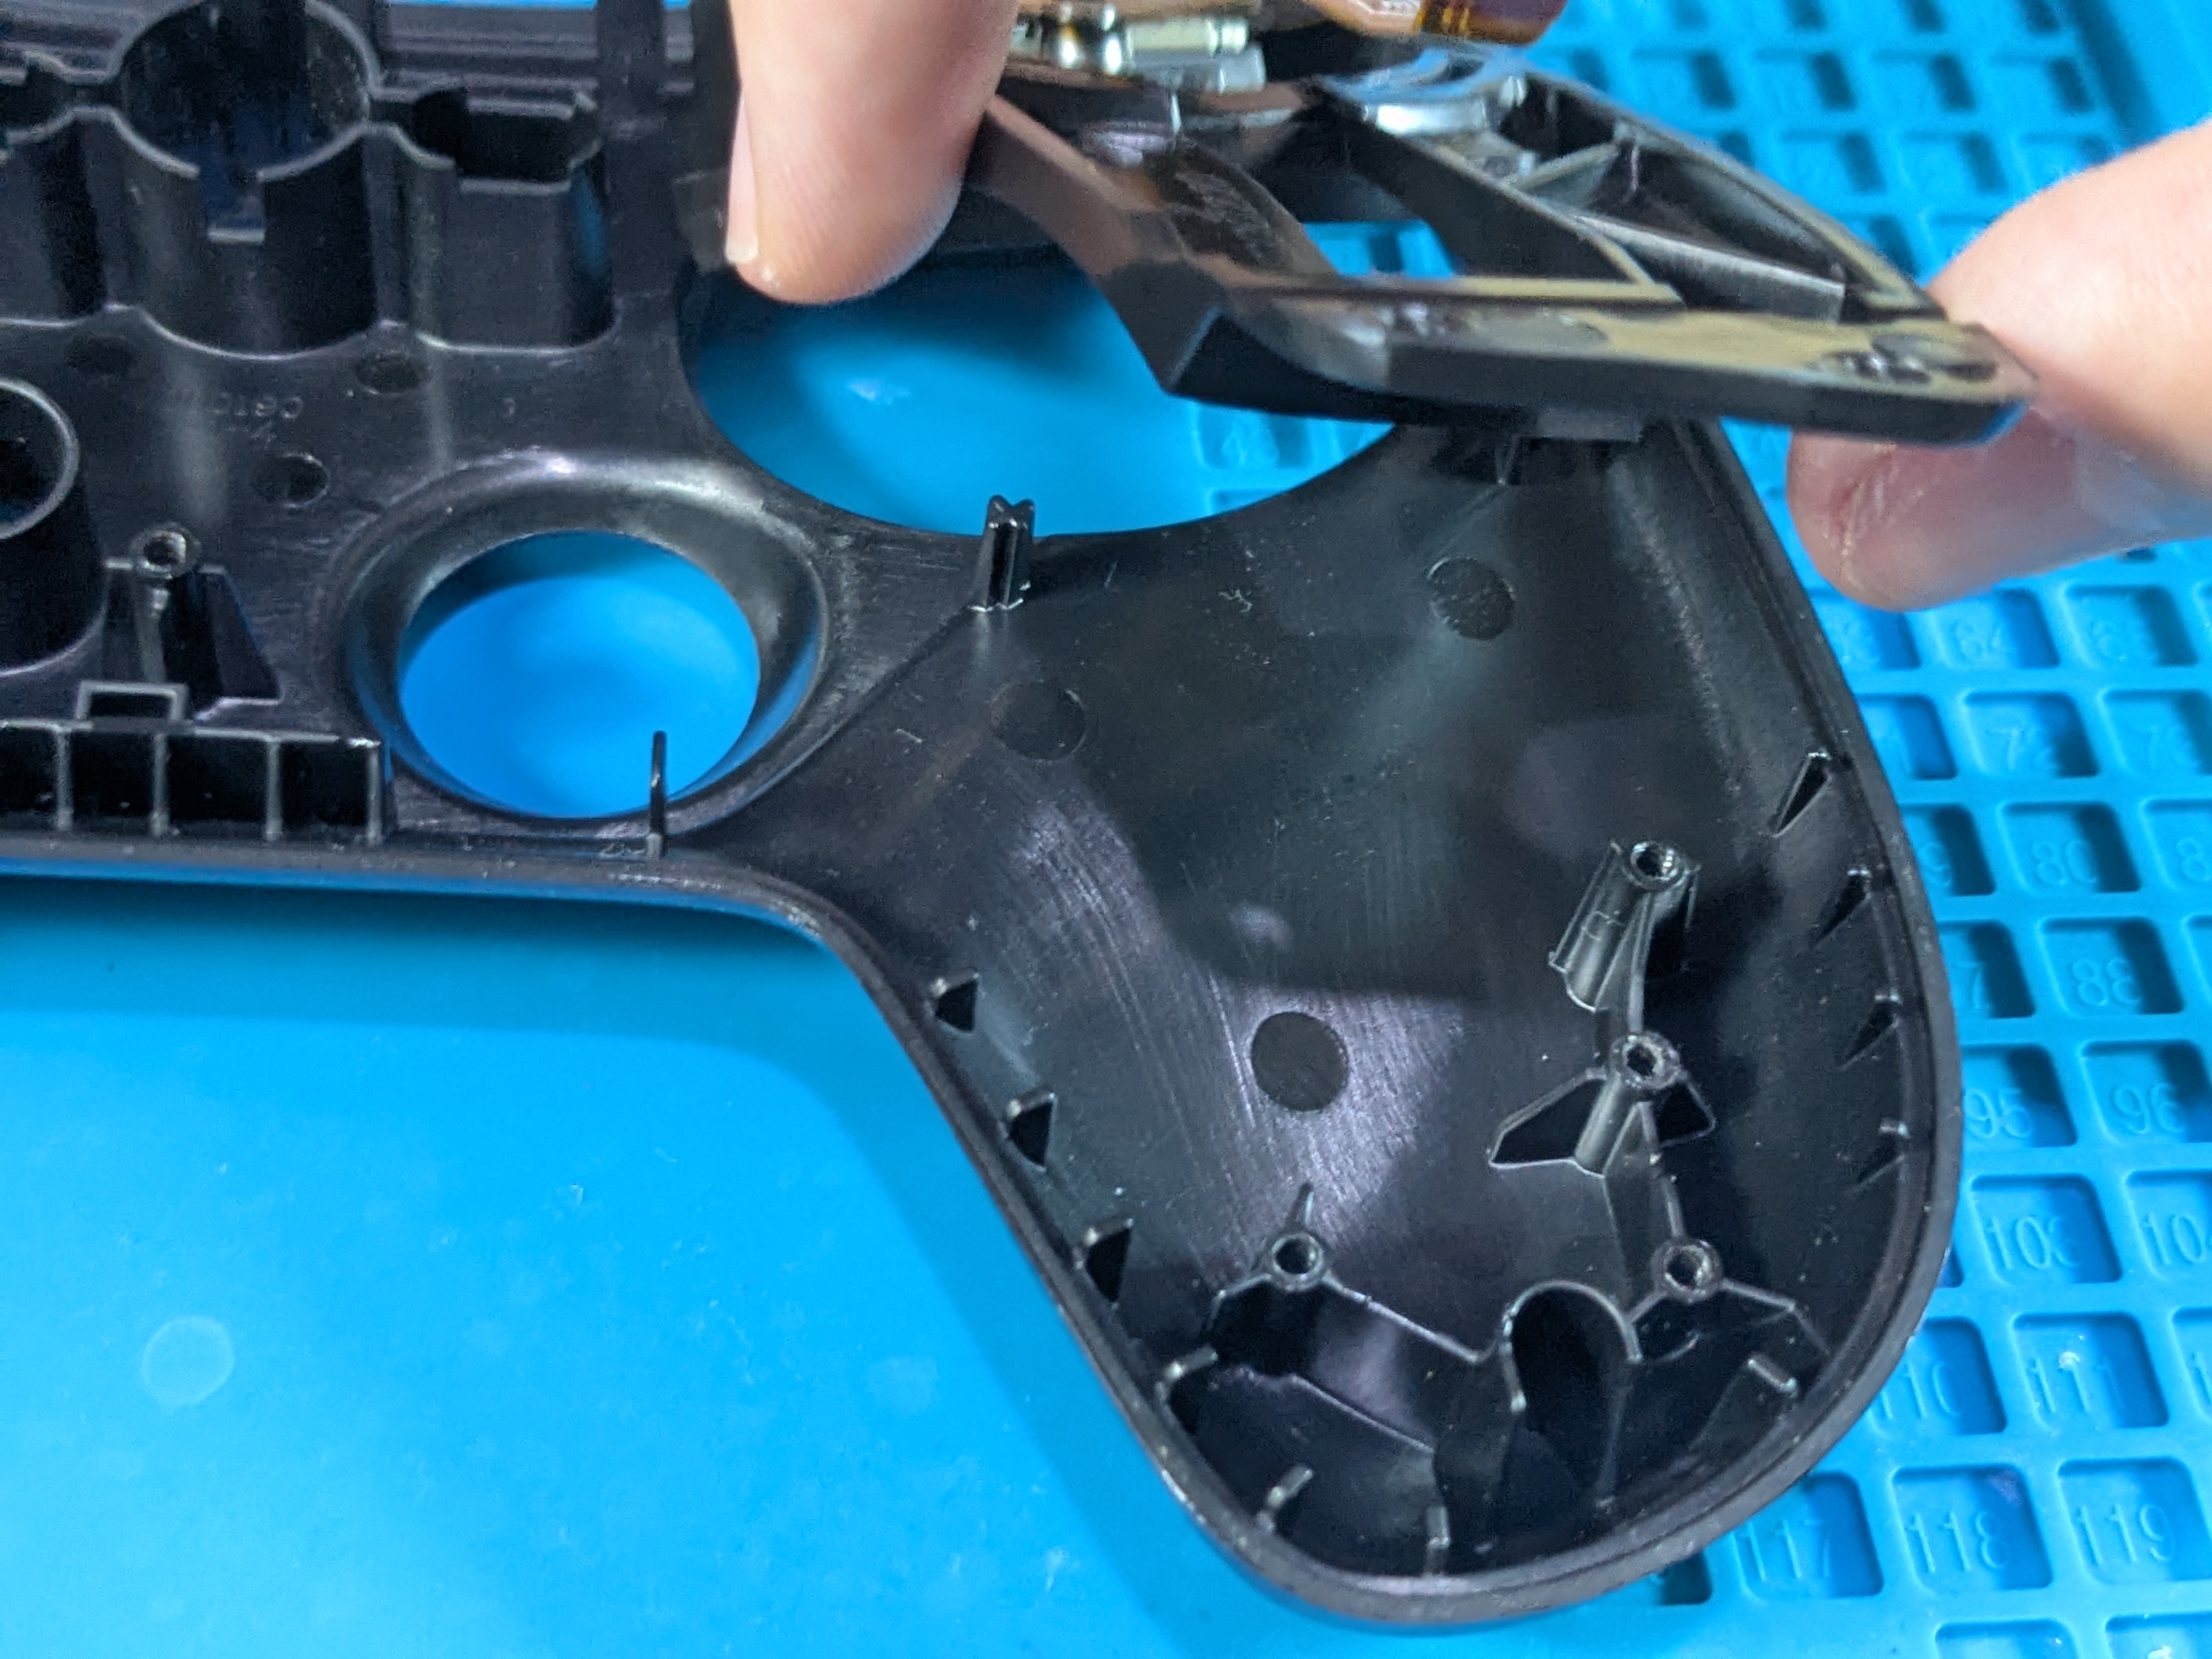
Taking Out The Left Trackpad
- After taking out the screws, pull out the trackpads by grabbing them on the sides
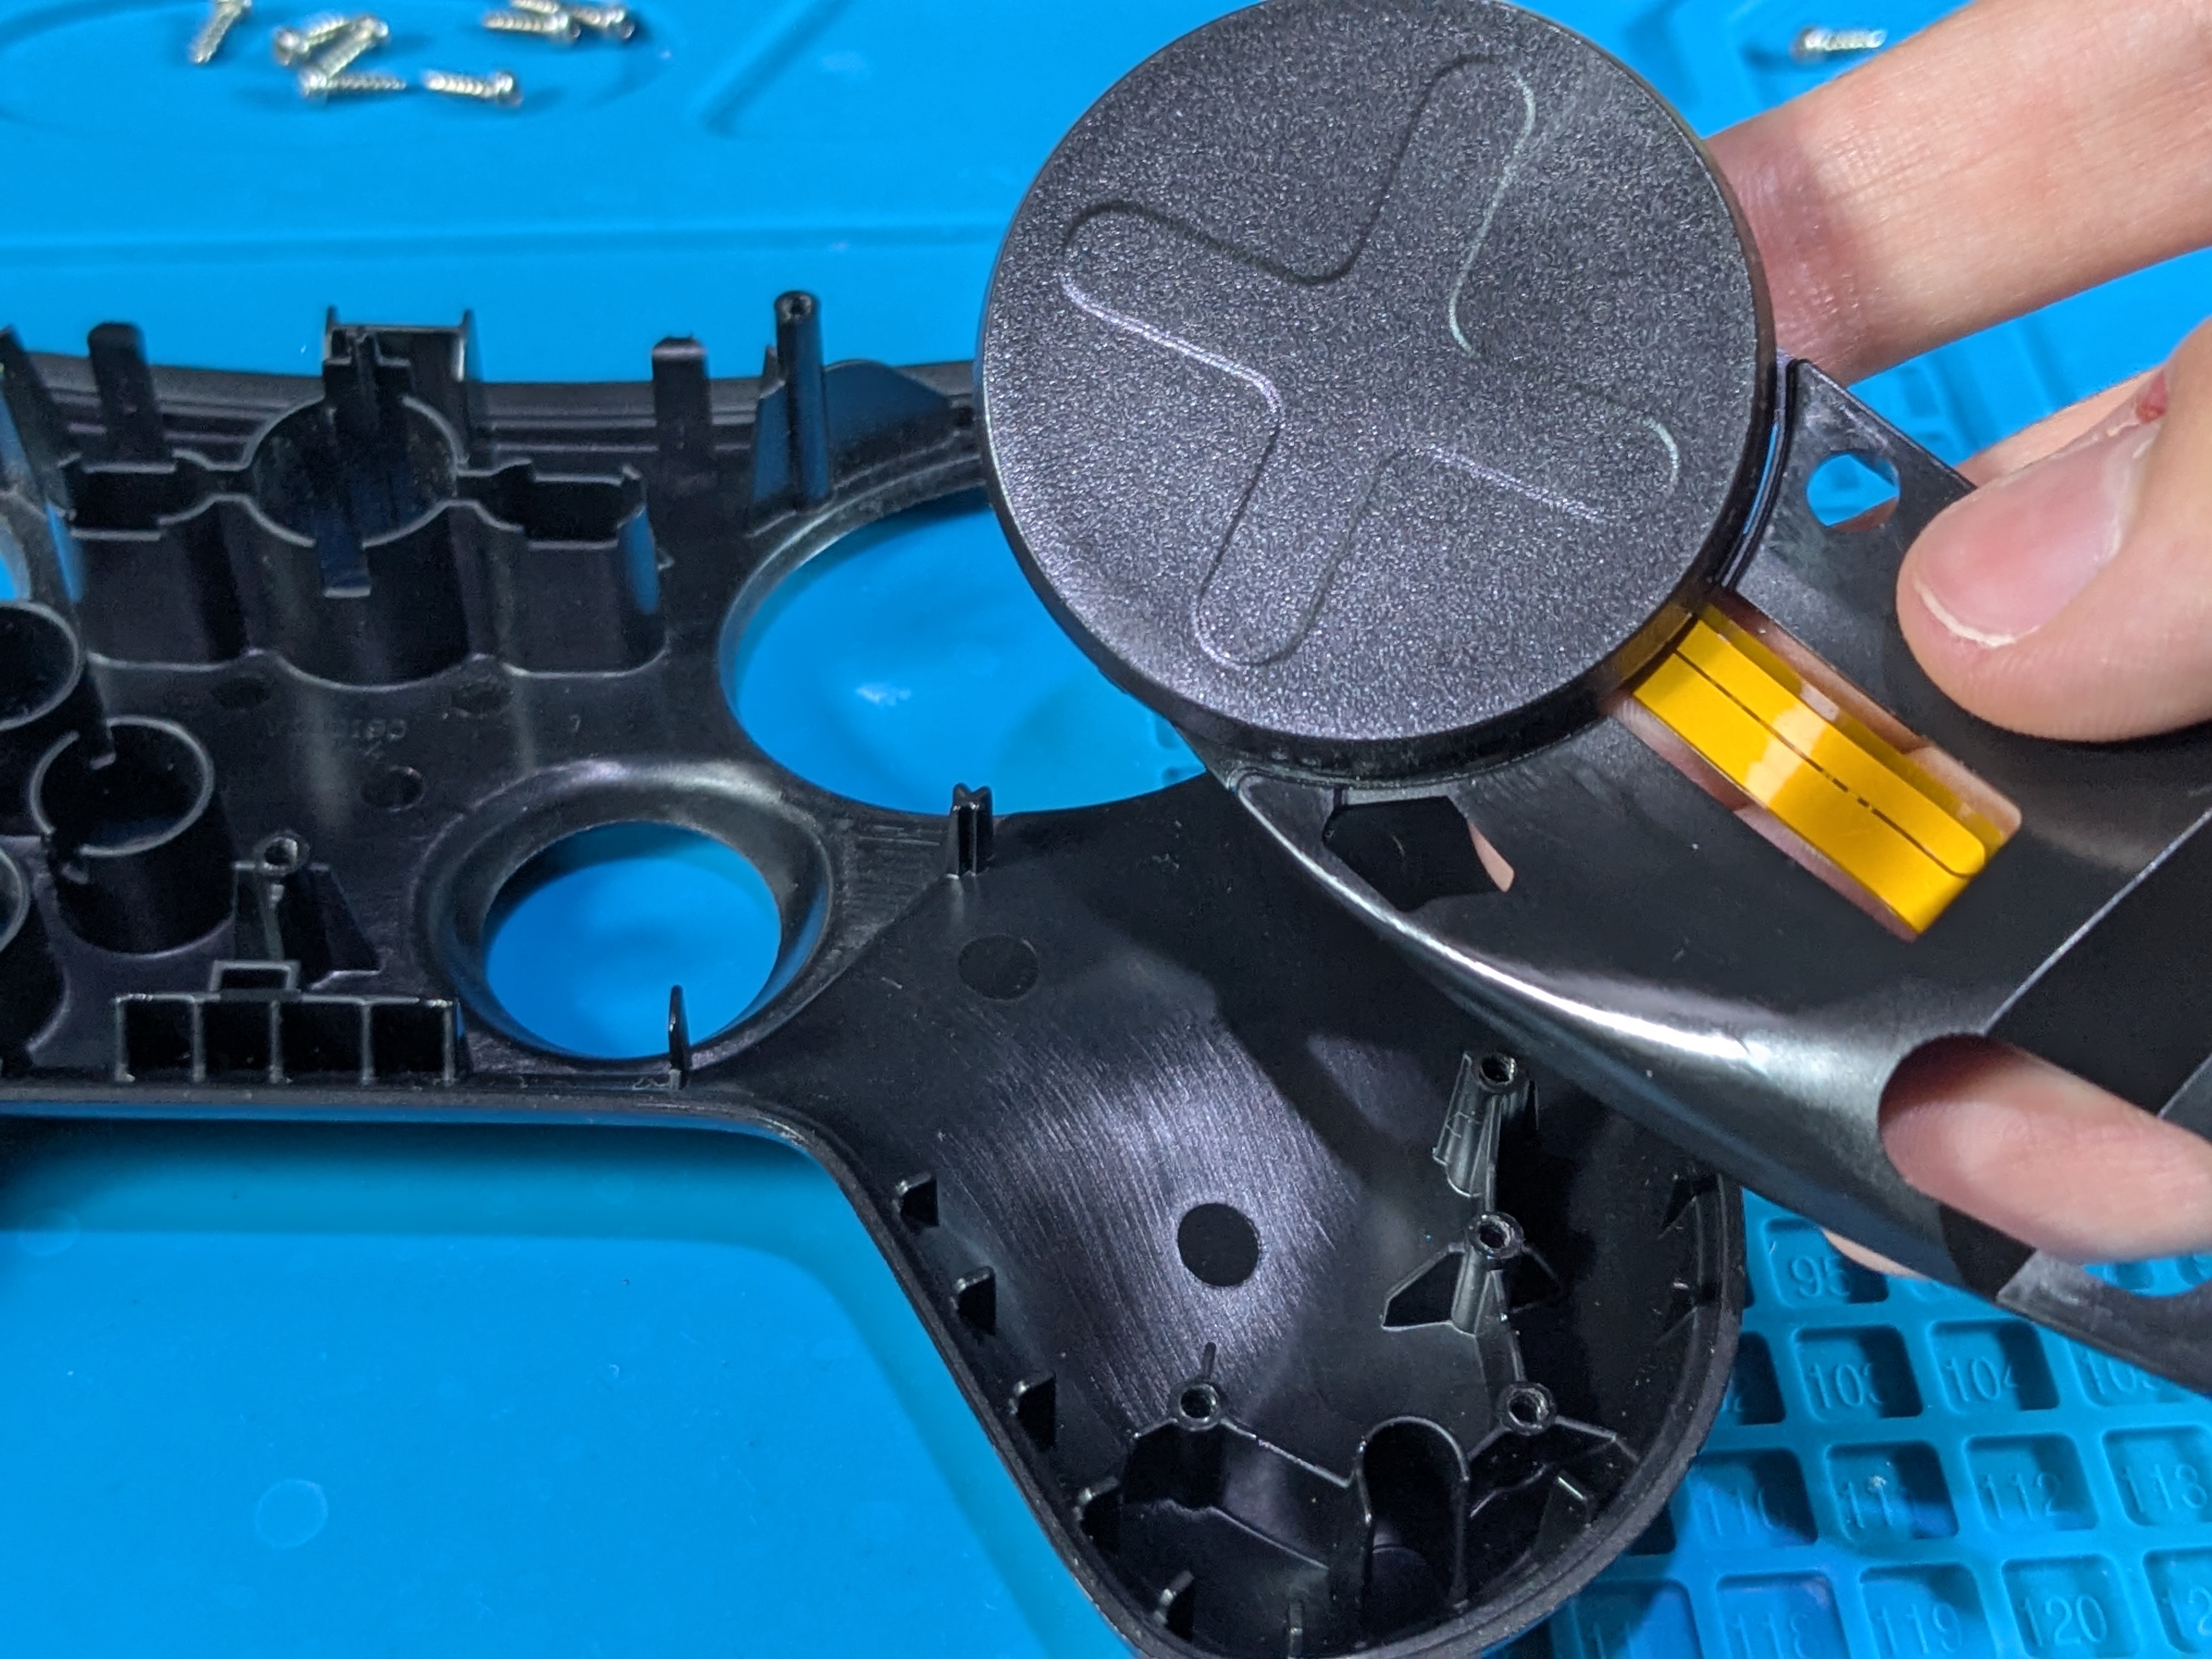
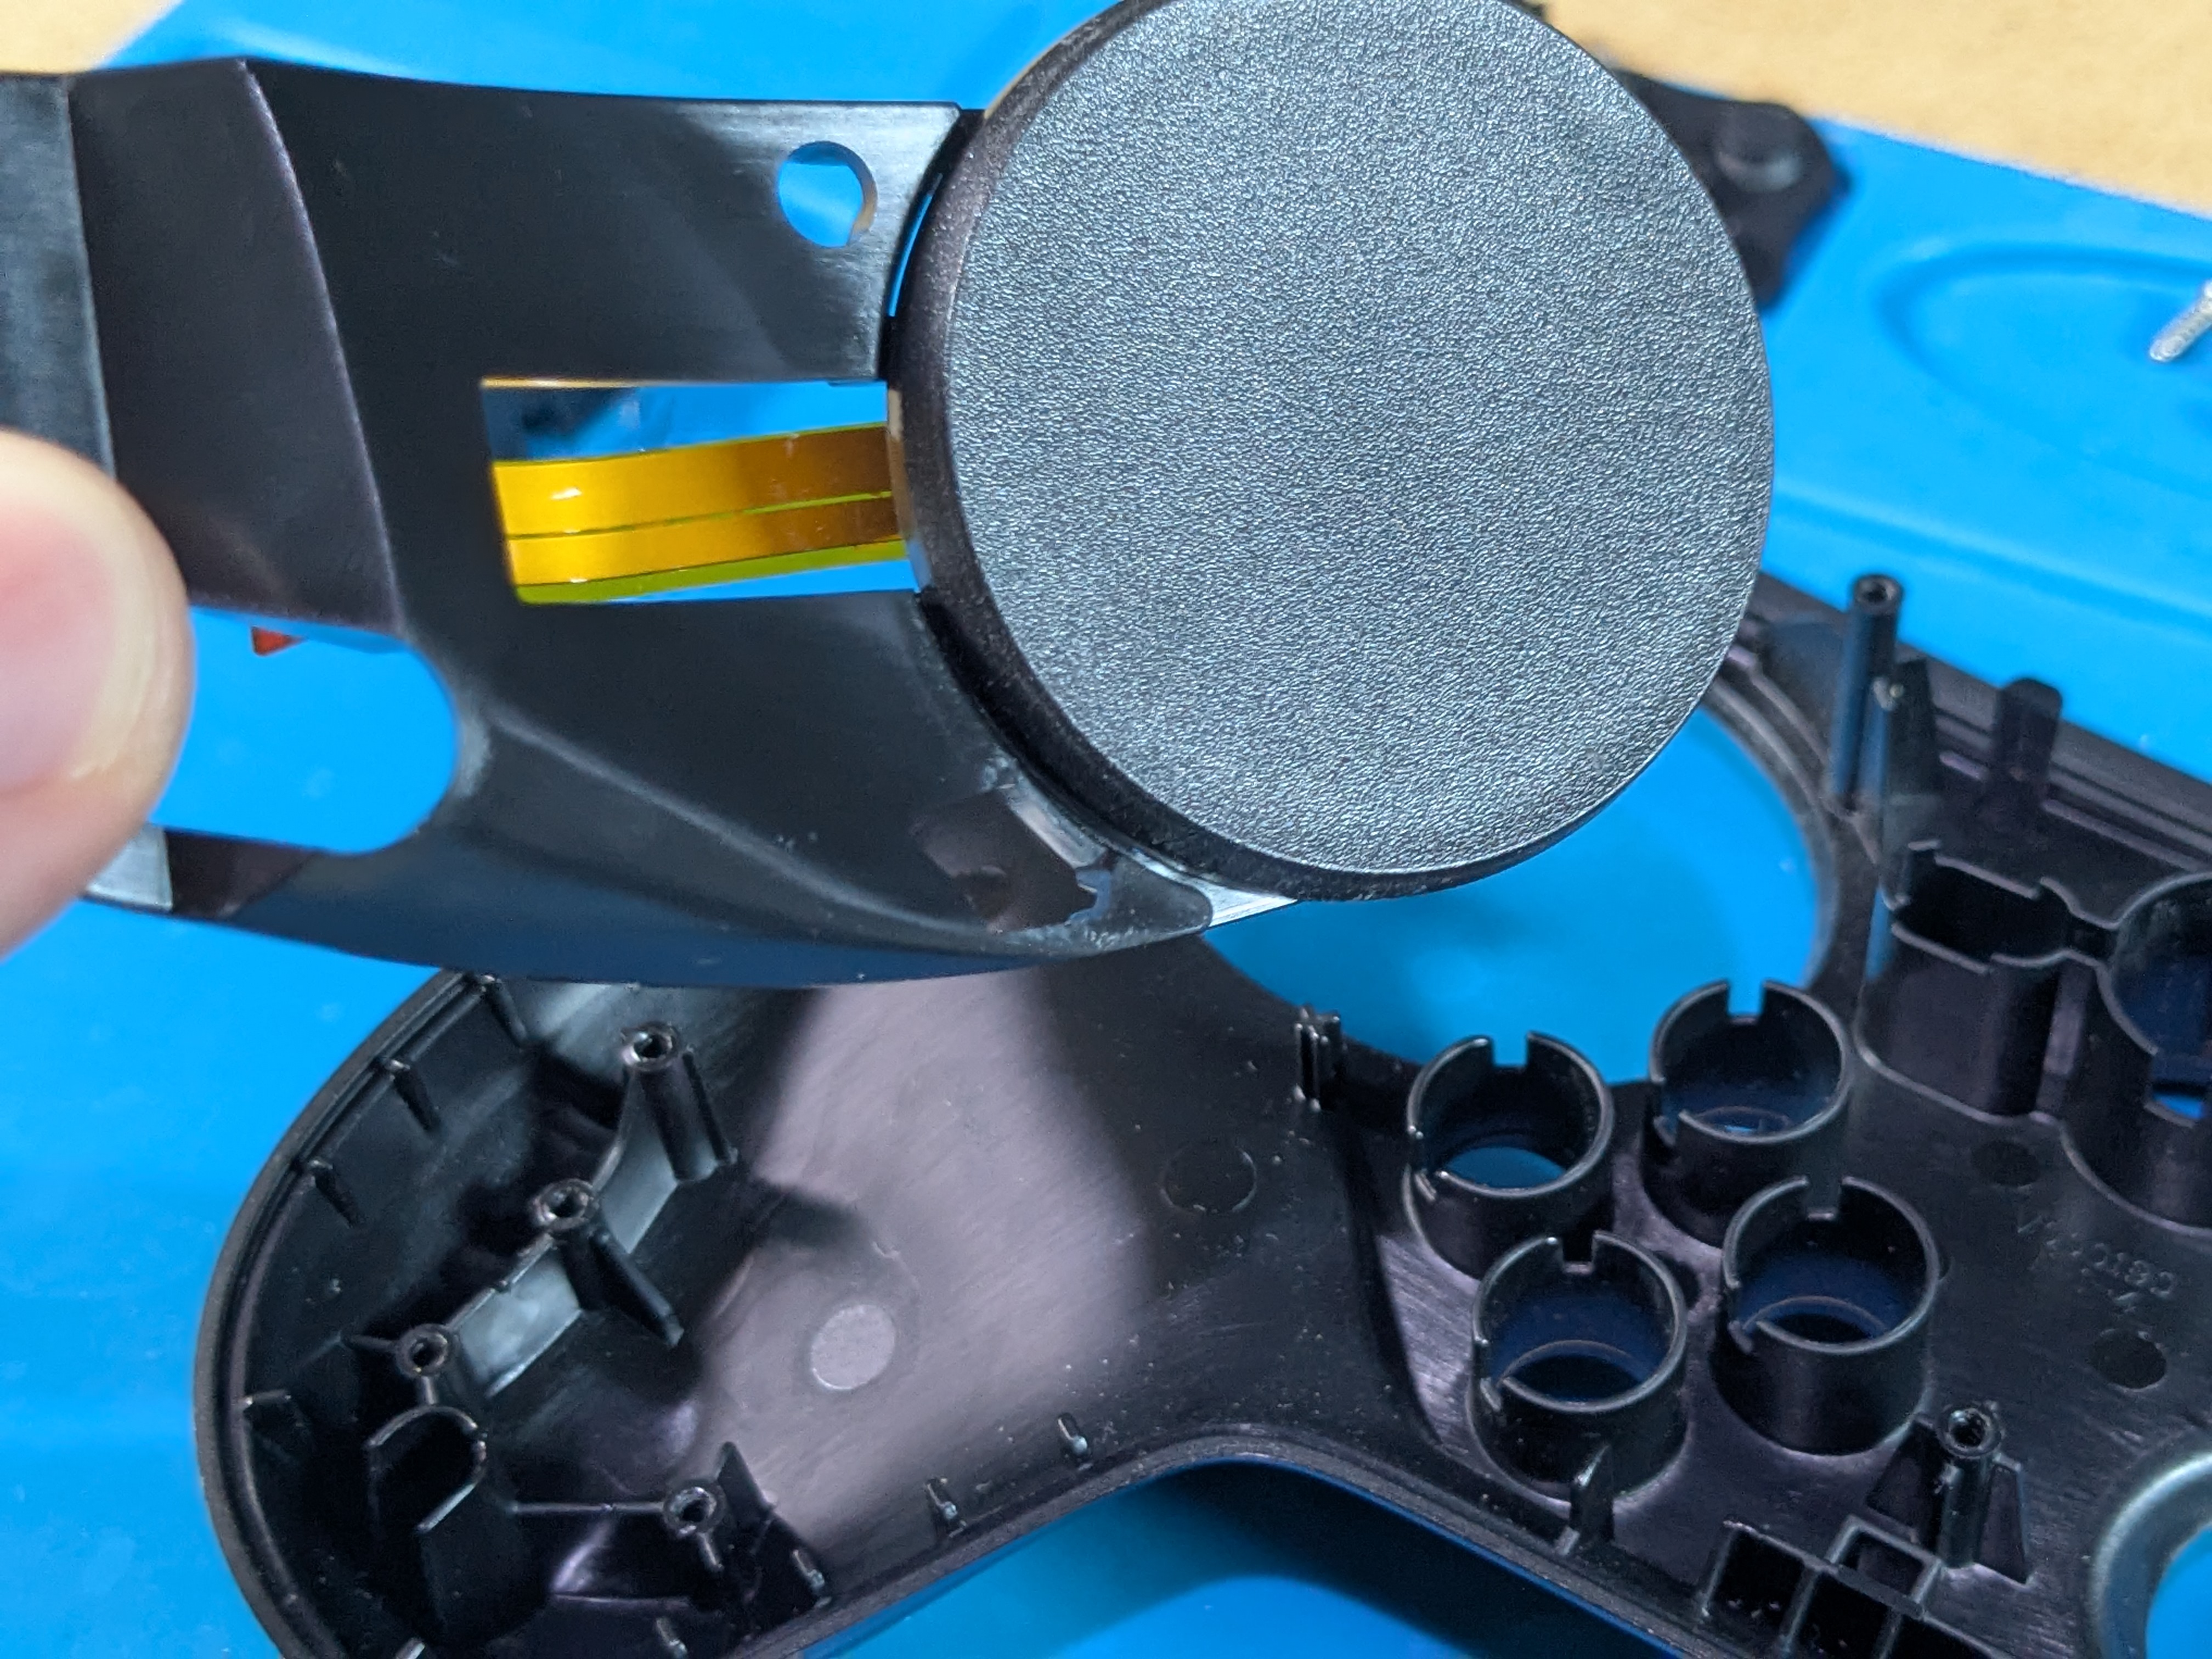
Taking Out The Right Trackpad
- Same method as left side
Front And Back Shell Removed
- Here’s how the controller should look like with the front and back shell taken off

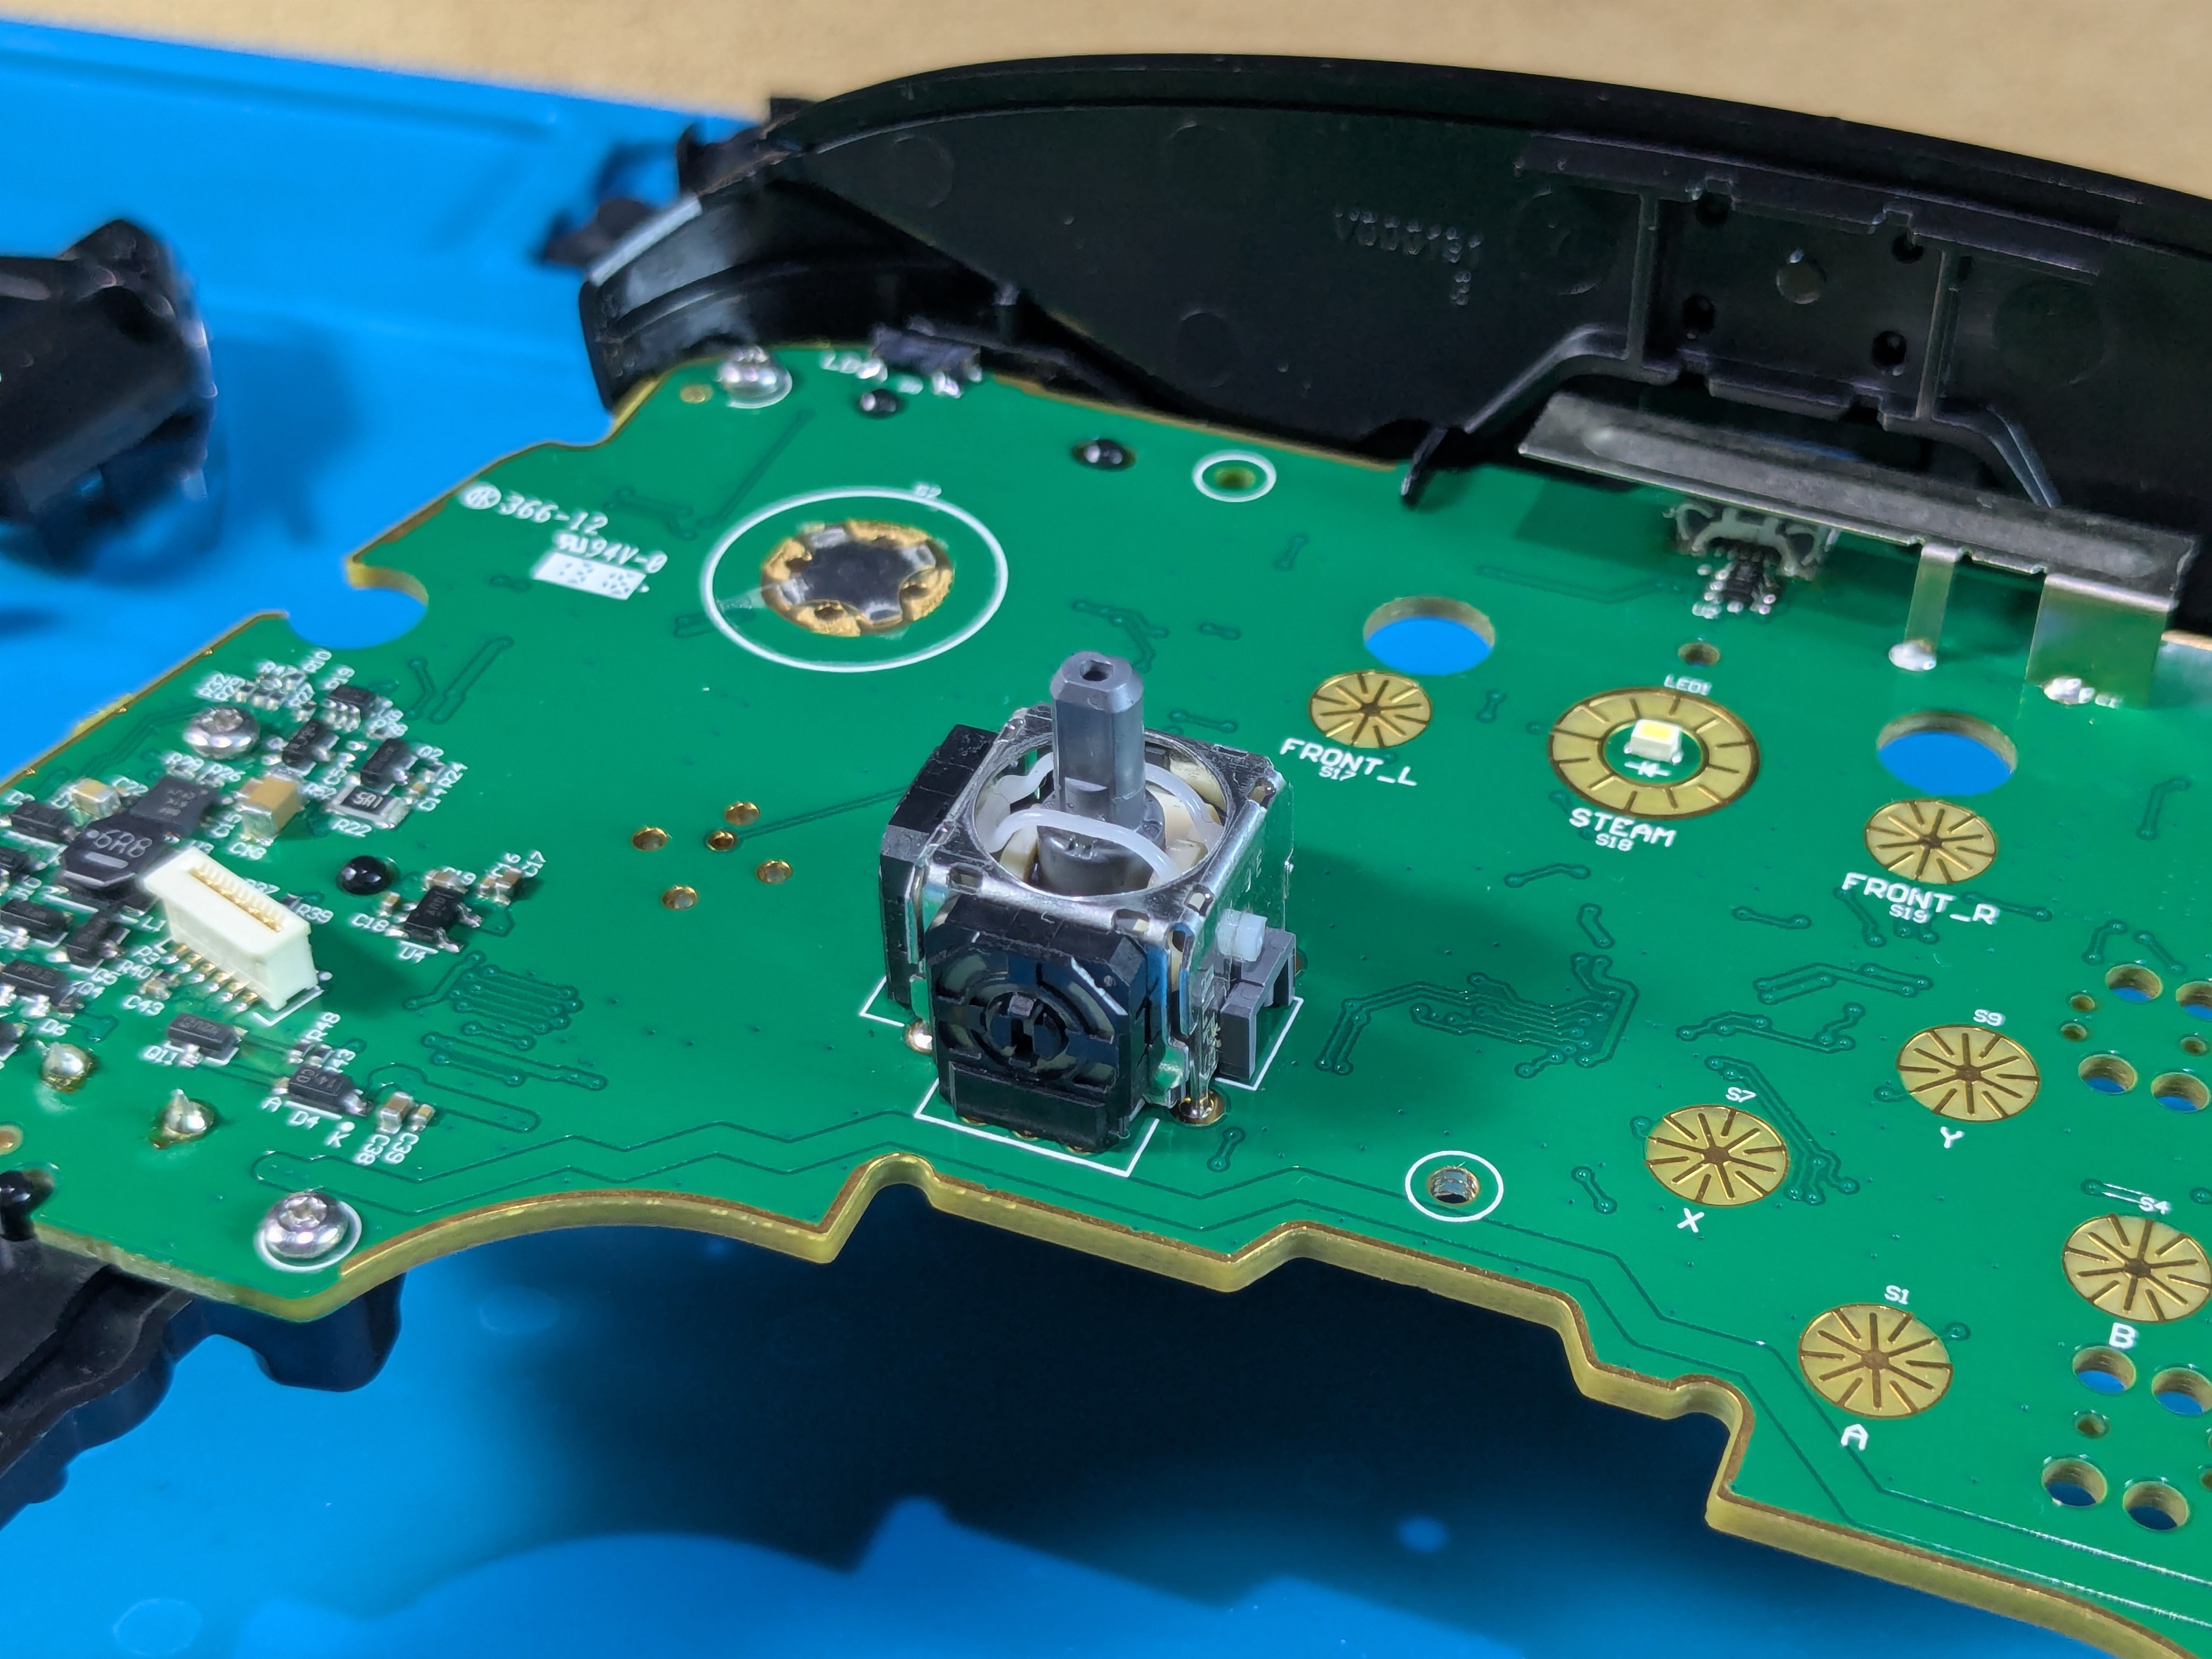
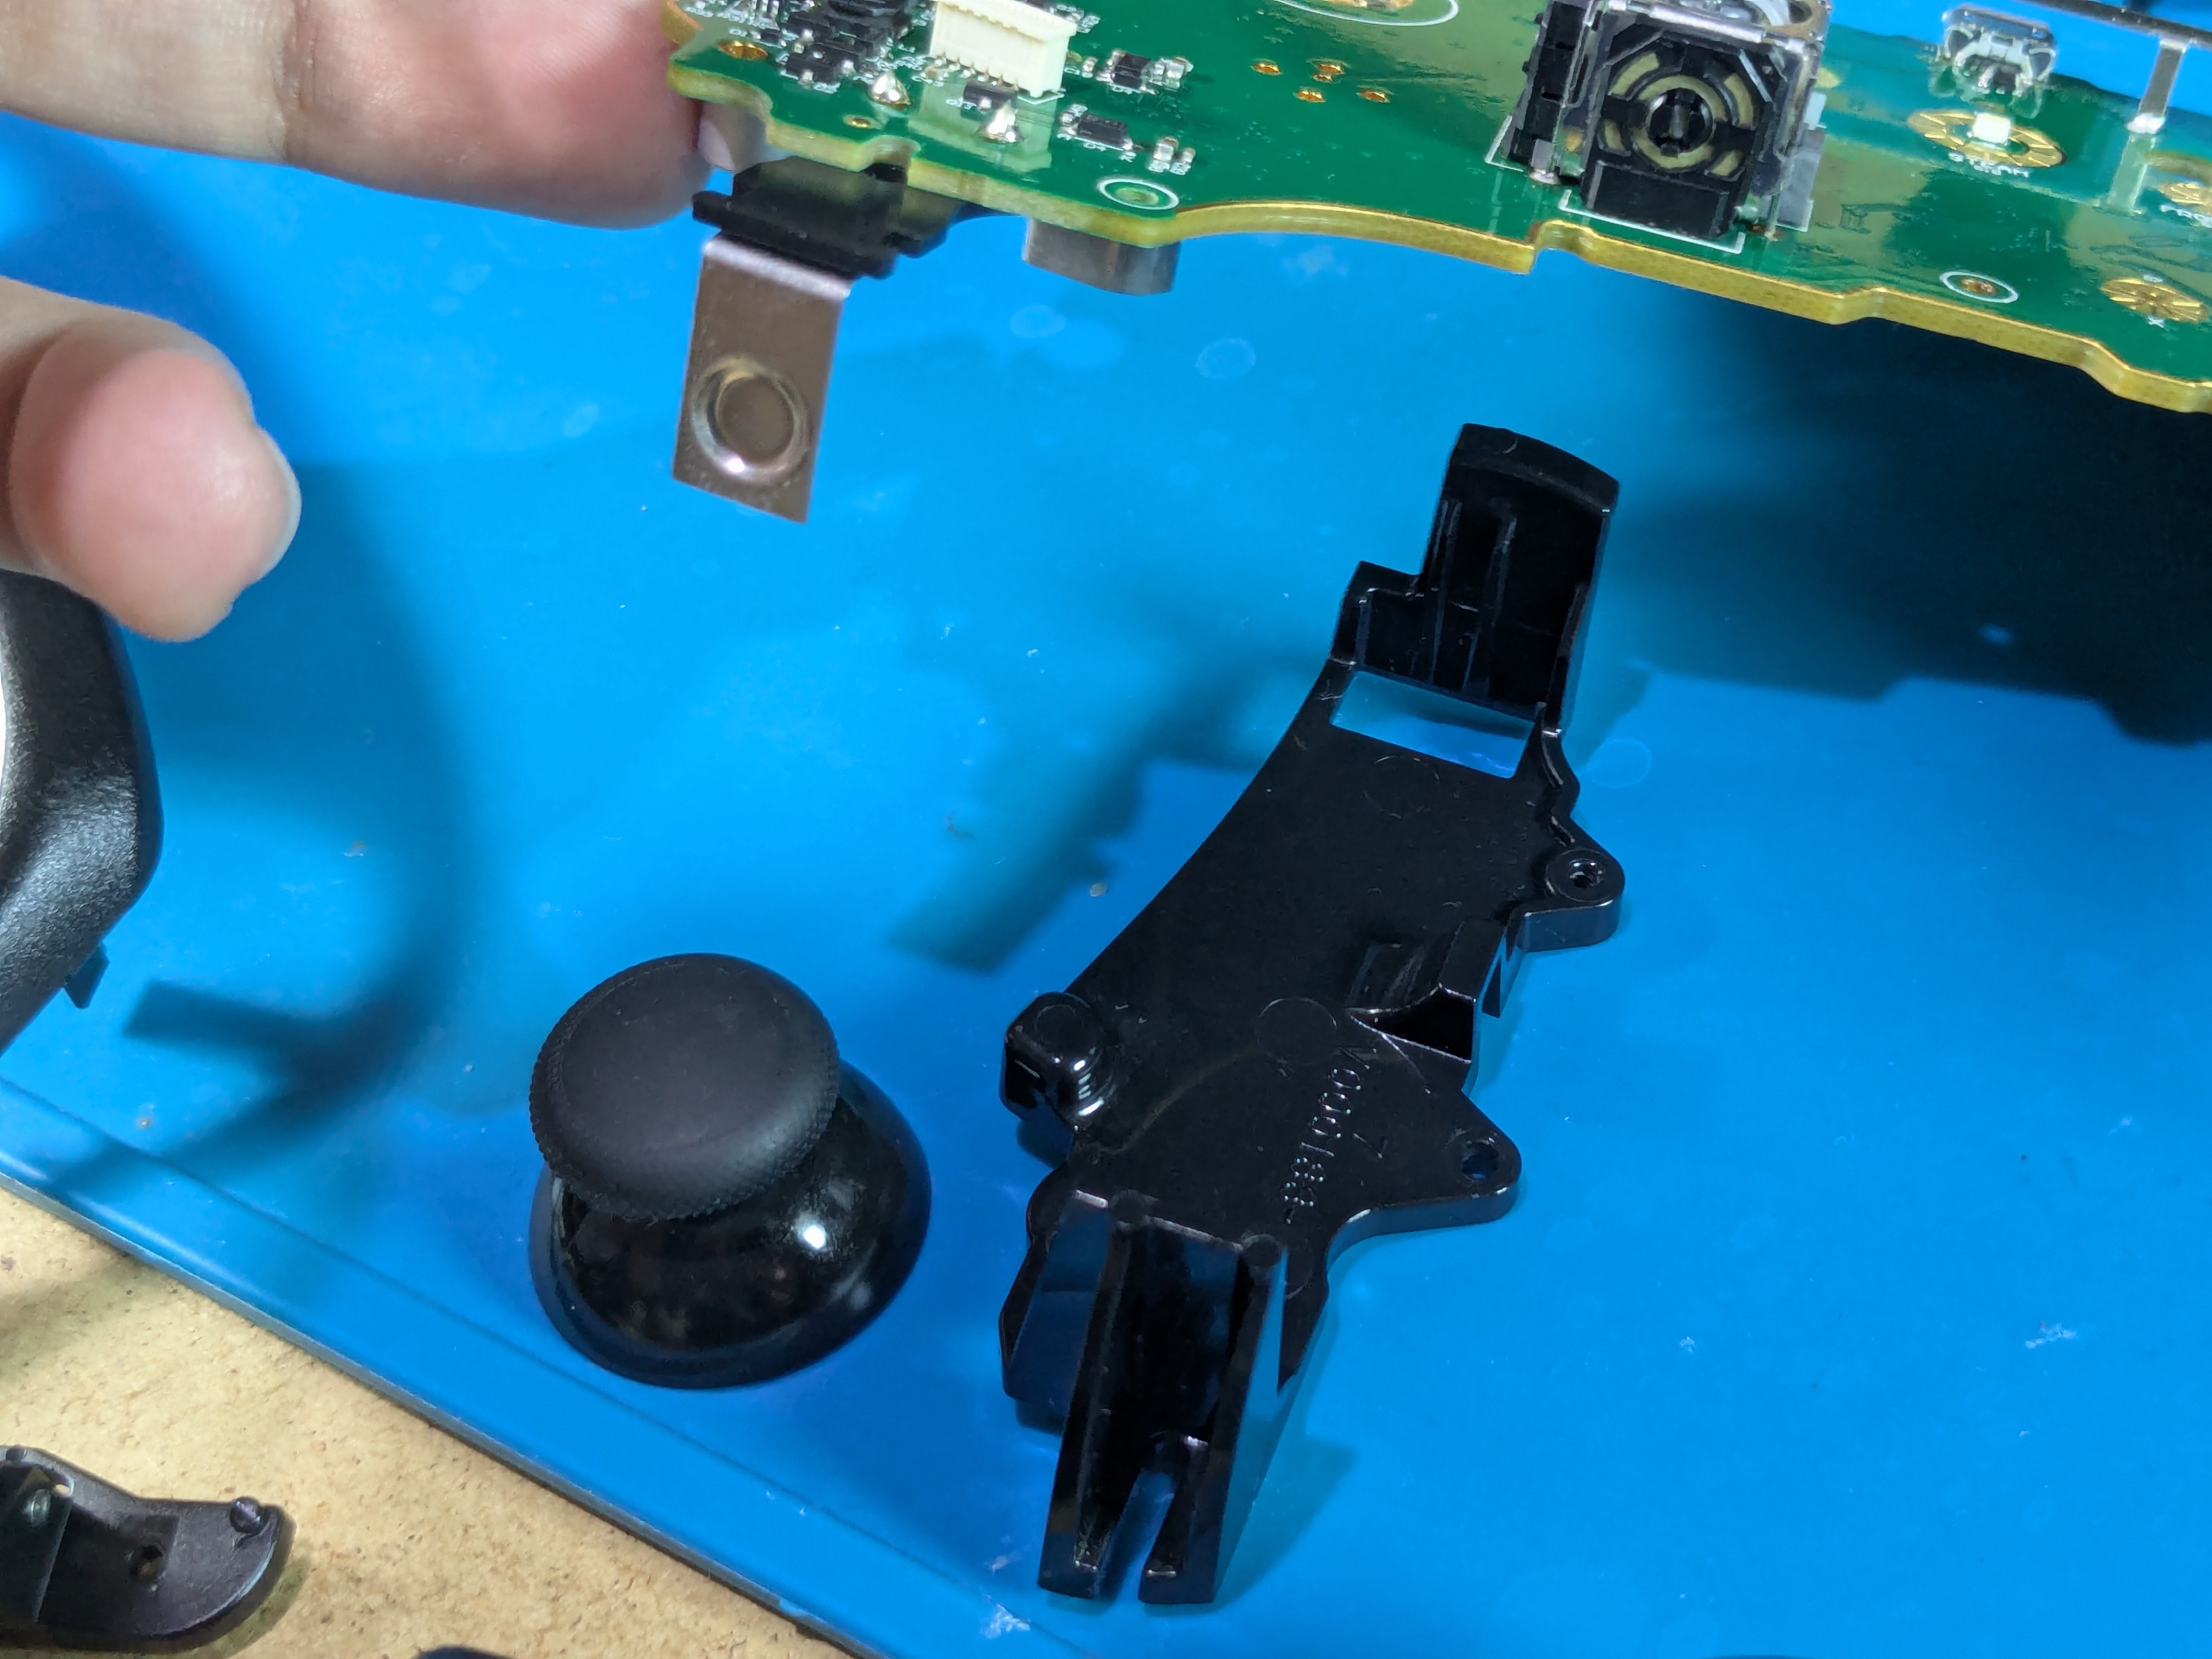
Taking Off The Joystick Cap
- Hold the controller down and then pull off the joystick cap from the module

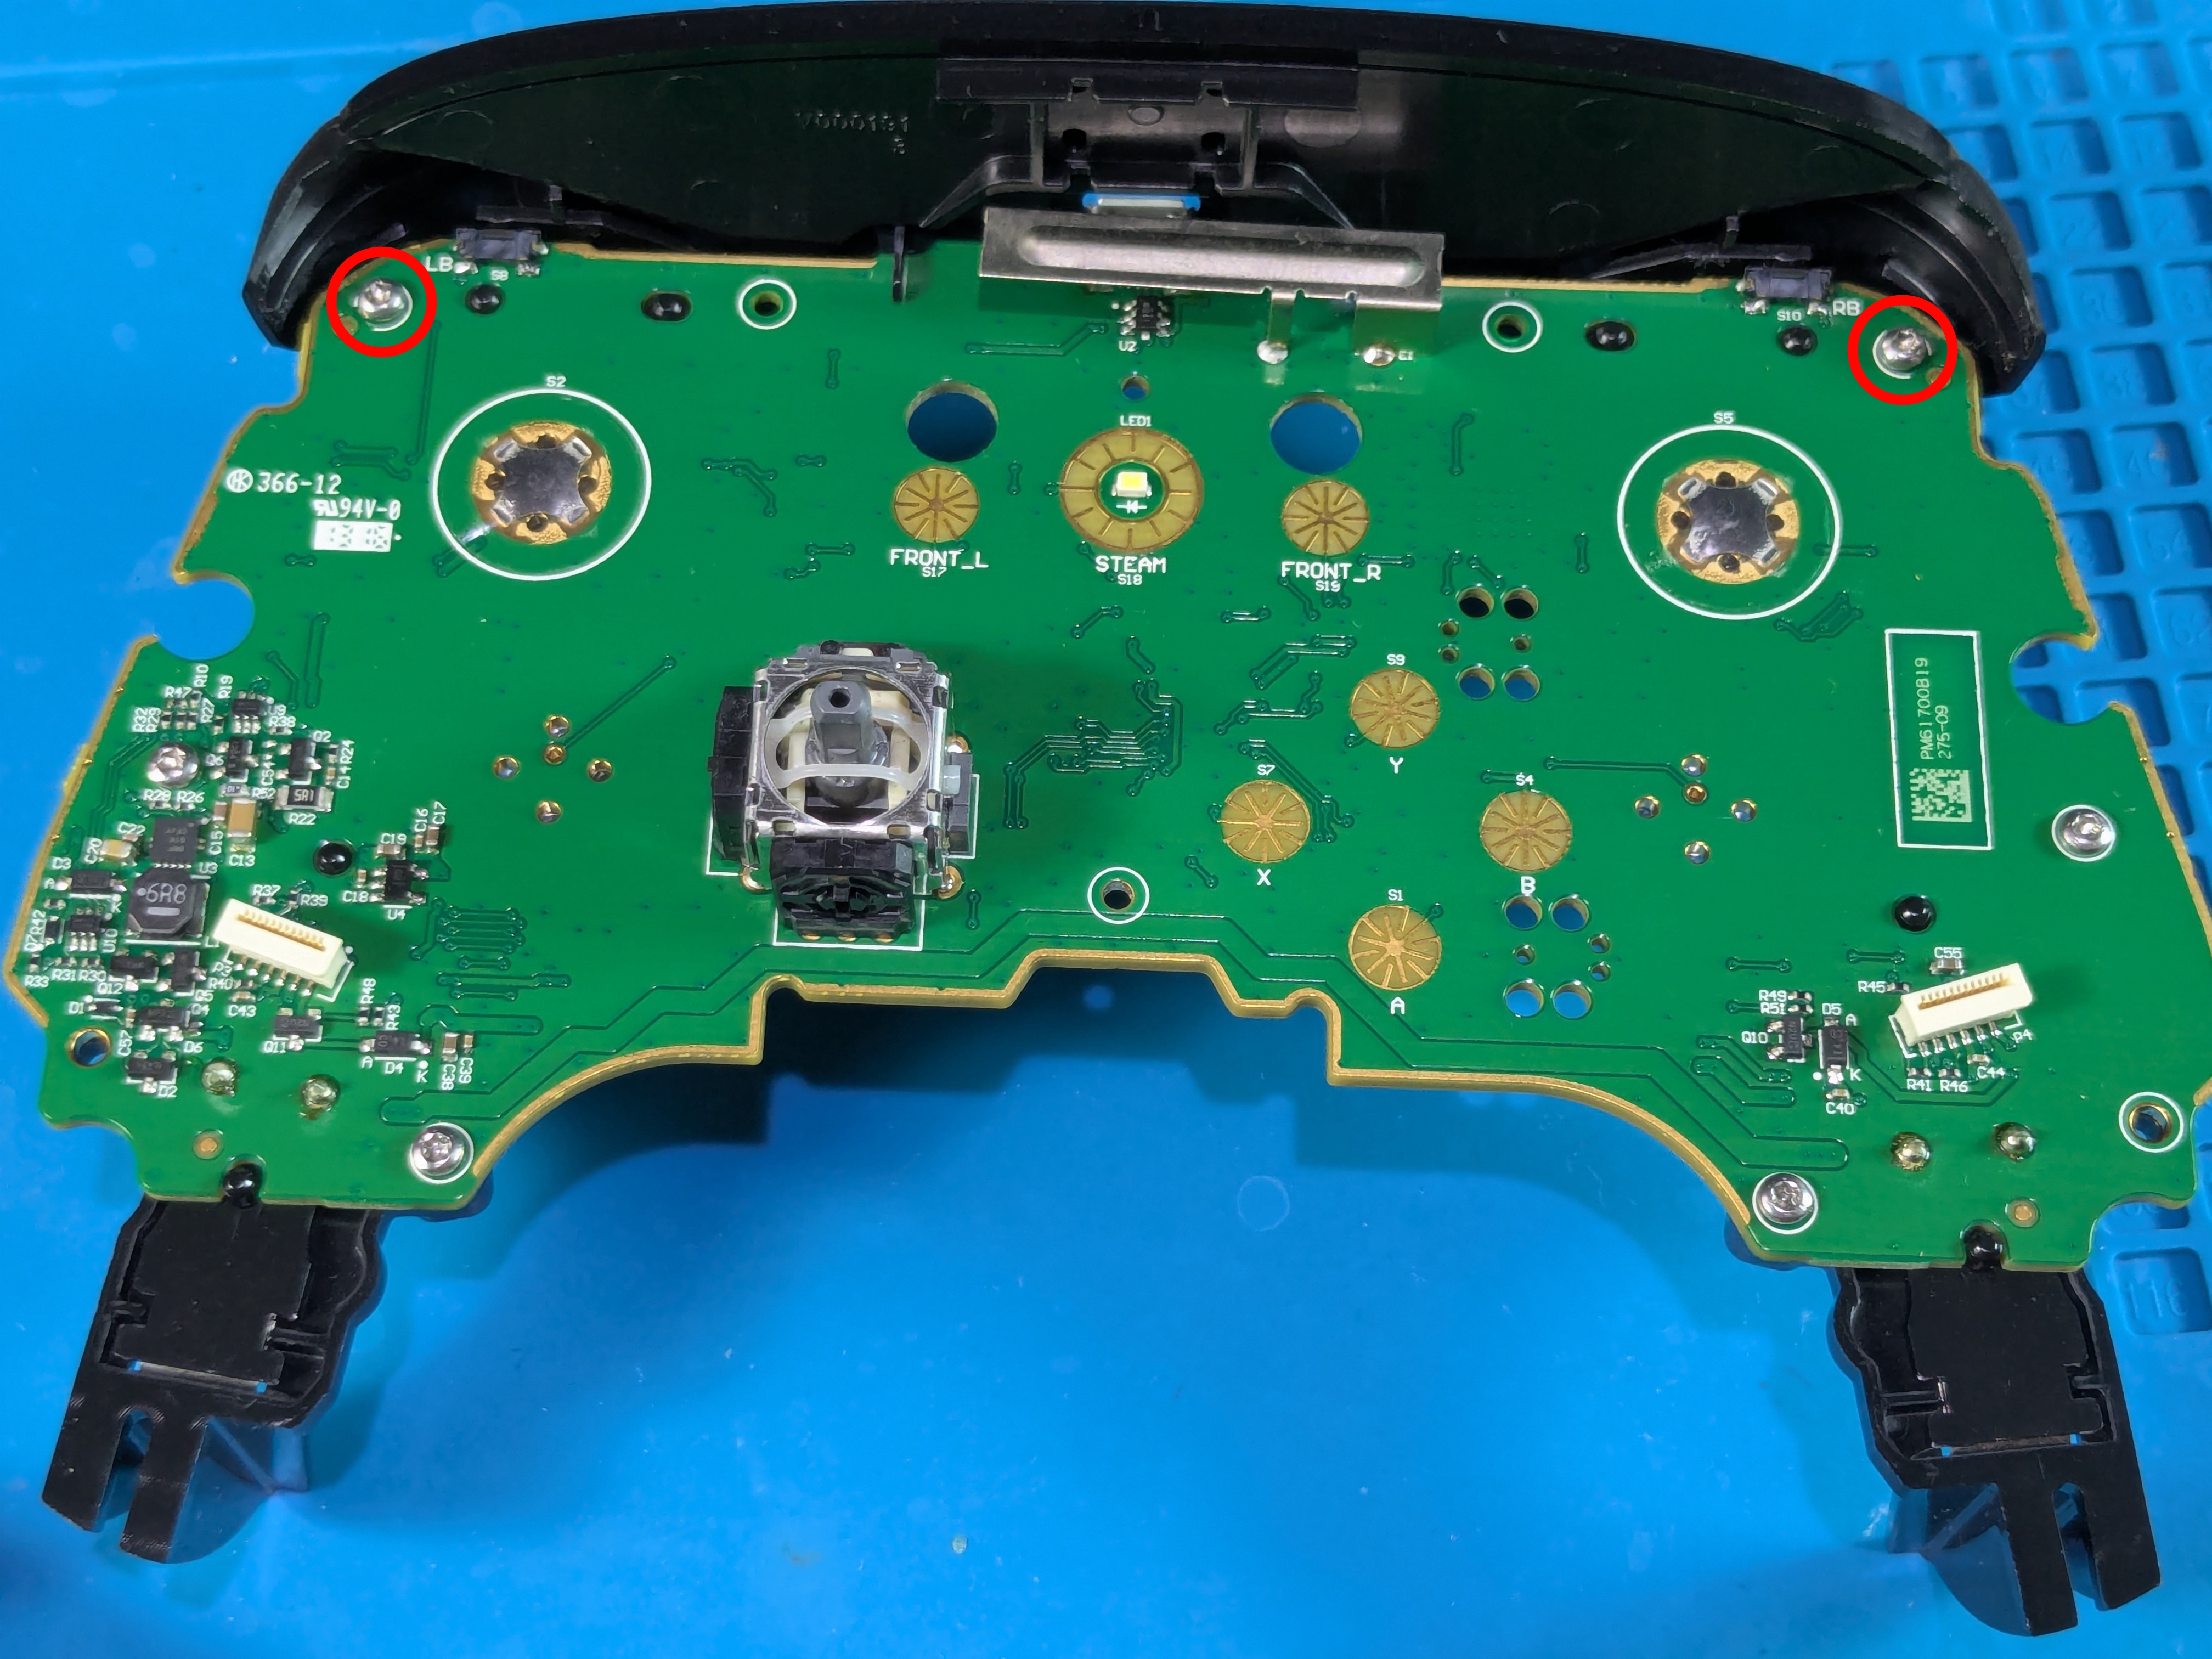
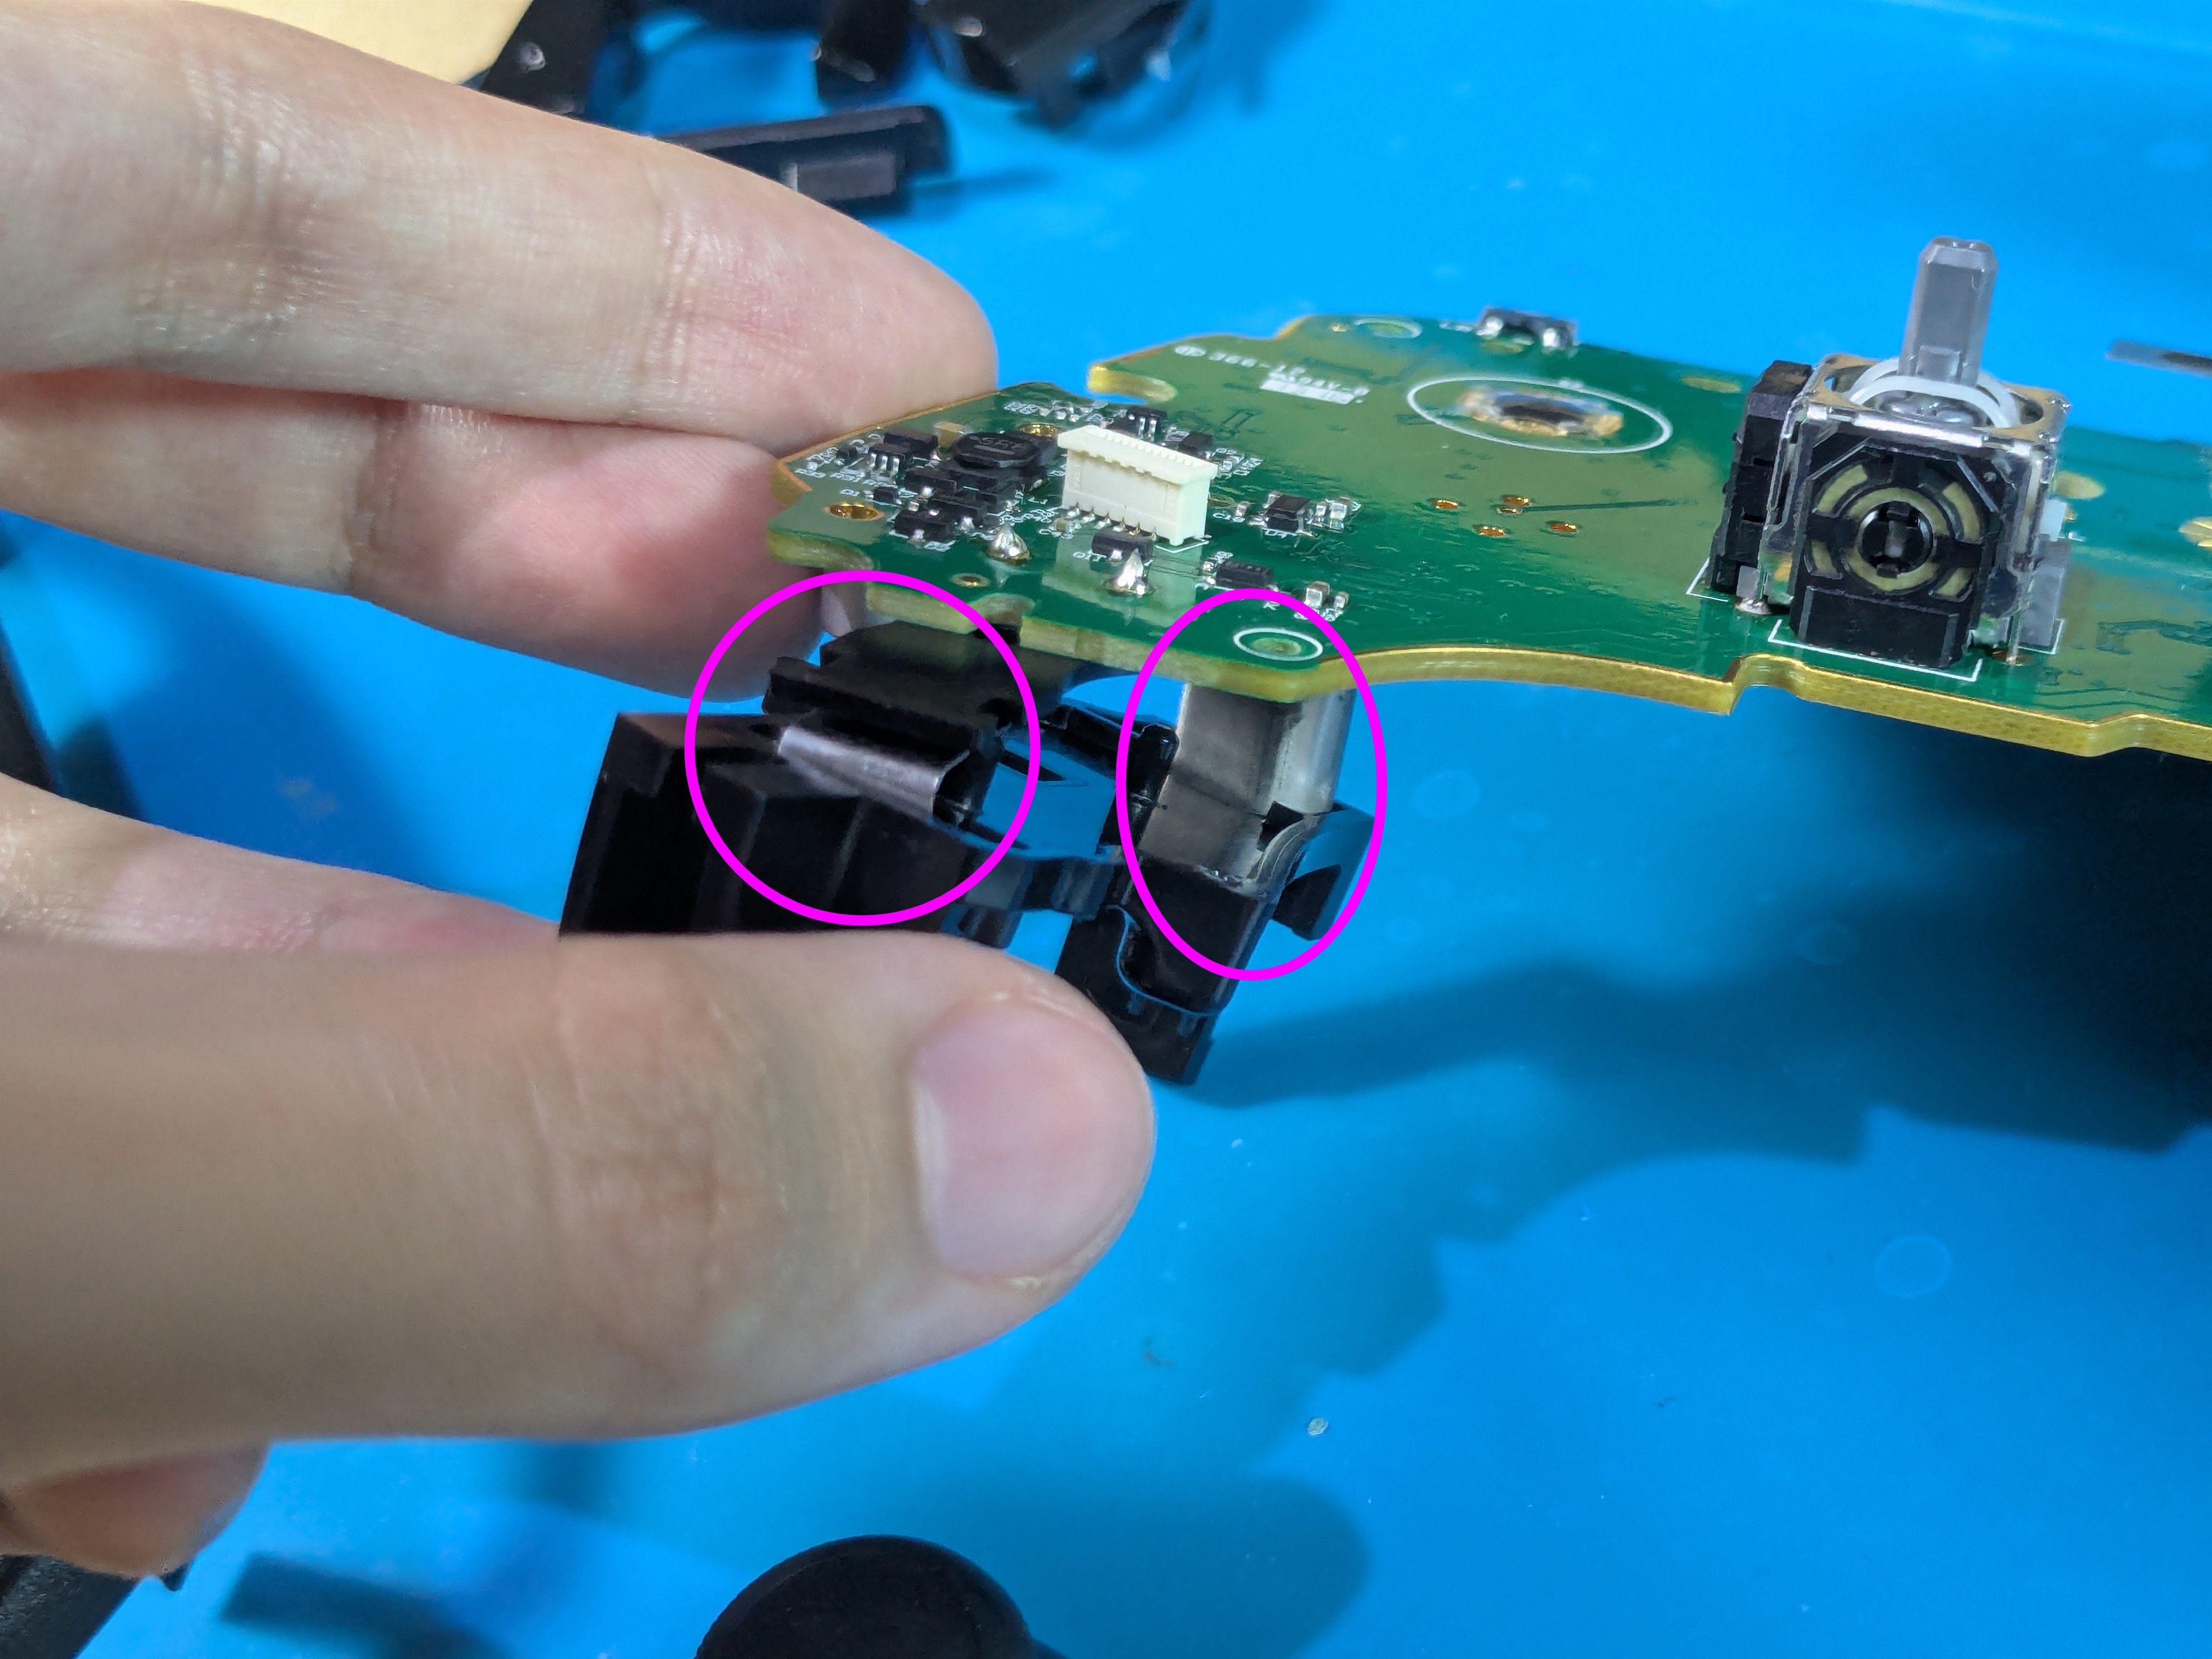
Taking Off The Top Assembly
Top Assembly Screw Locations
- The top assembly is held by (2 small) screws on the front
Disassembling The Top Assembly
- After taking out the screws, pry / wiggle the assembly upwards so the top cover disconnects from the triggers’ pegs

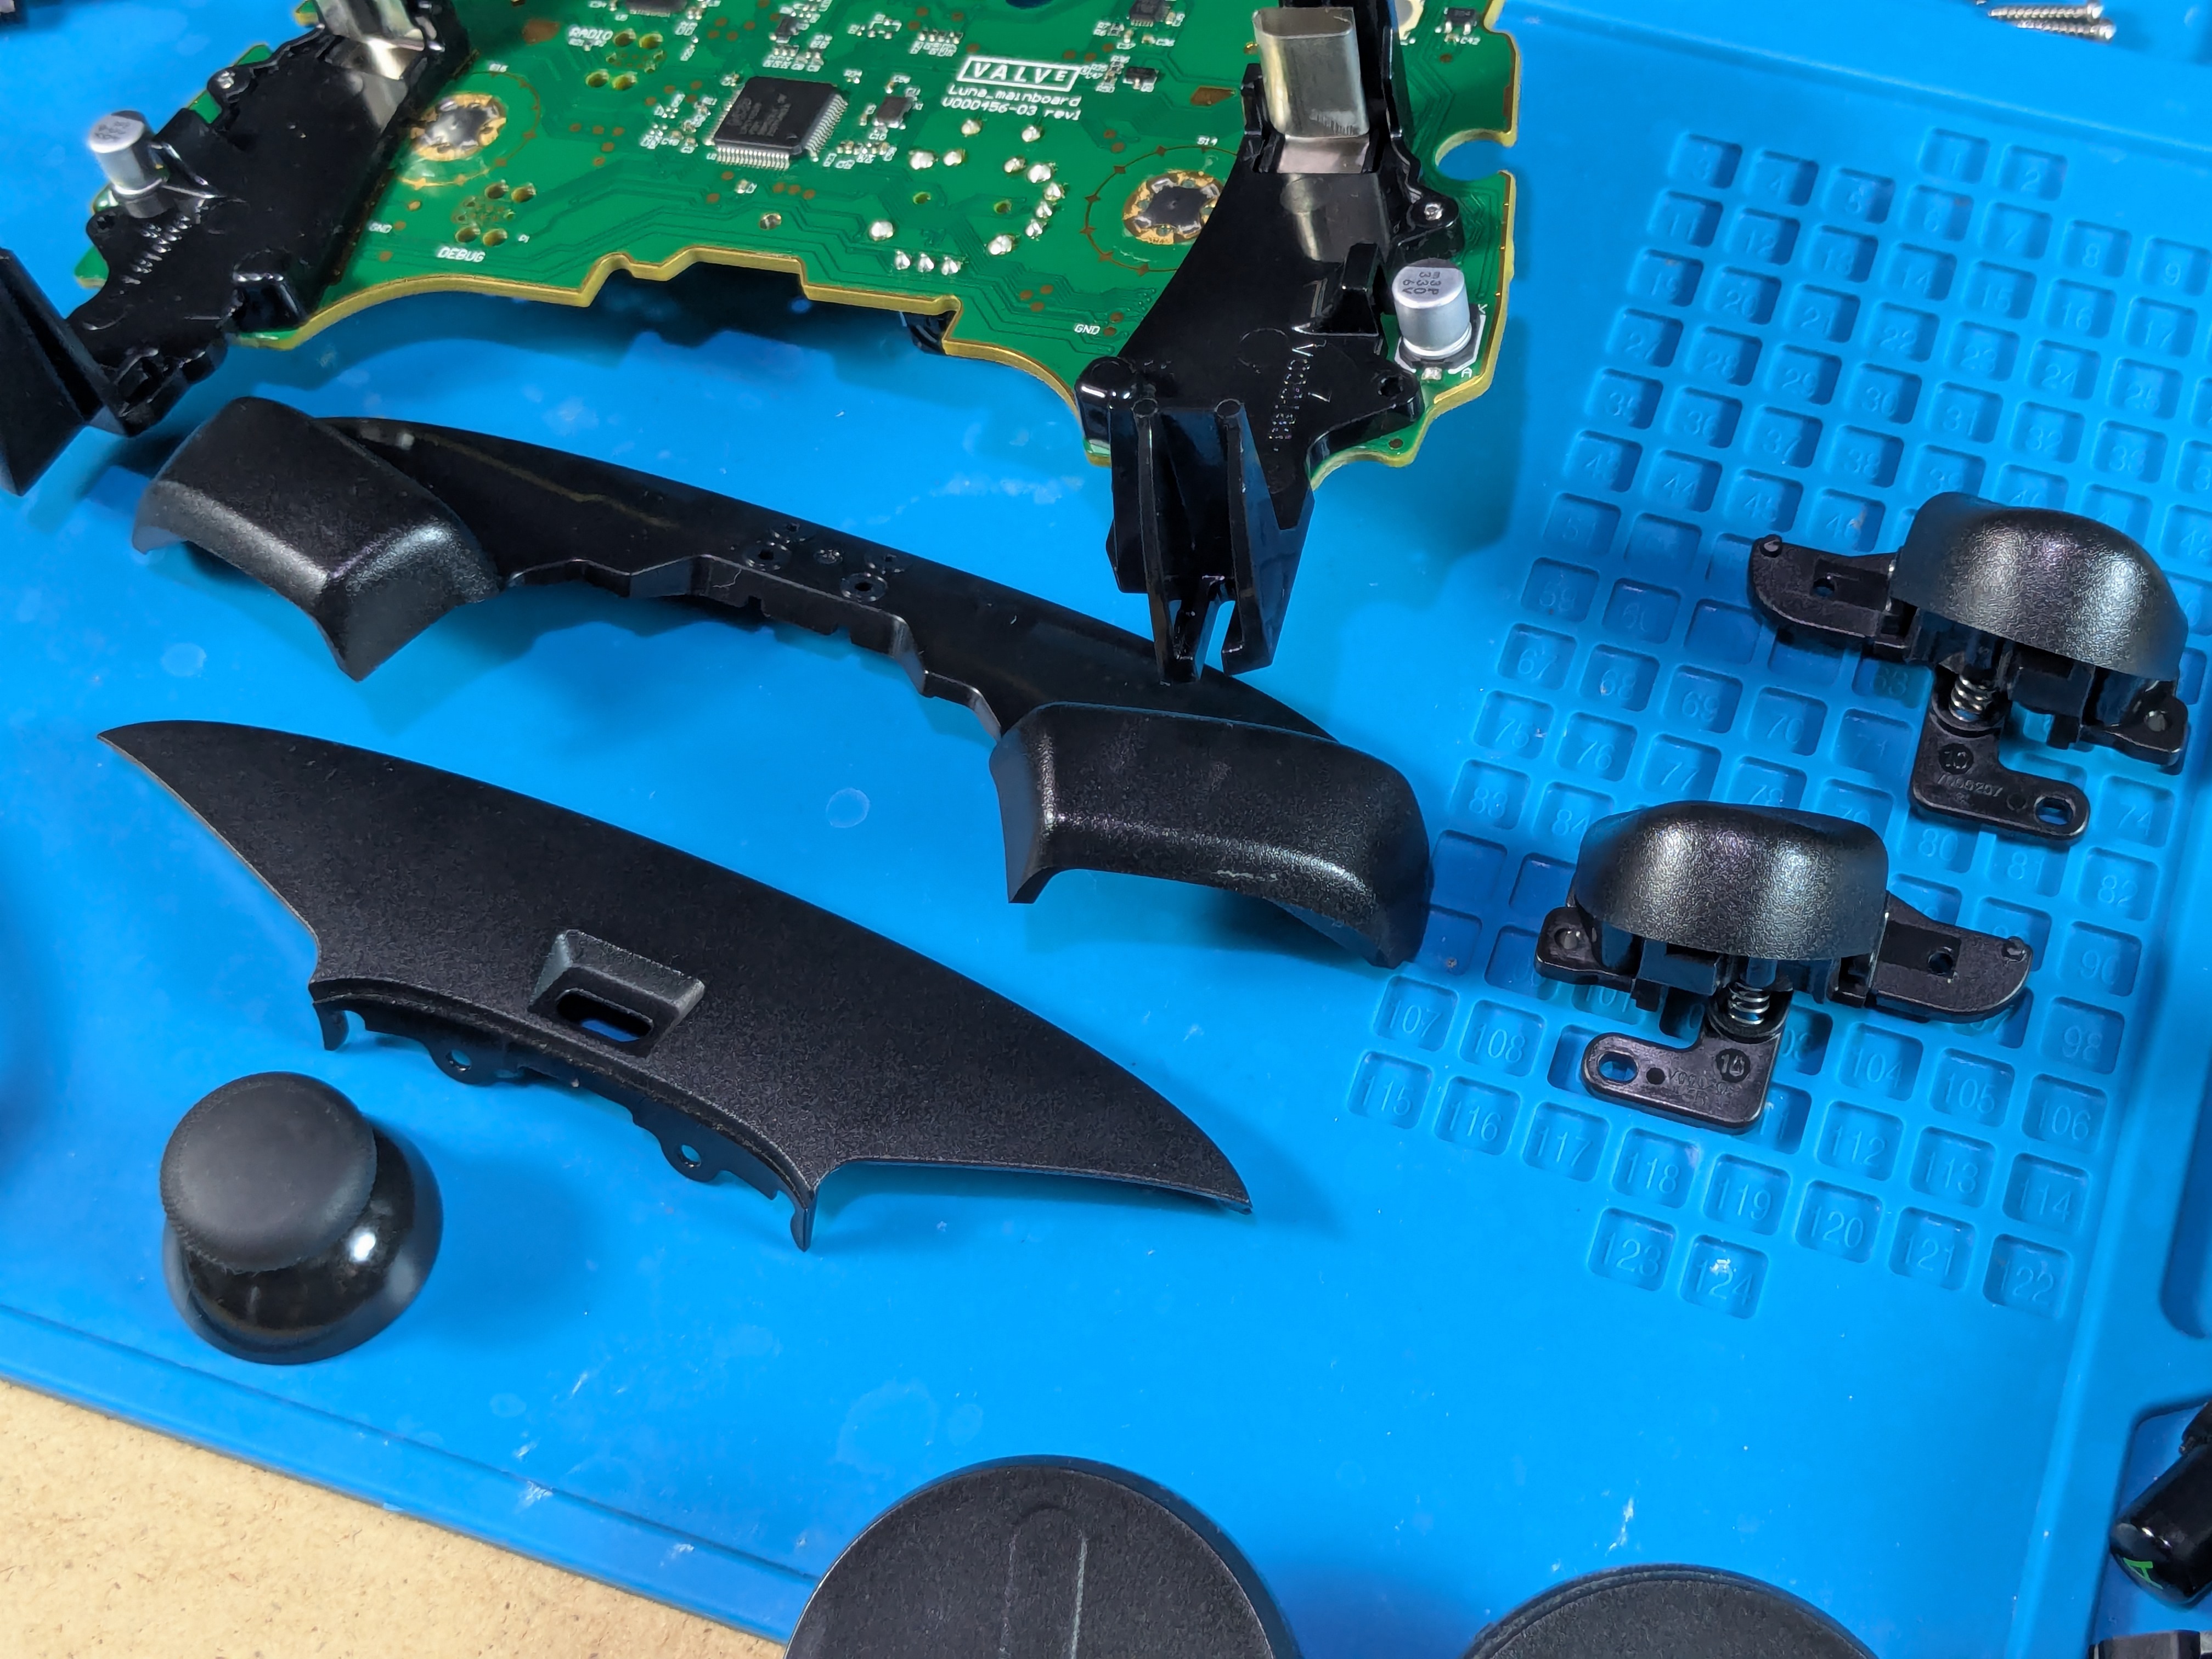
Top Assembly Parts
- The top assembly has 4 parts:
- Bumpers
- Top Cover
- Left & Right Triggers
Taking Off The Battery Holders
Battery Holders
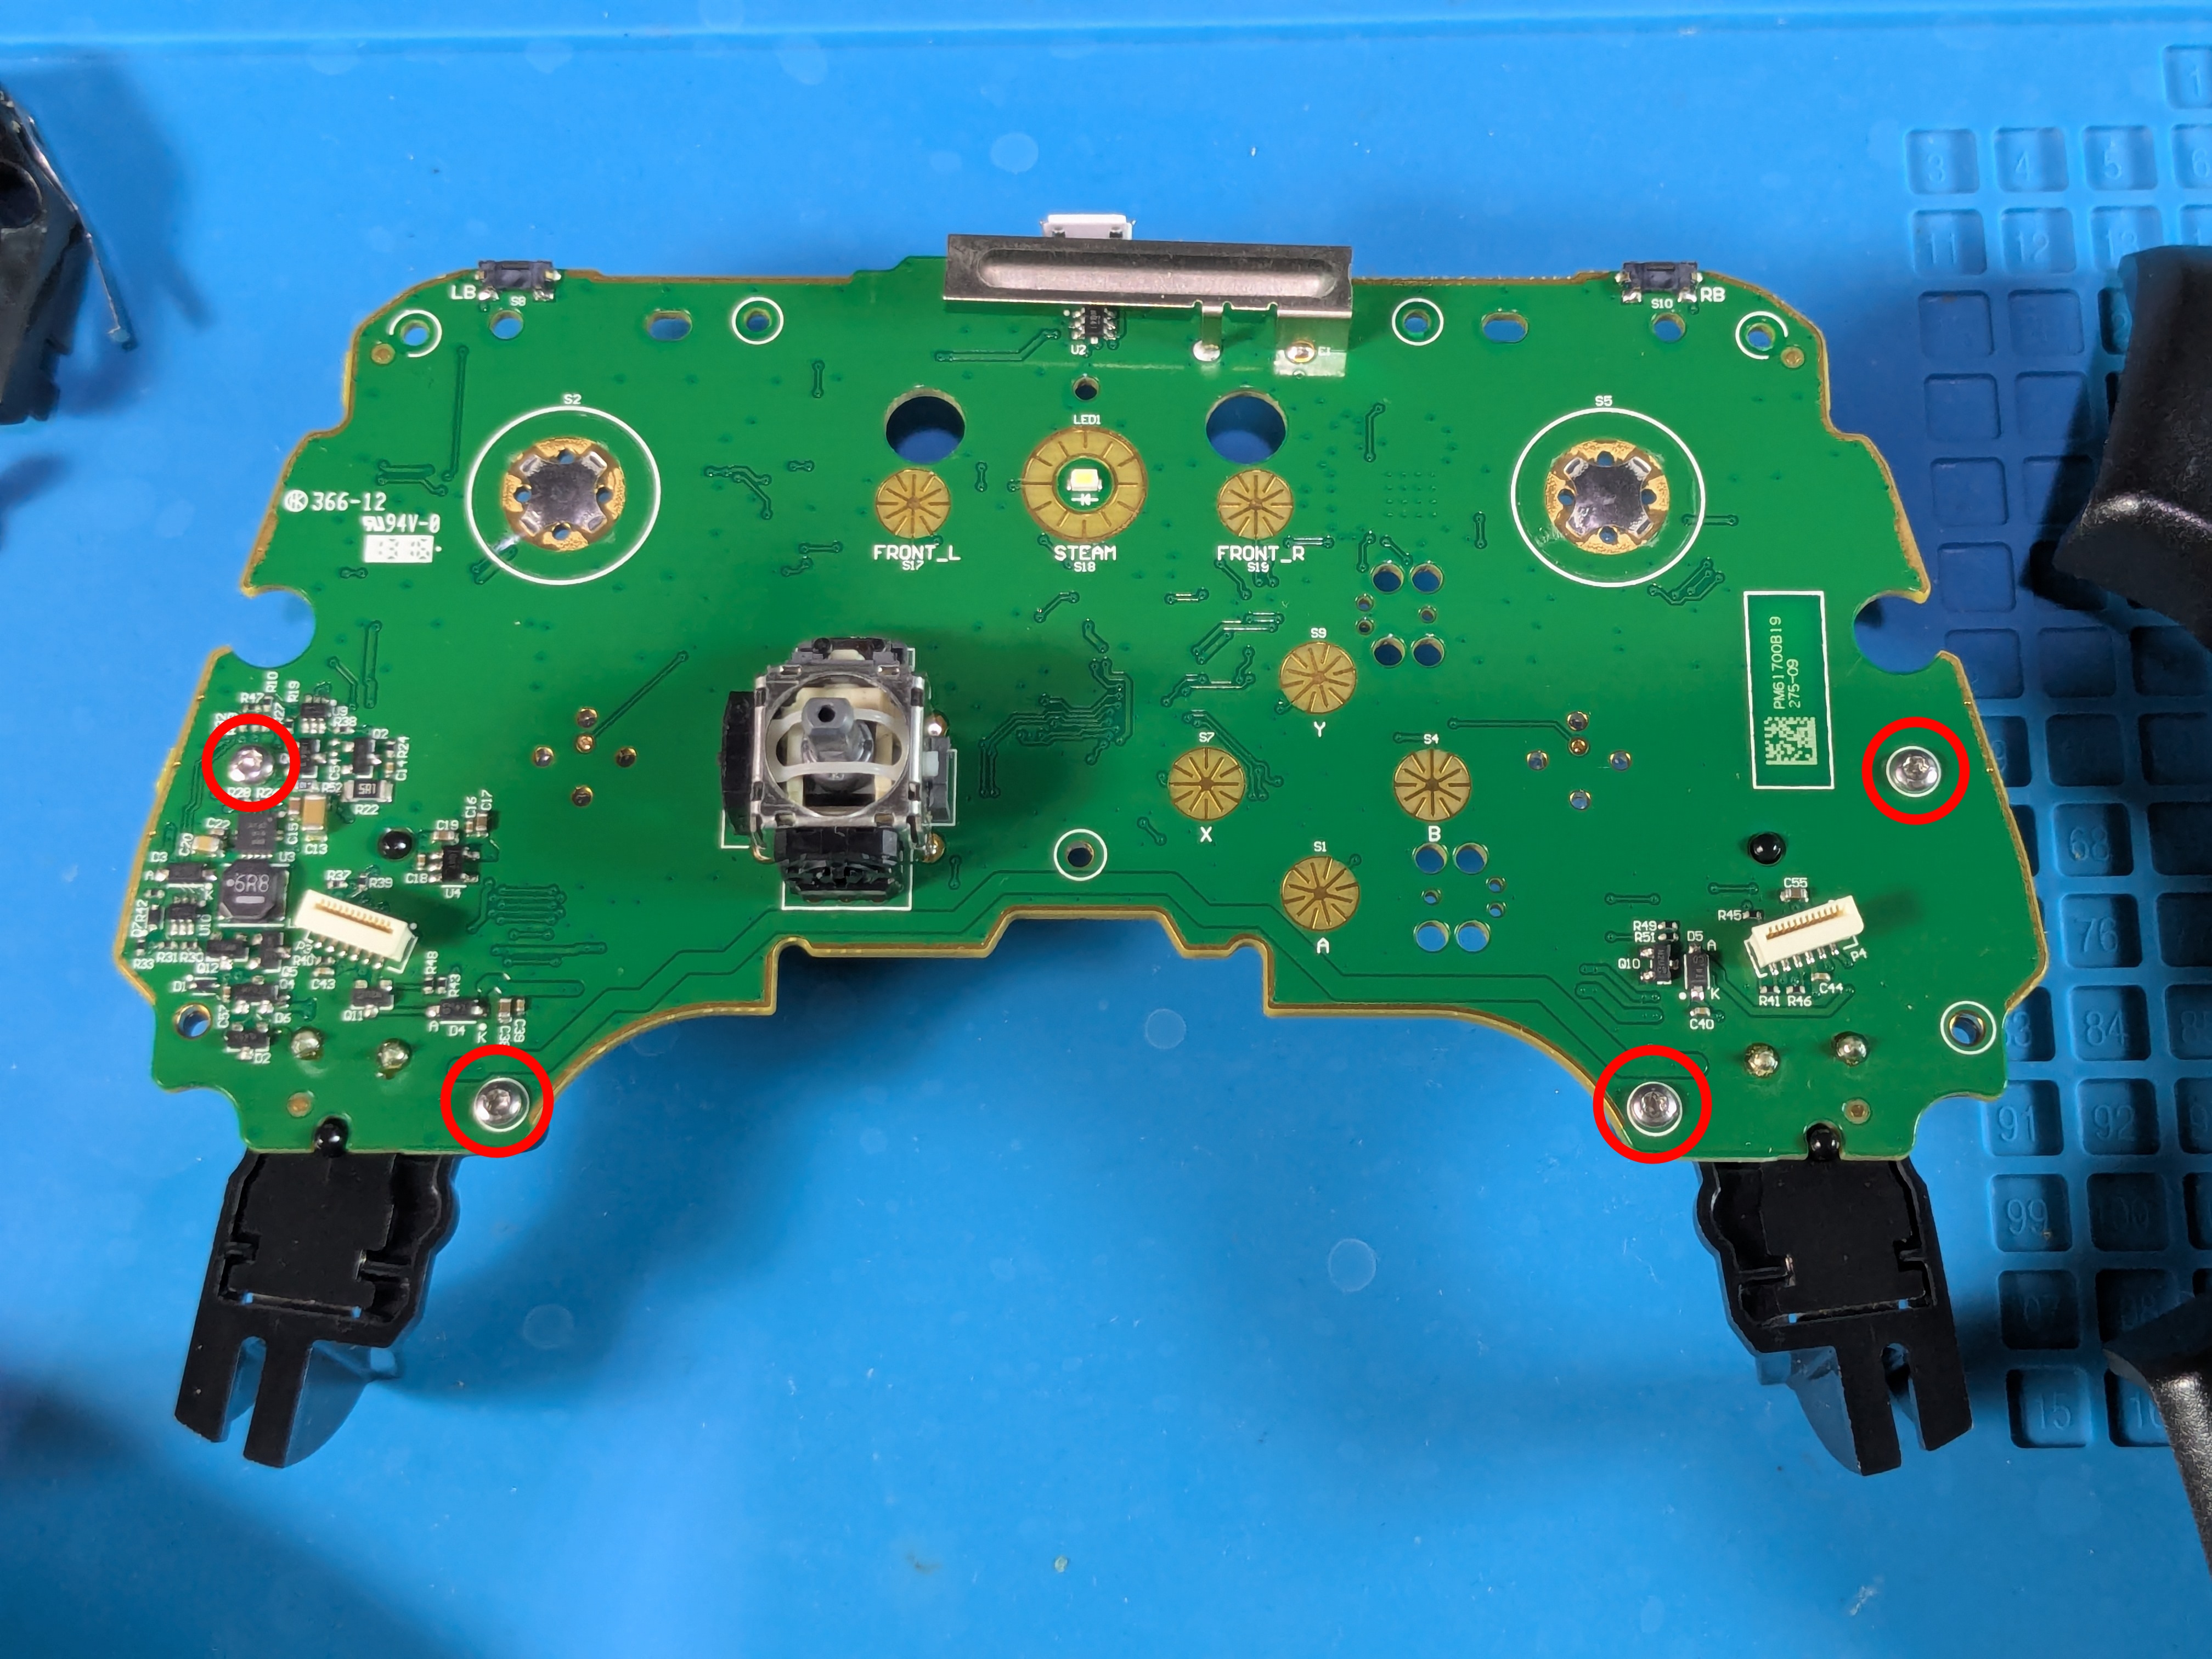
Battery Holders Screw Locations
- The battery holders are held by (2+2 small) screws on the front
Taking Off The Left Battery Holder
- After taking out the screws, carefully pull off the plastic holders from the battery contacts
Taking Off The Right Battery Holder
- Same method as the left side
Battery Holder Off
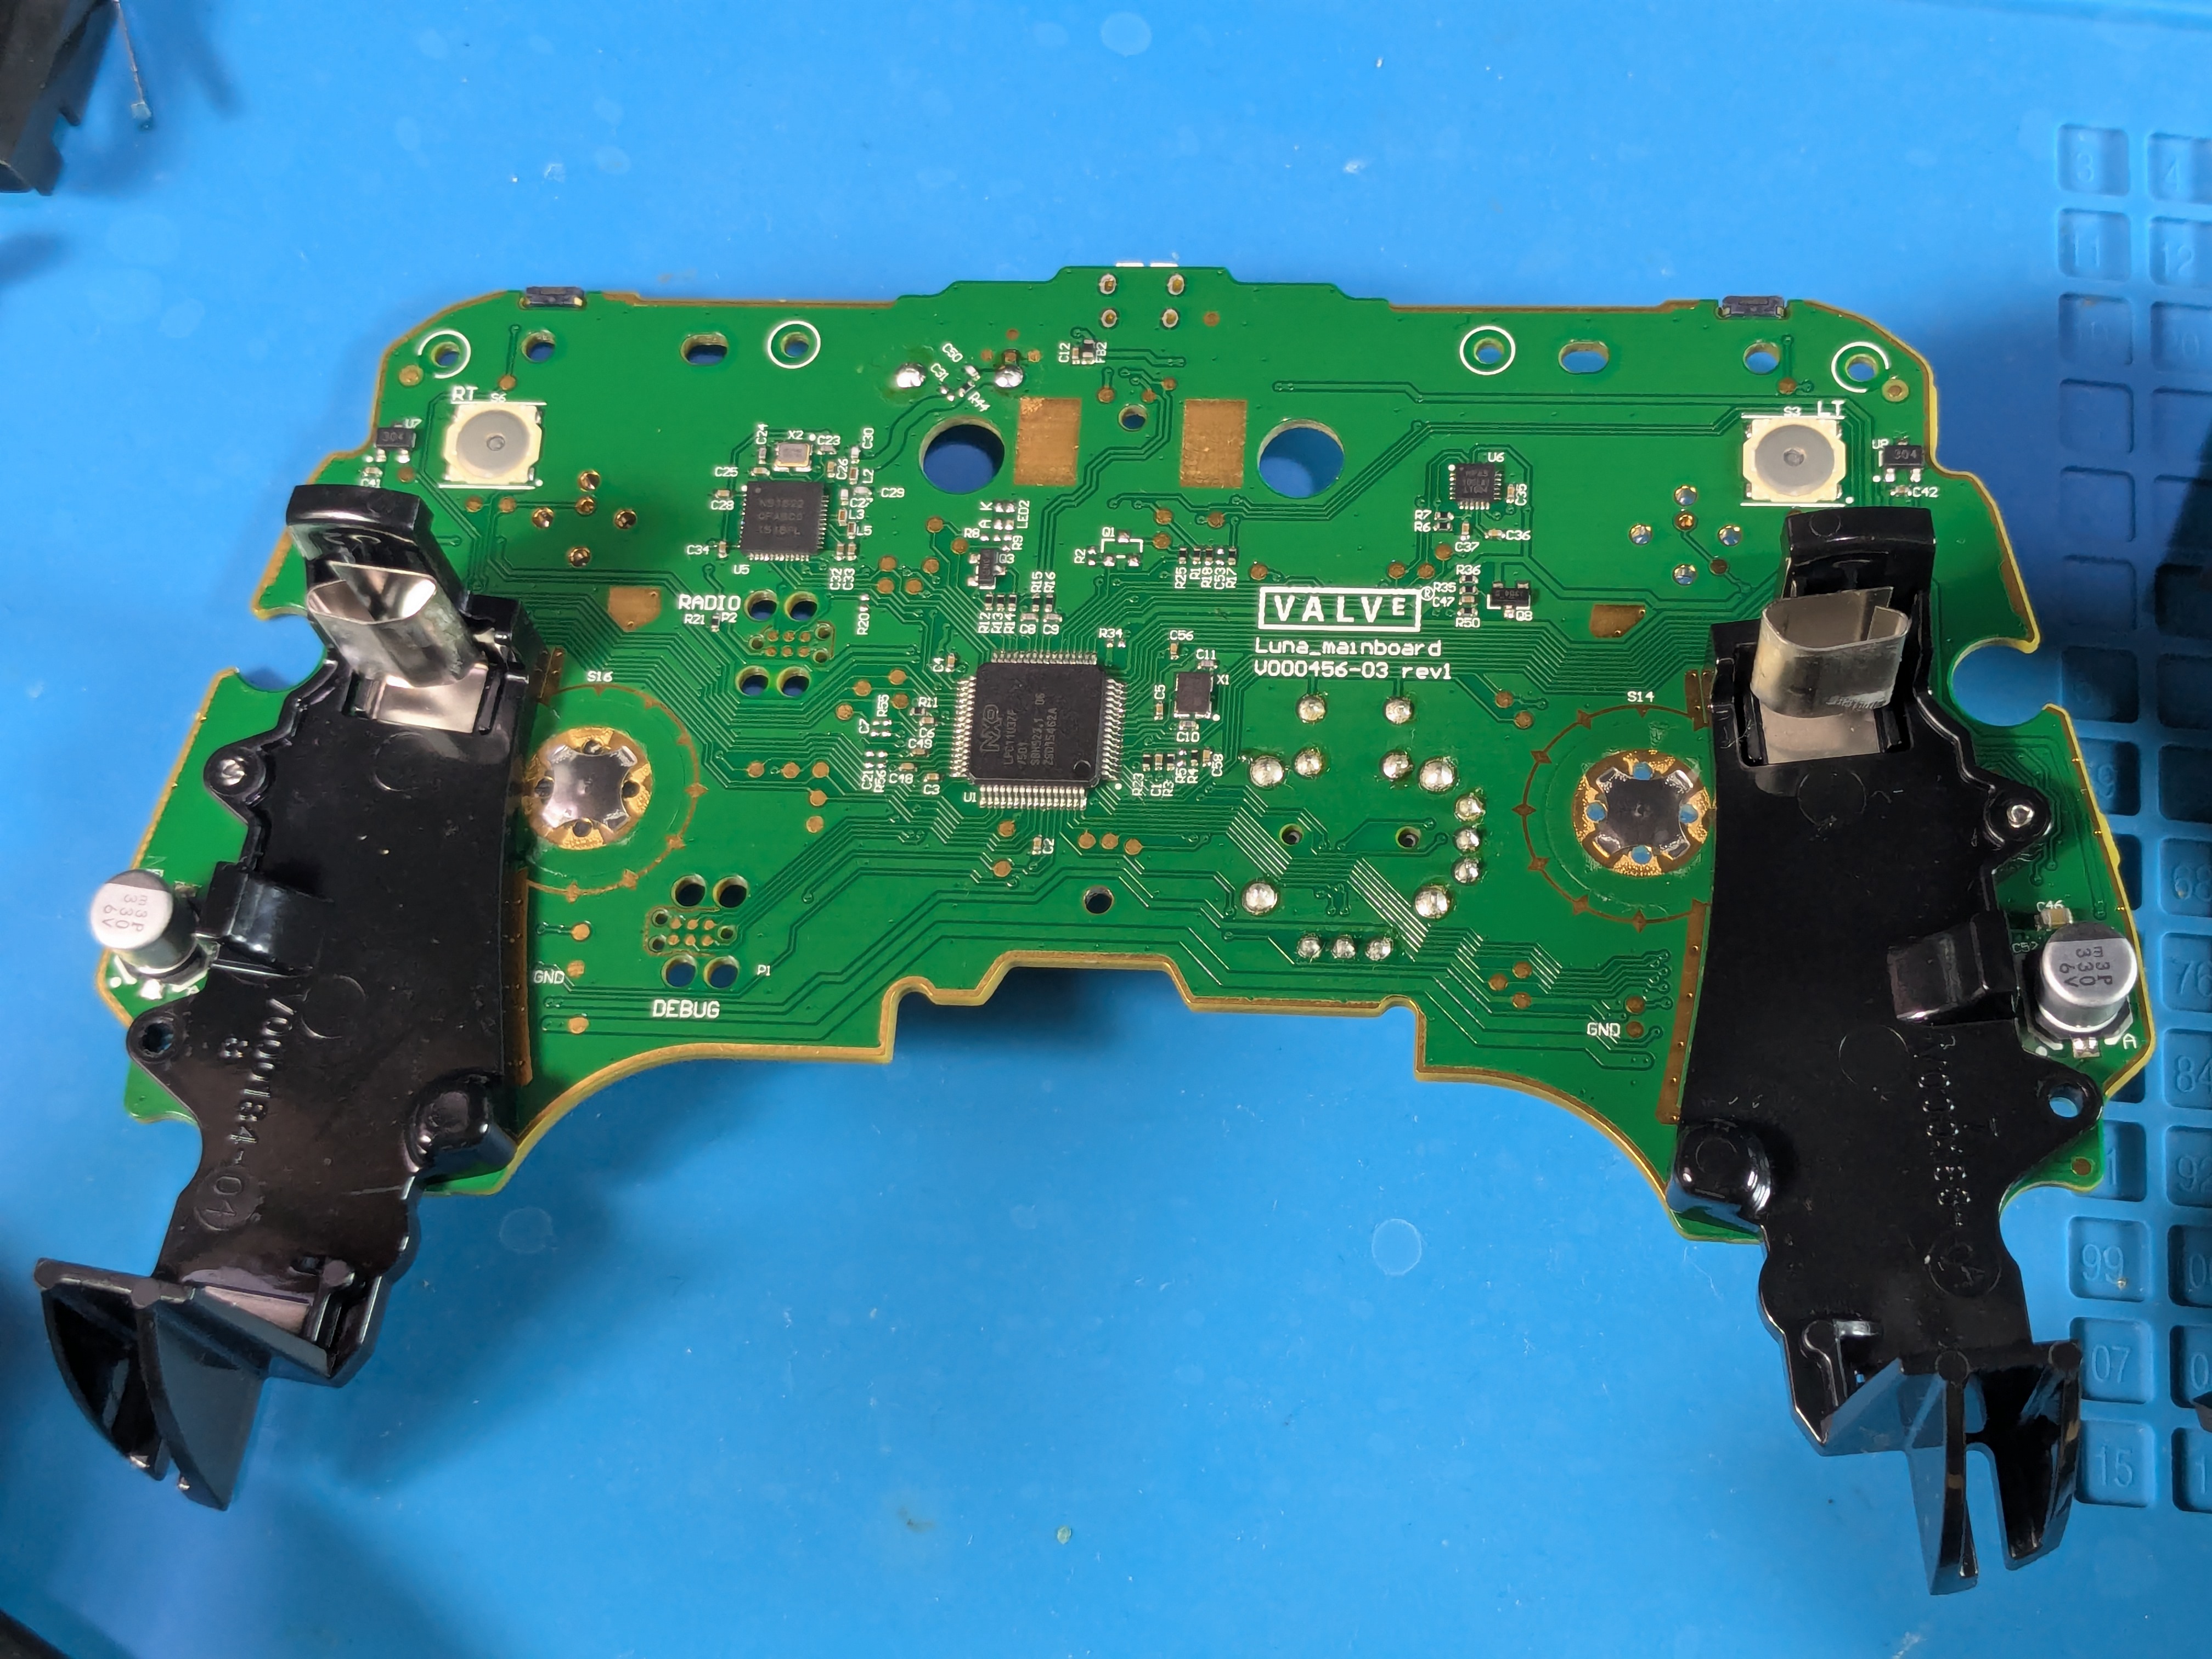
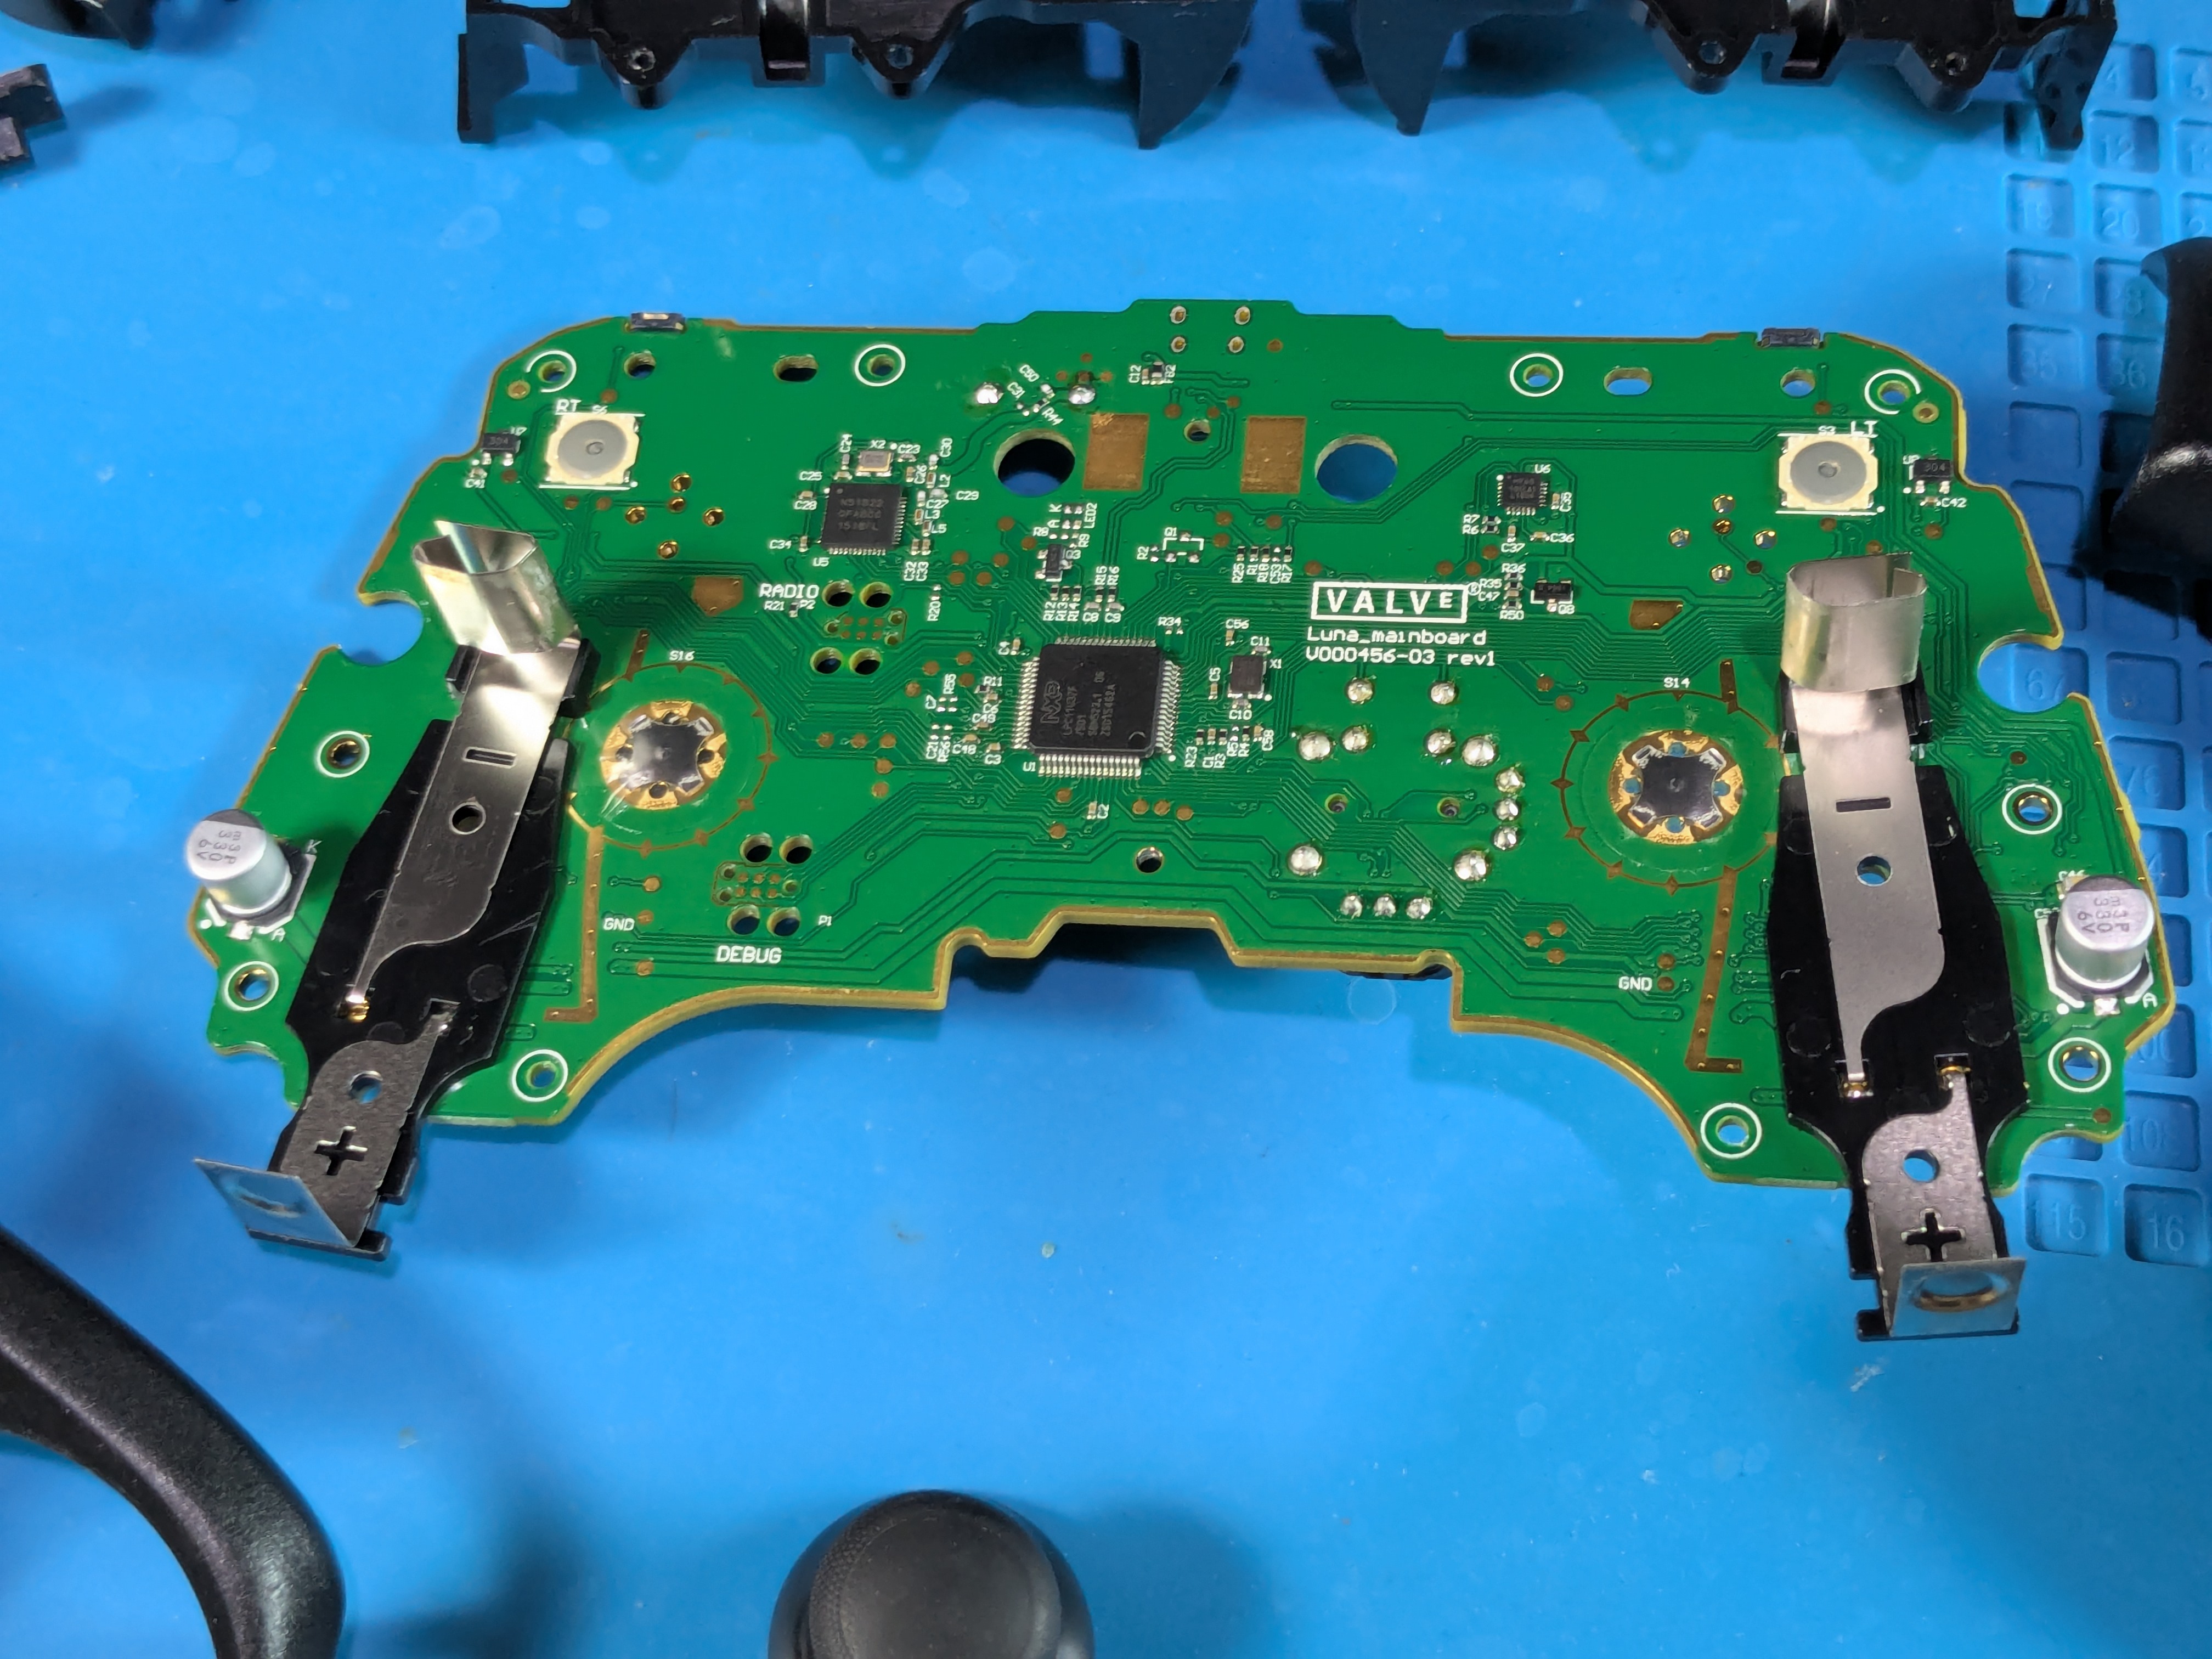
Board Only
- Here’s how the board looks like without the other parts attached

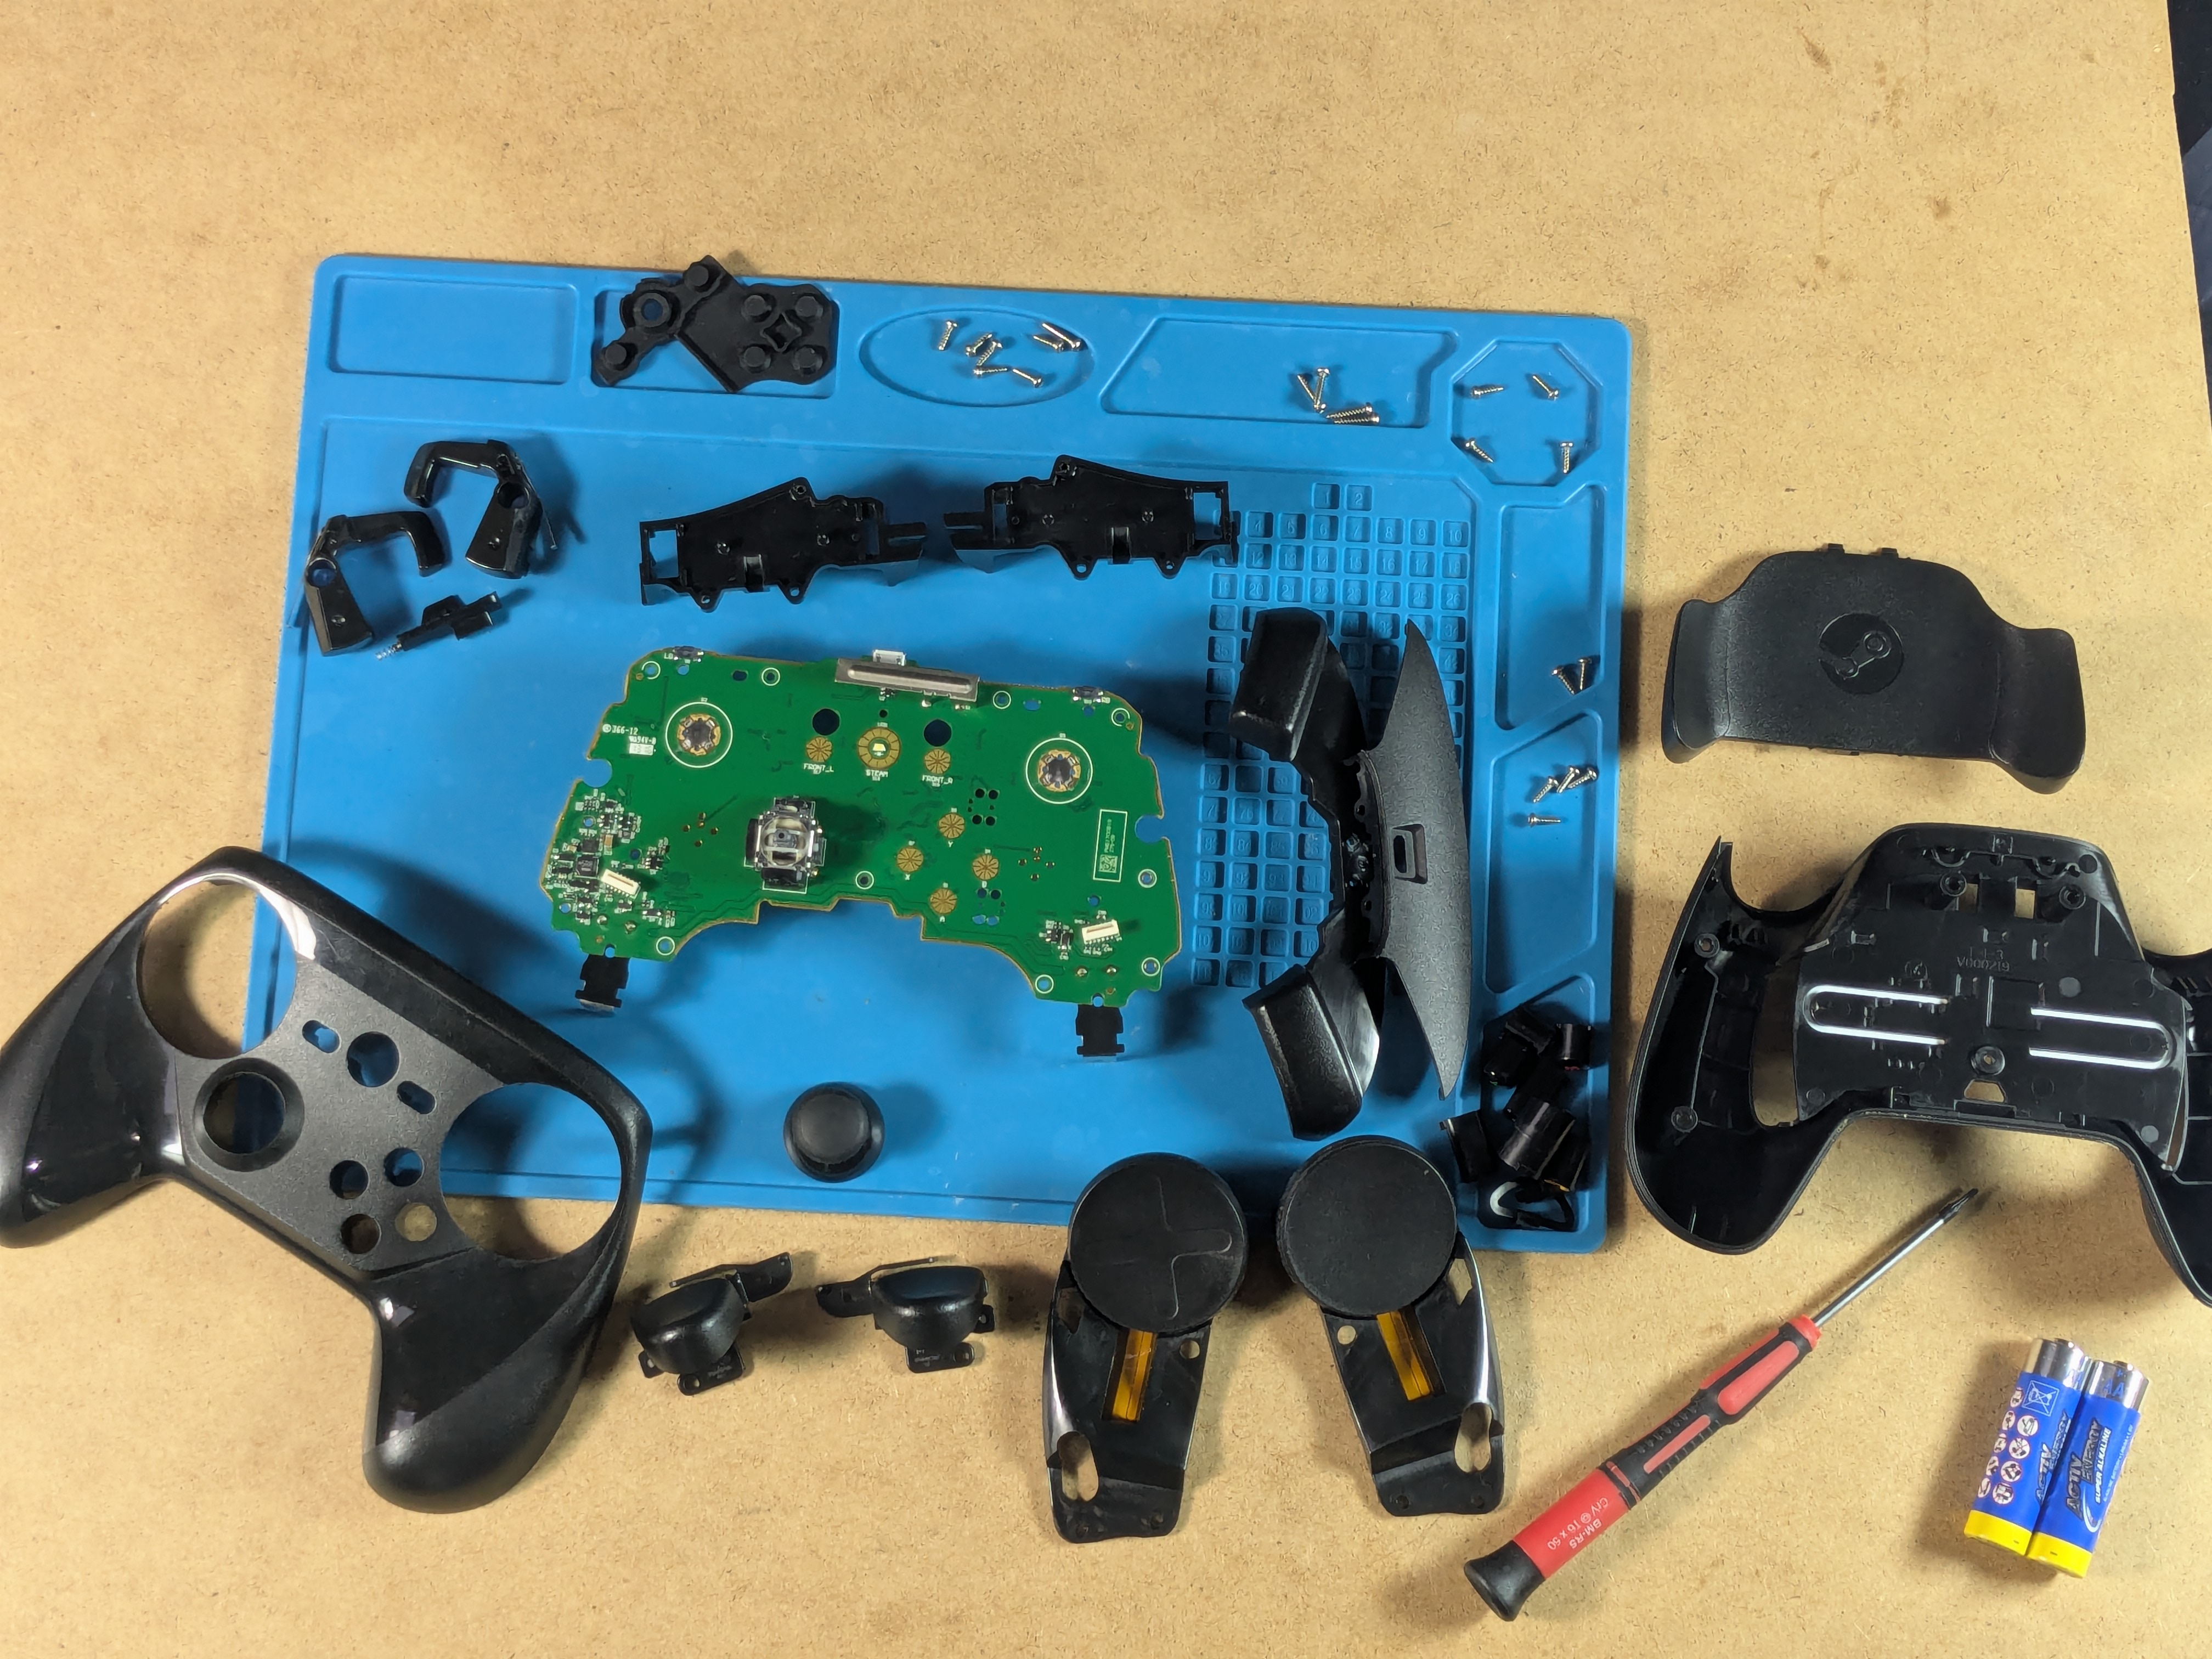
Disassembled Steam Controller
Further Disassembly
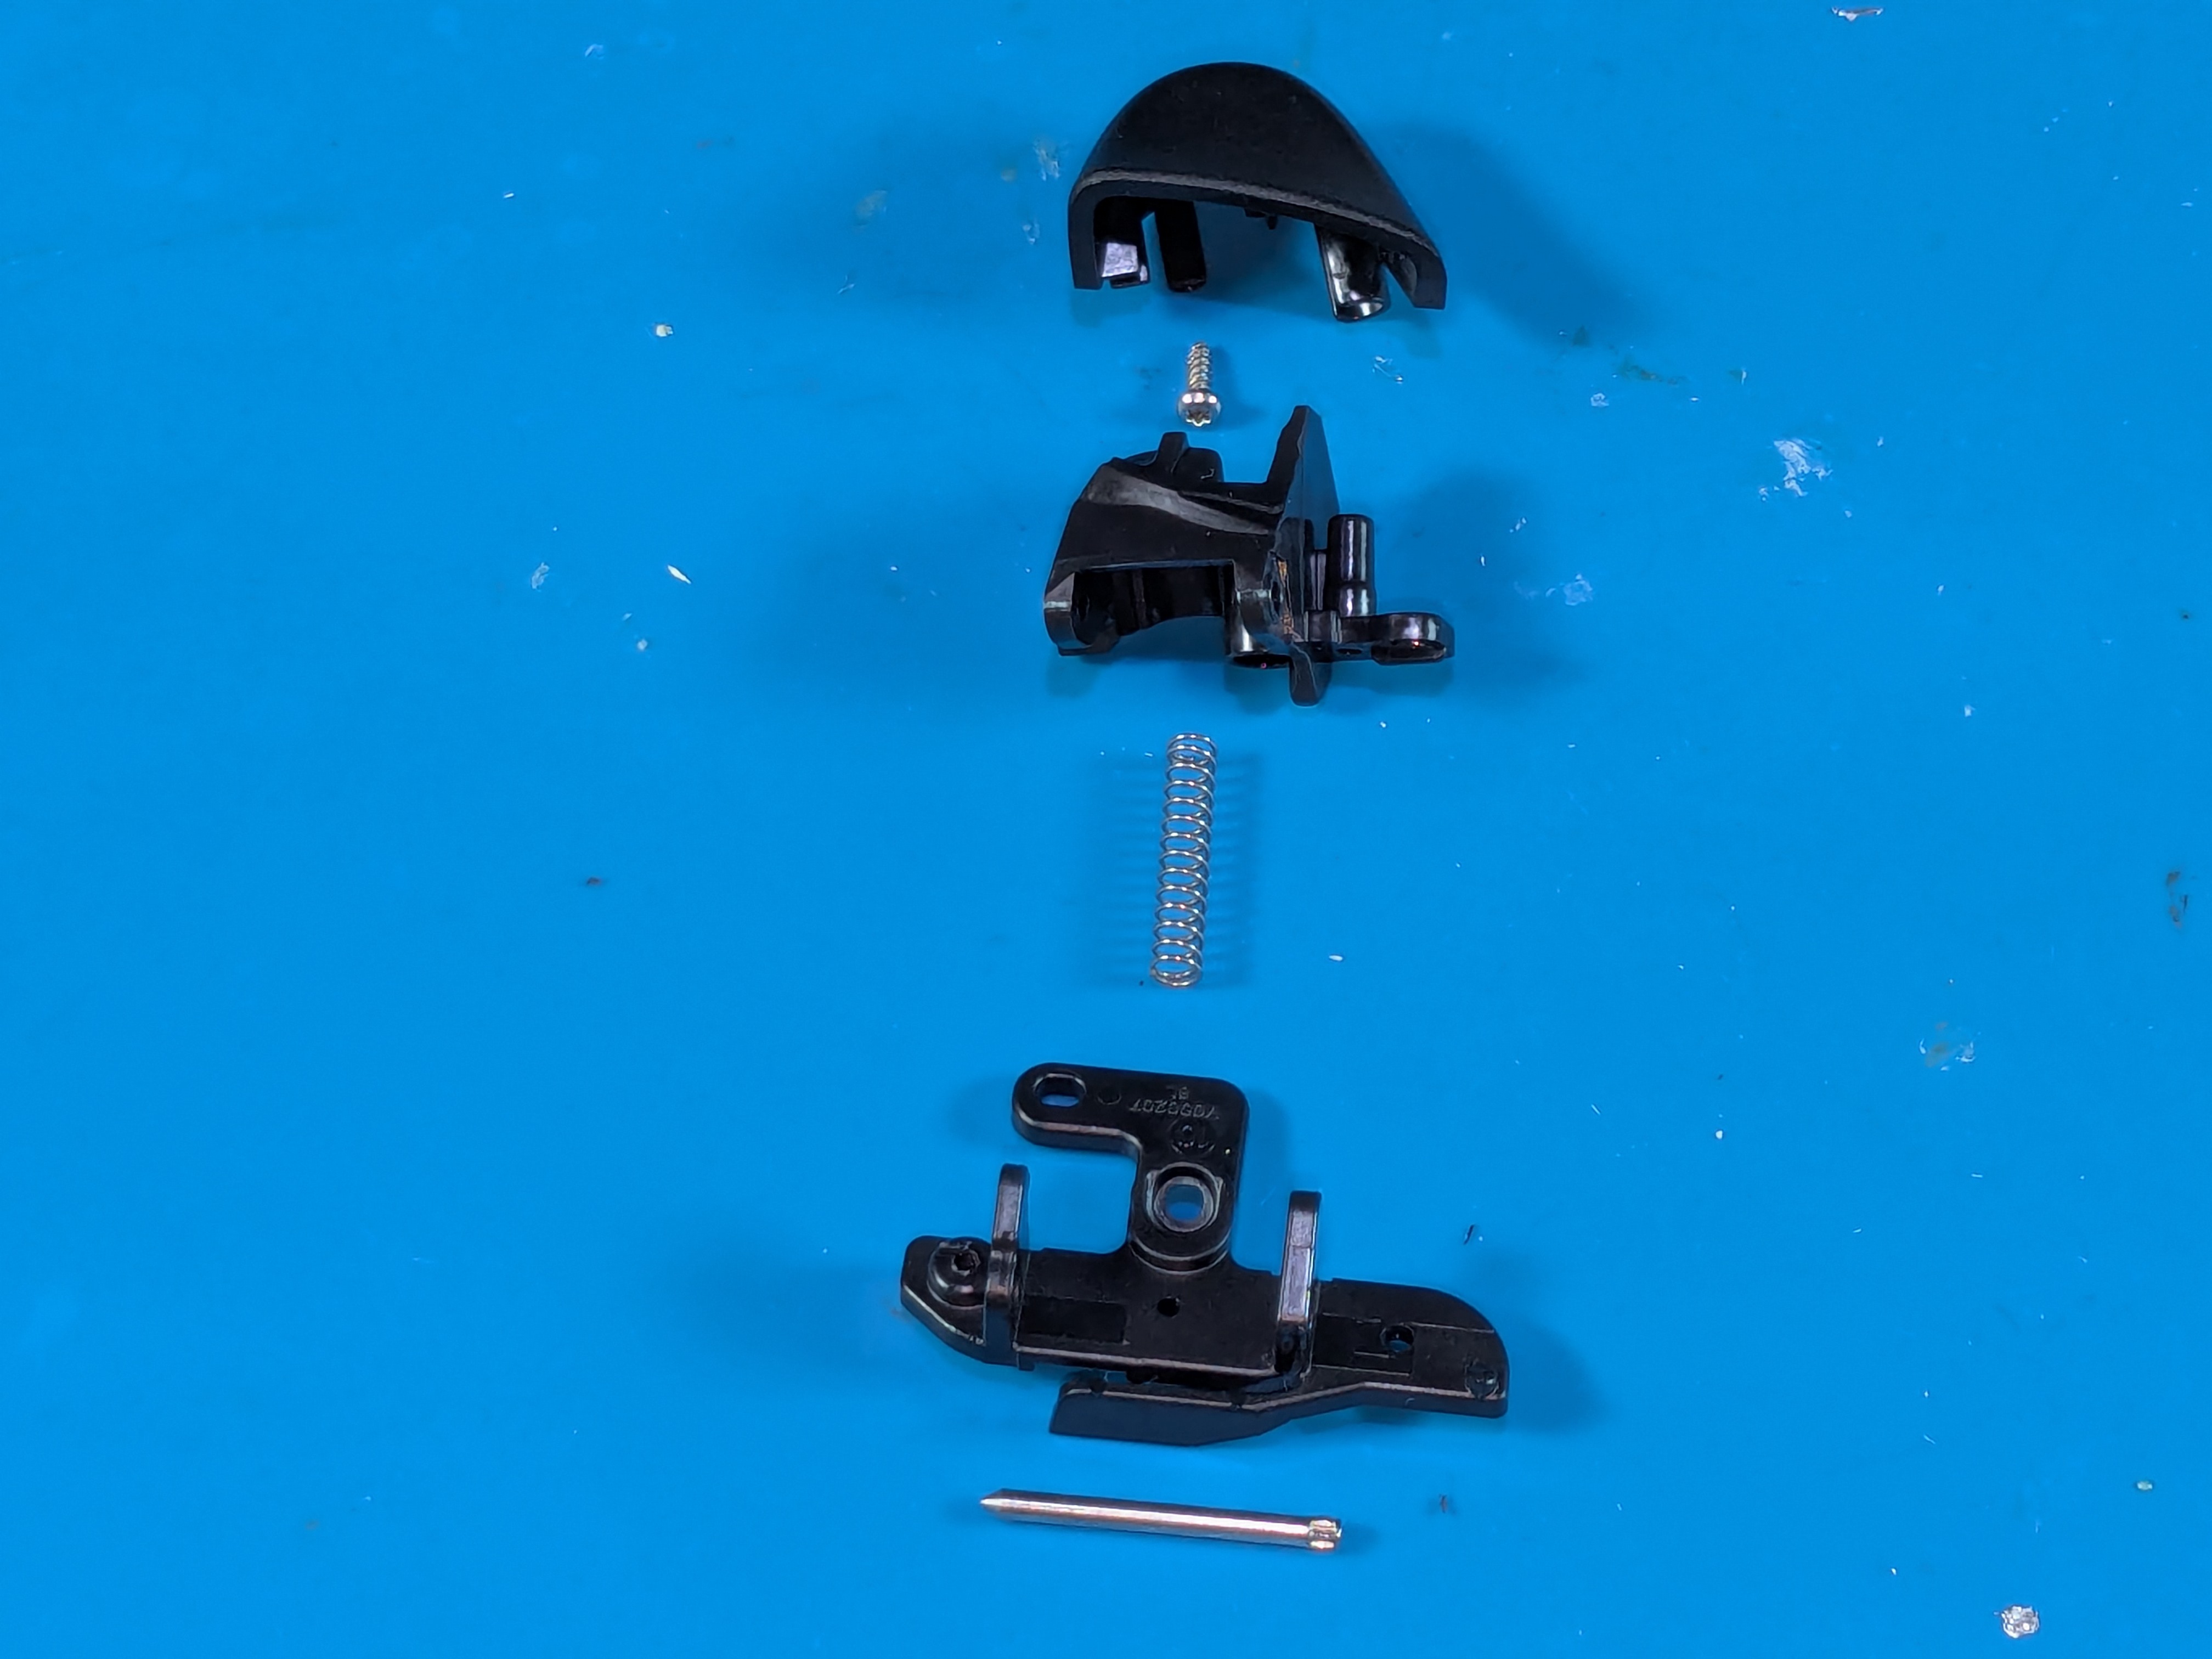
Disassembling The Triggers
- First get off the trigger cap by unscrewing it from the inside
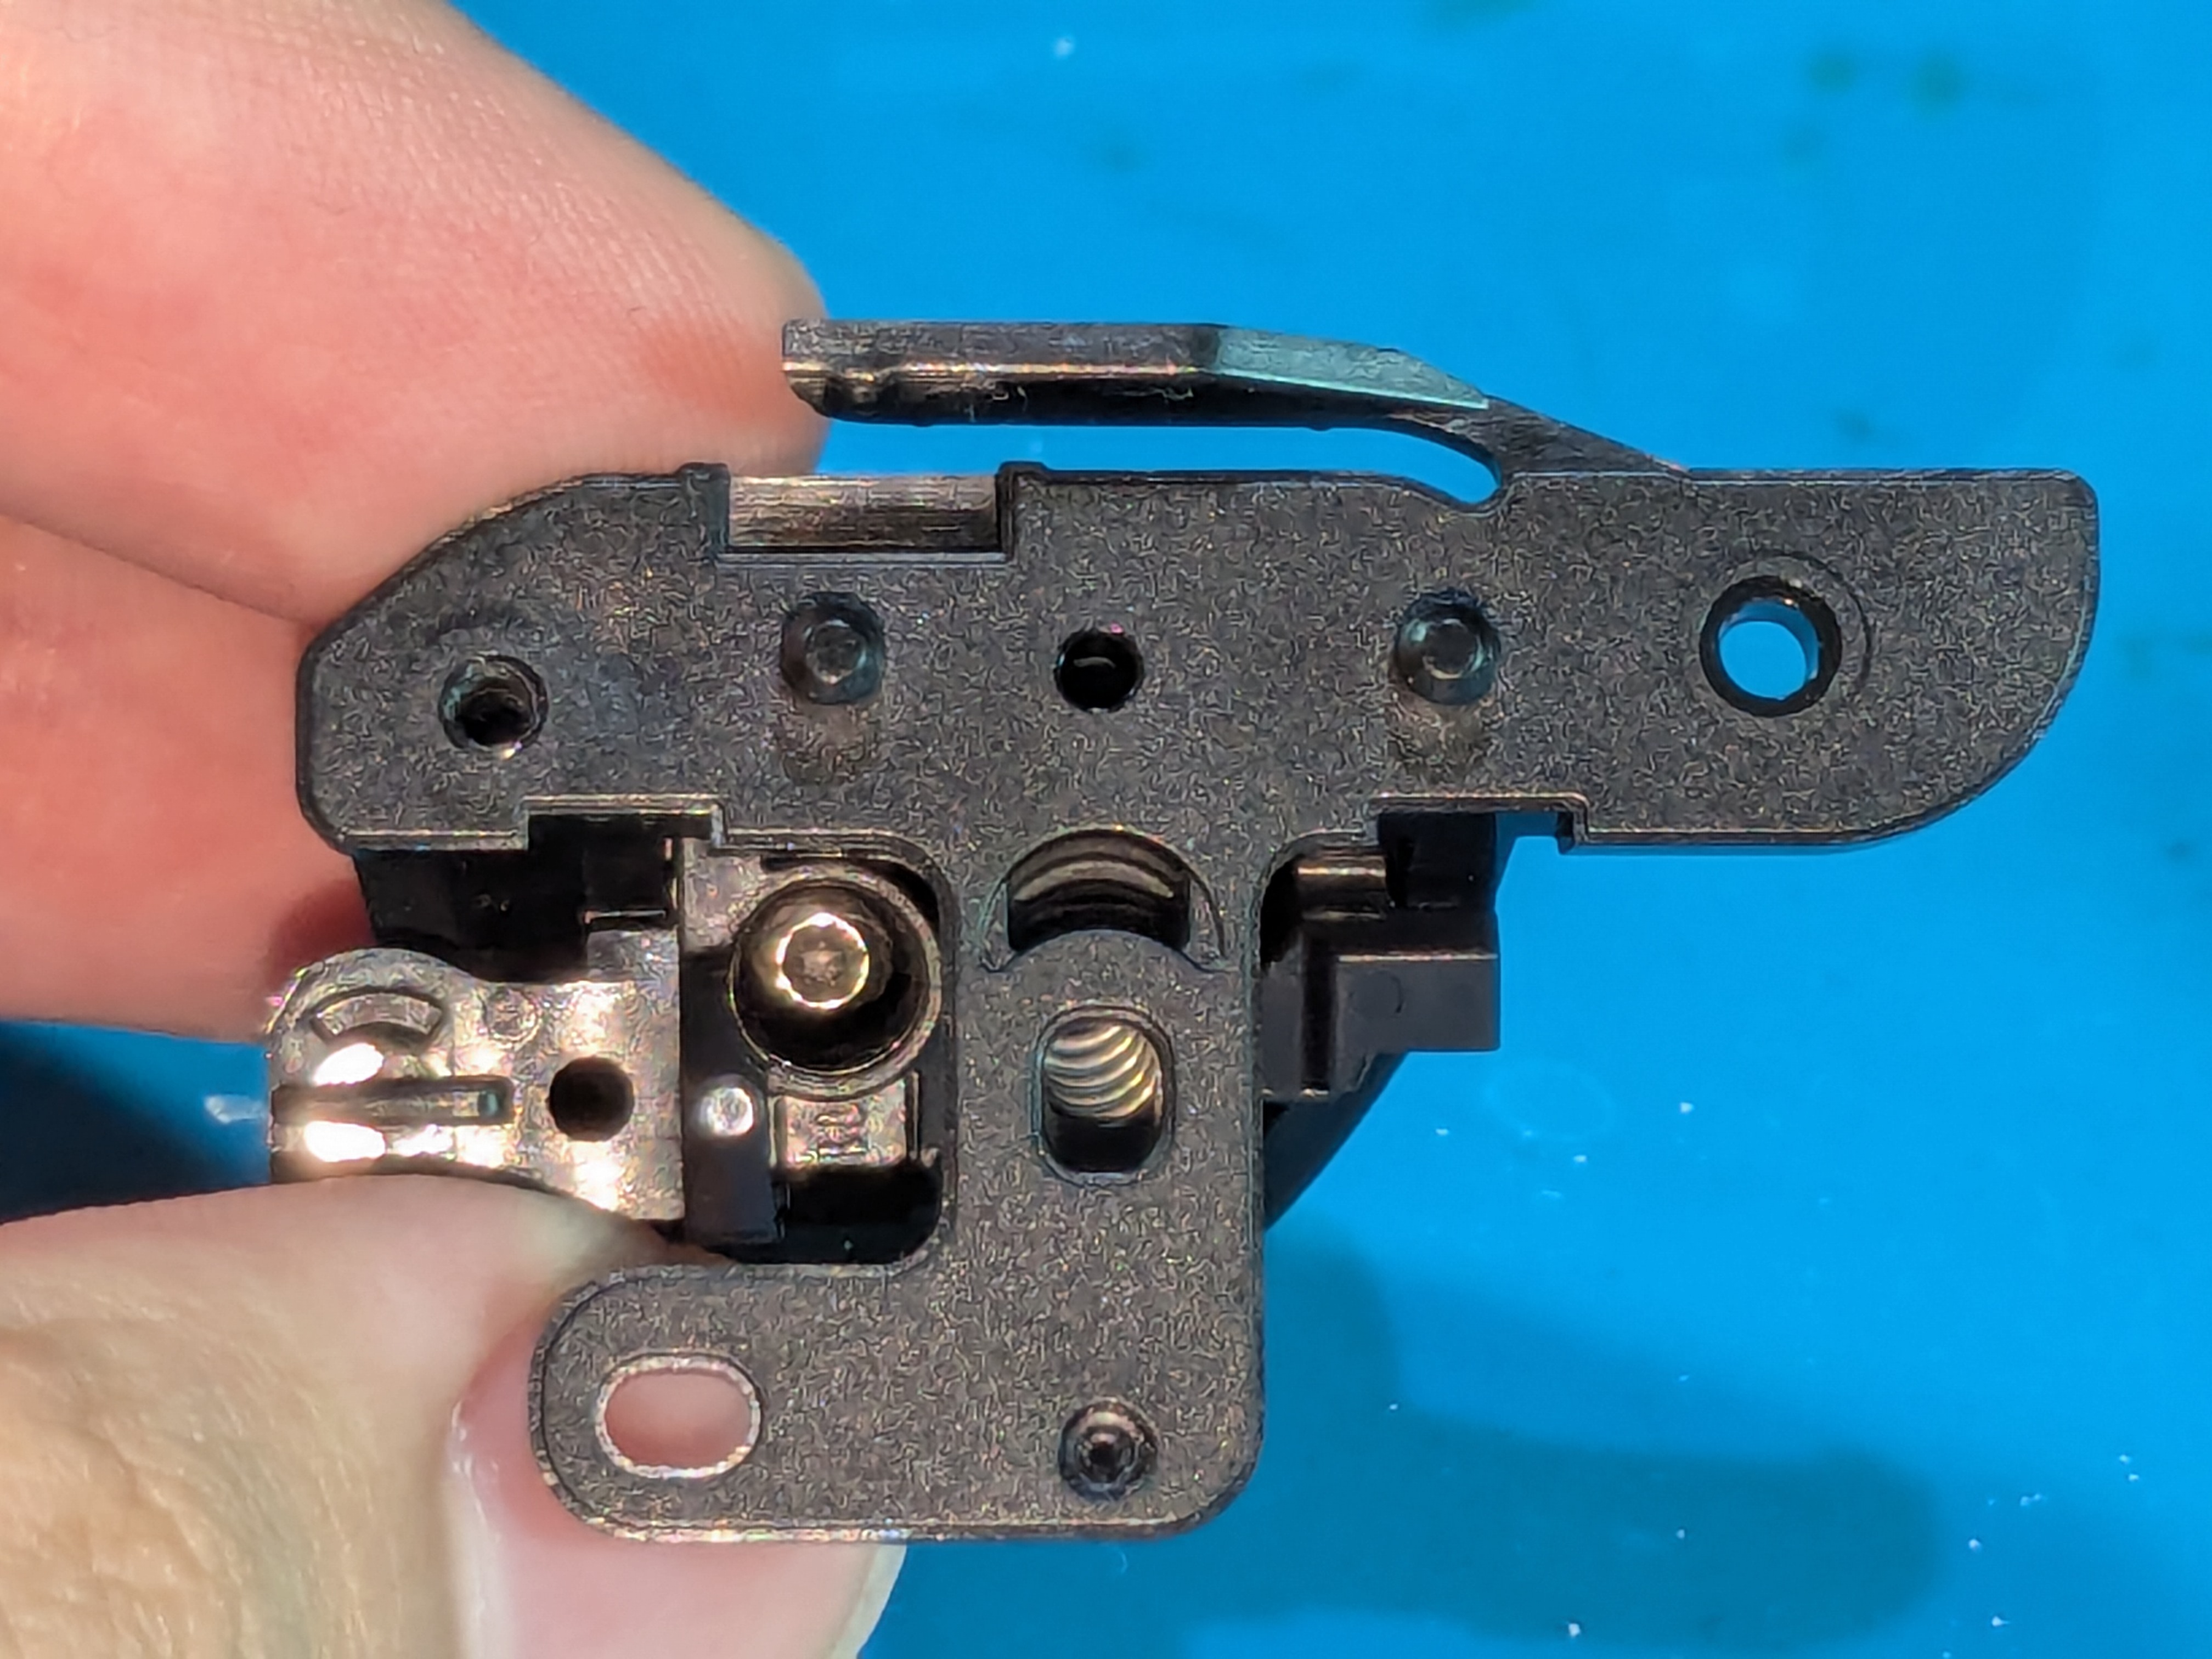
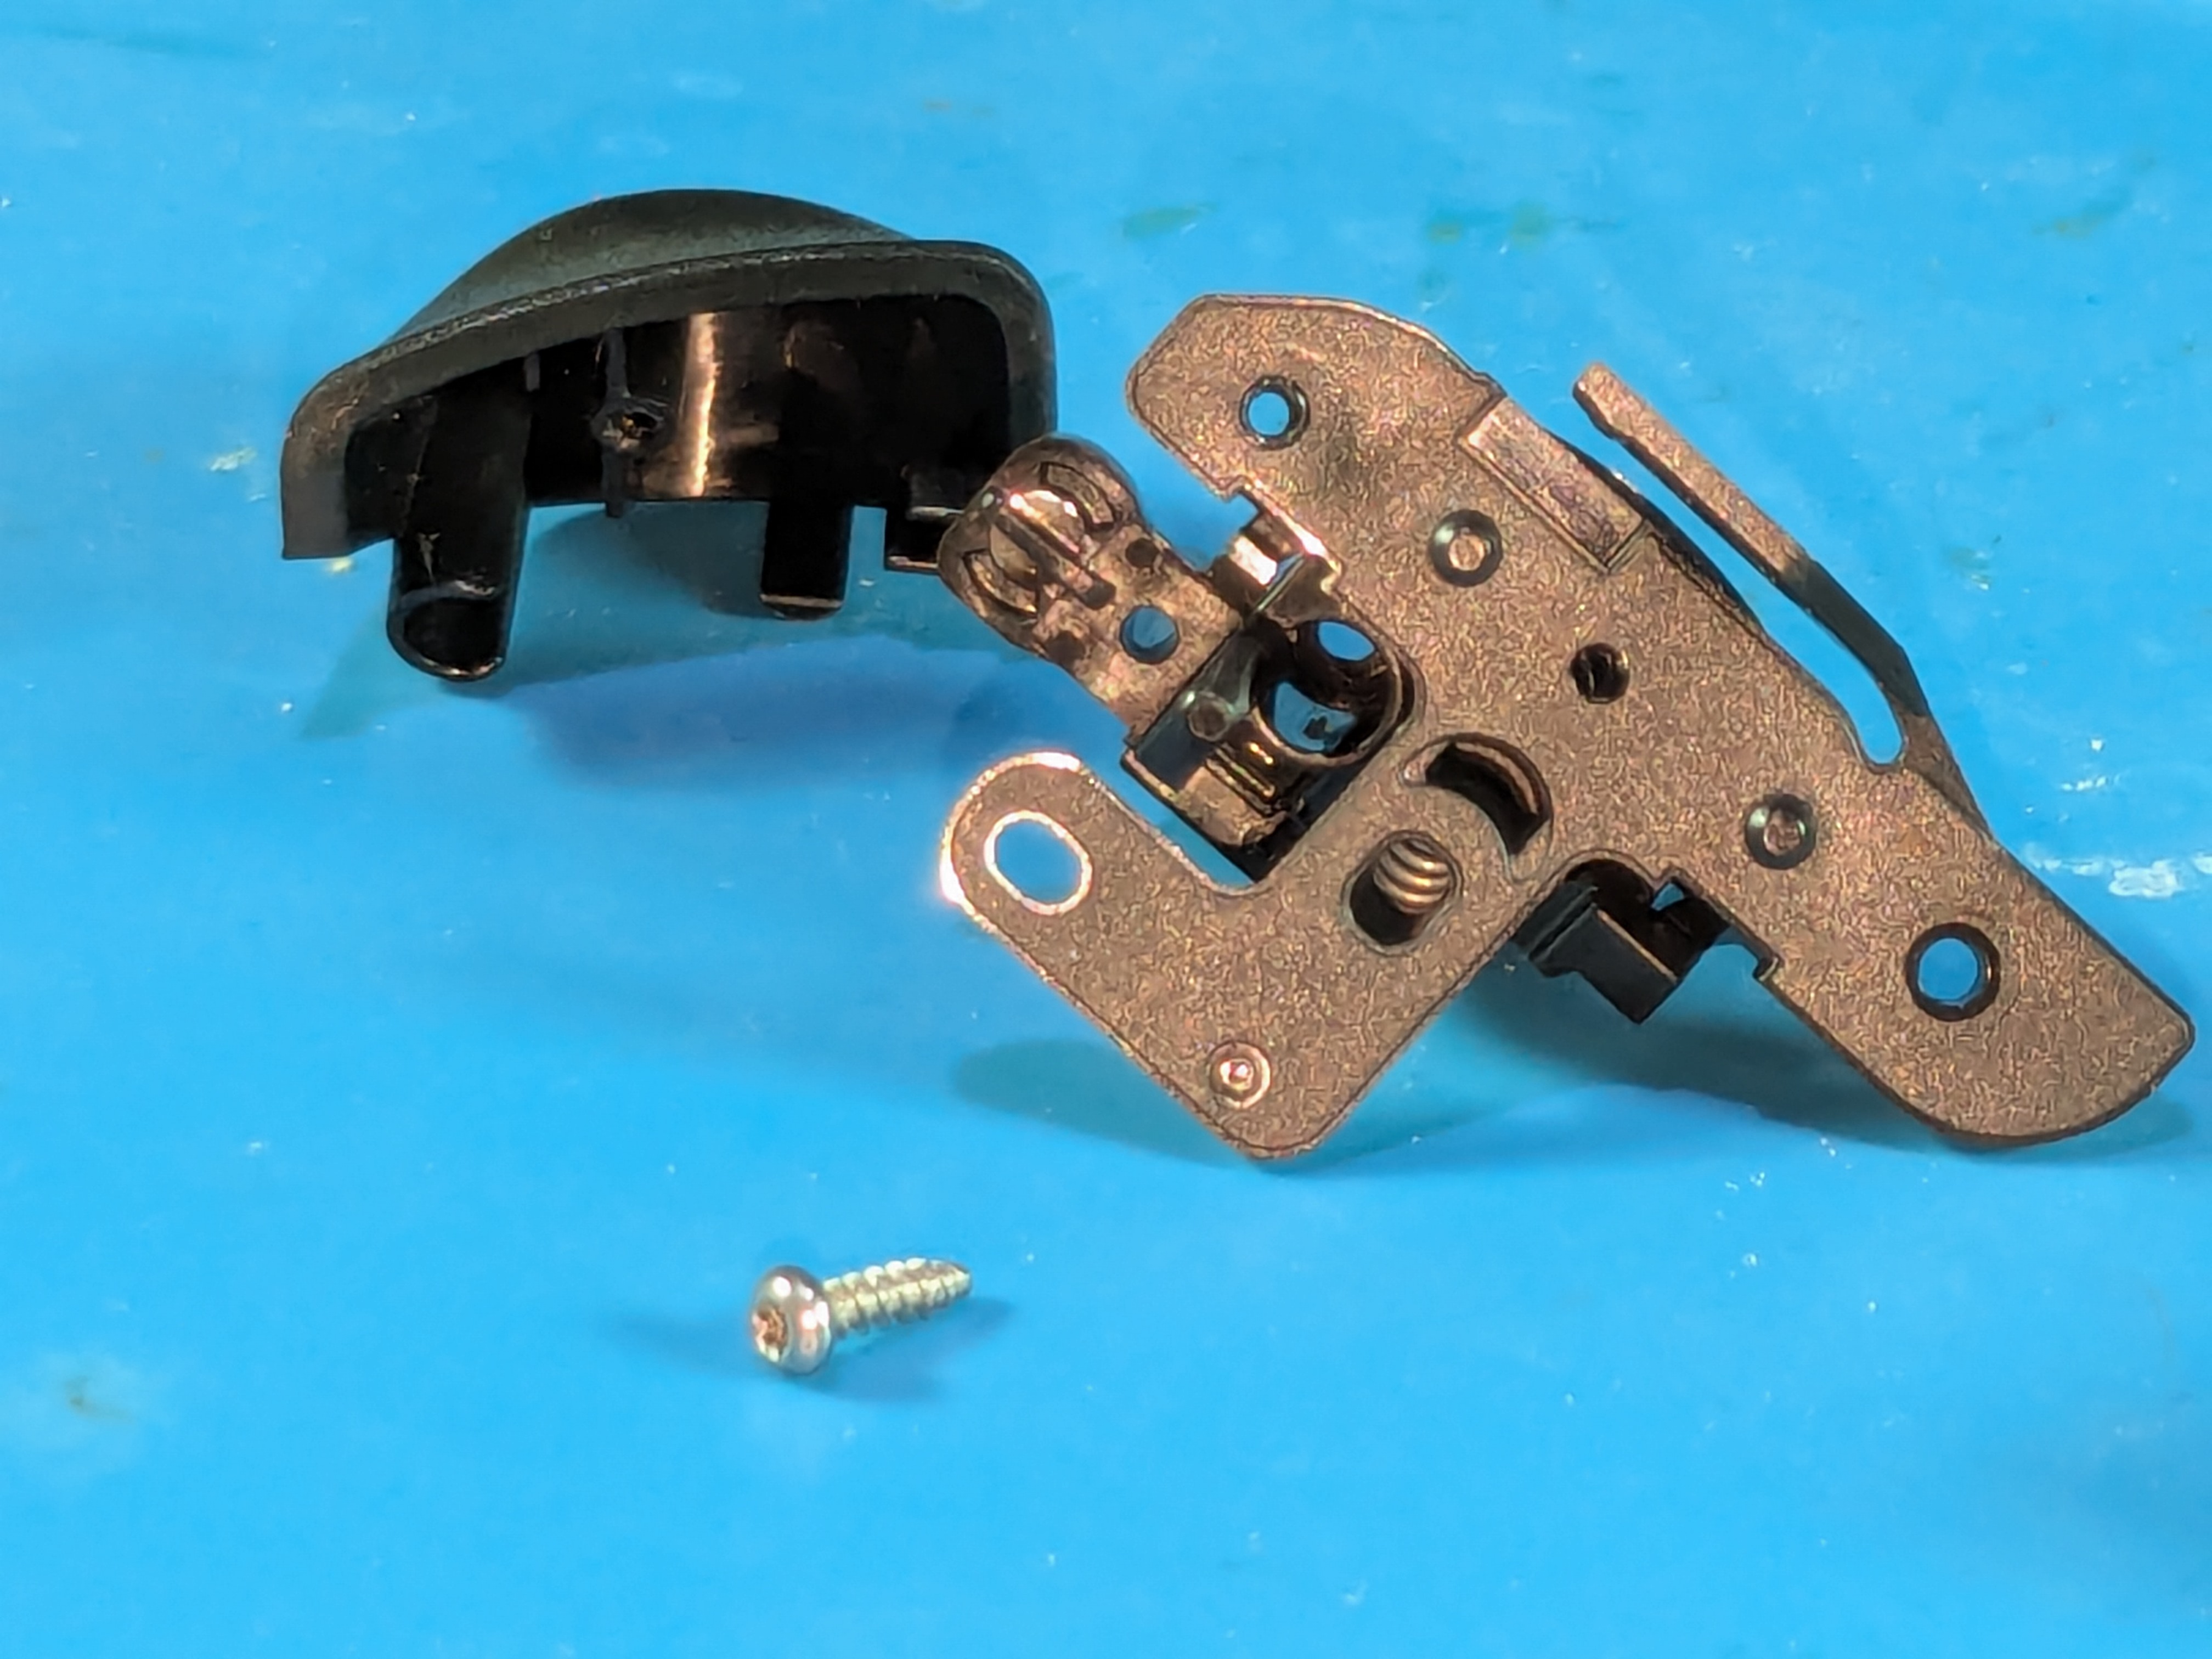
- After getting off the cap, use a flathead screwdriver and push out the metal rod starting from the pointy end
- This may require some force, be careful and try holding the trigger assembly in a way that won’t break off the thin parts

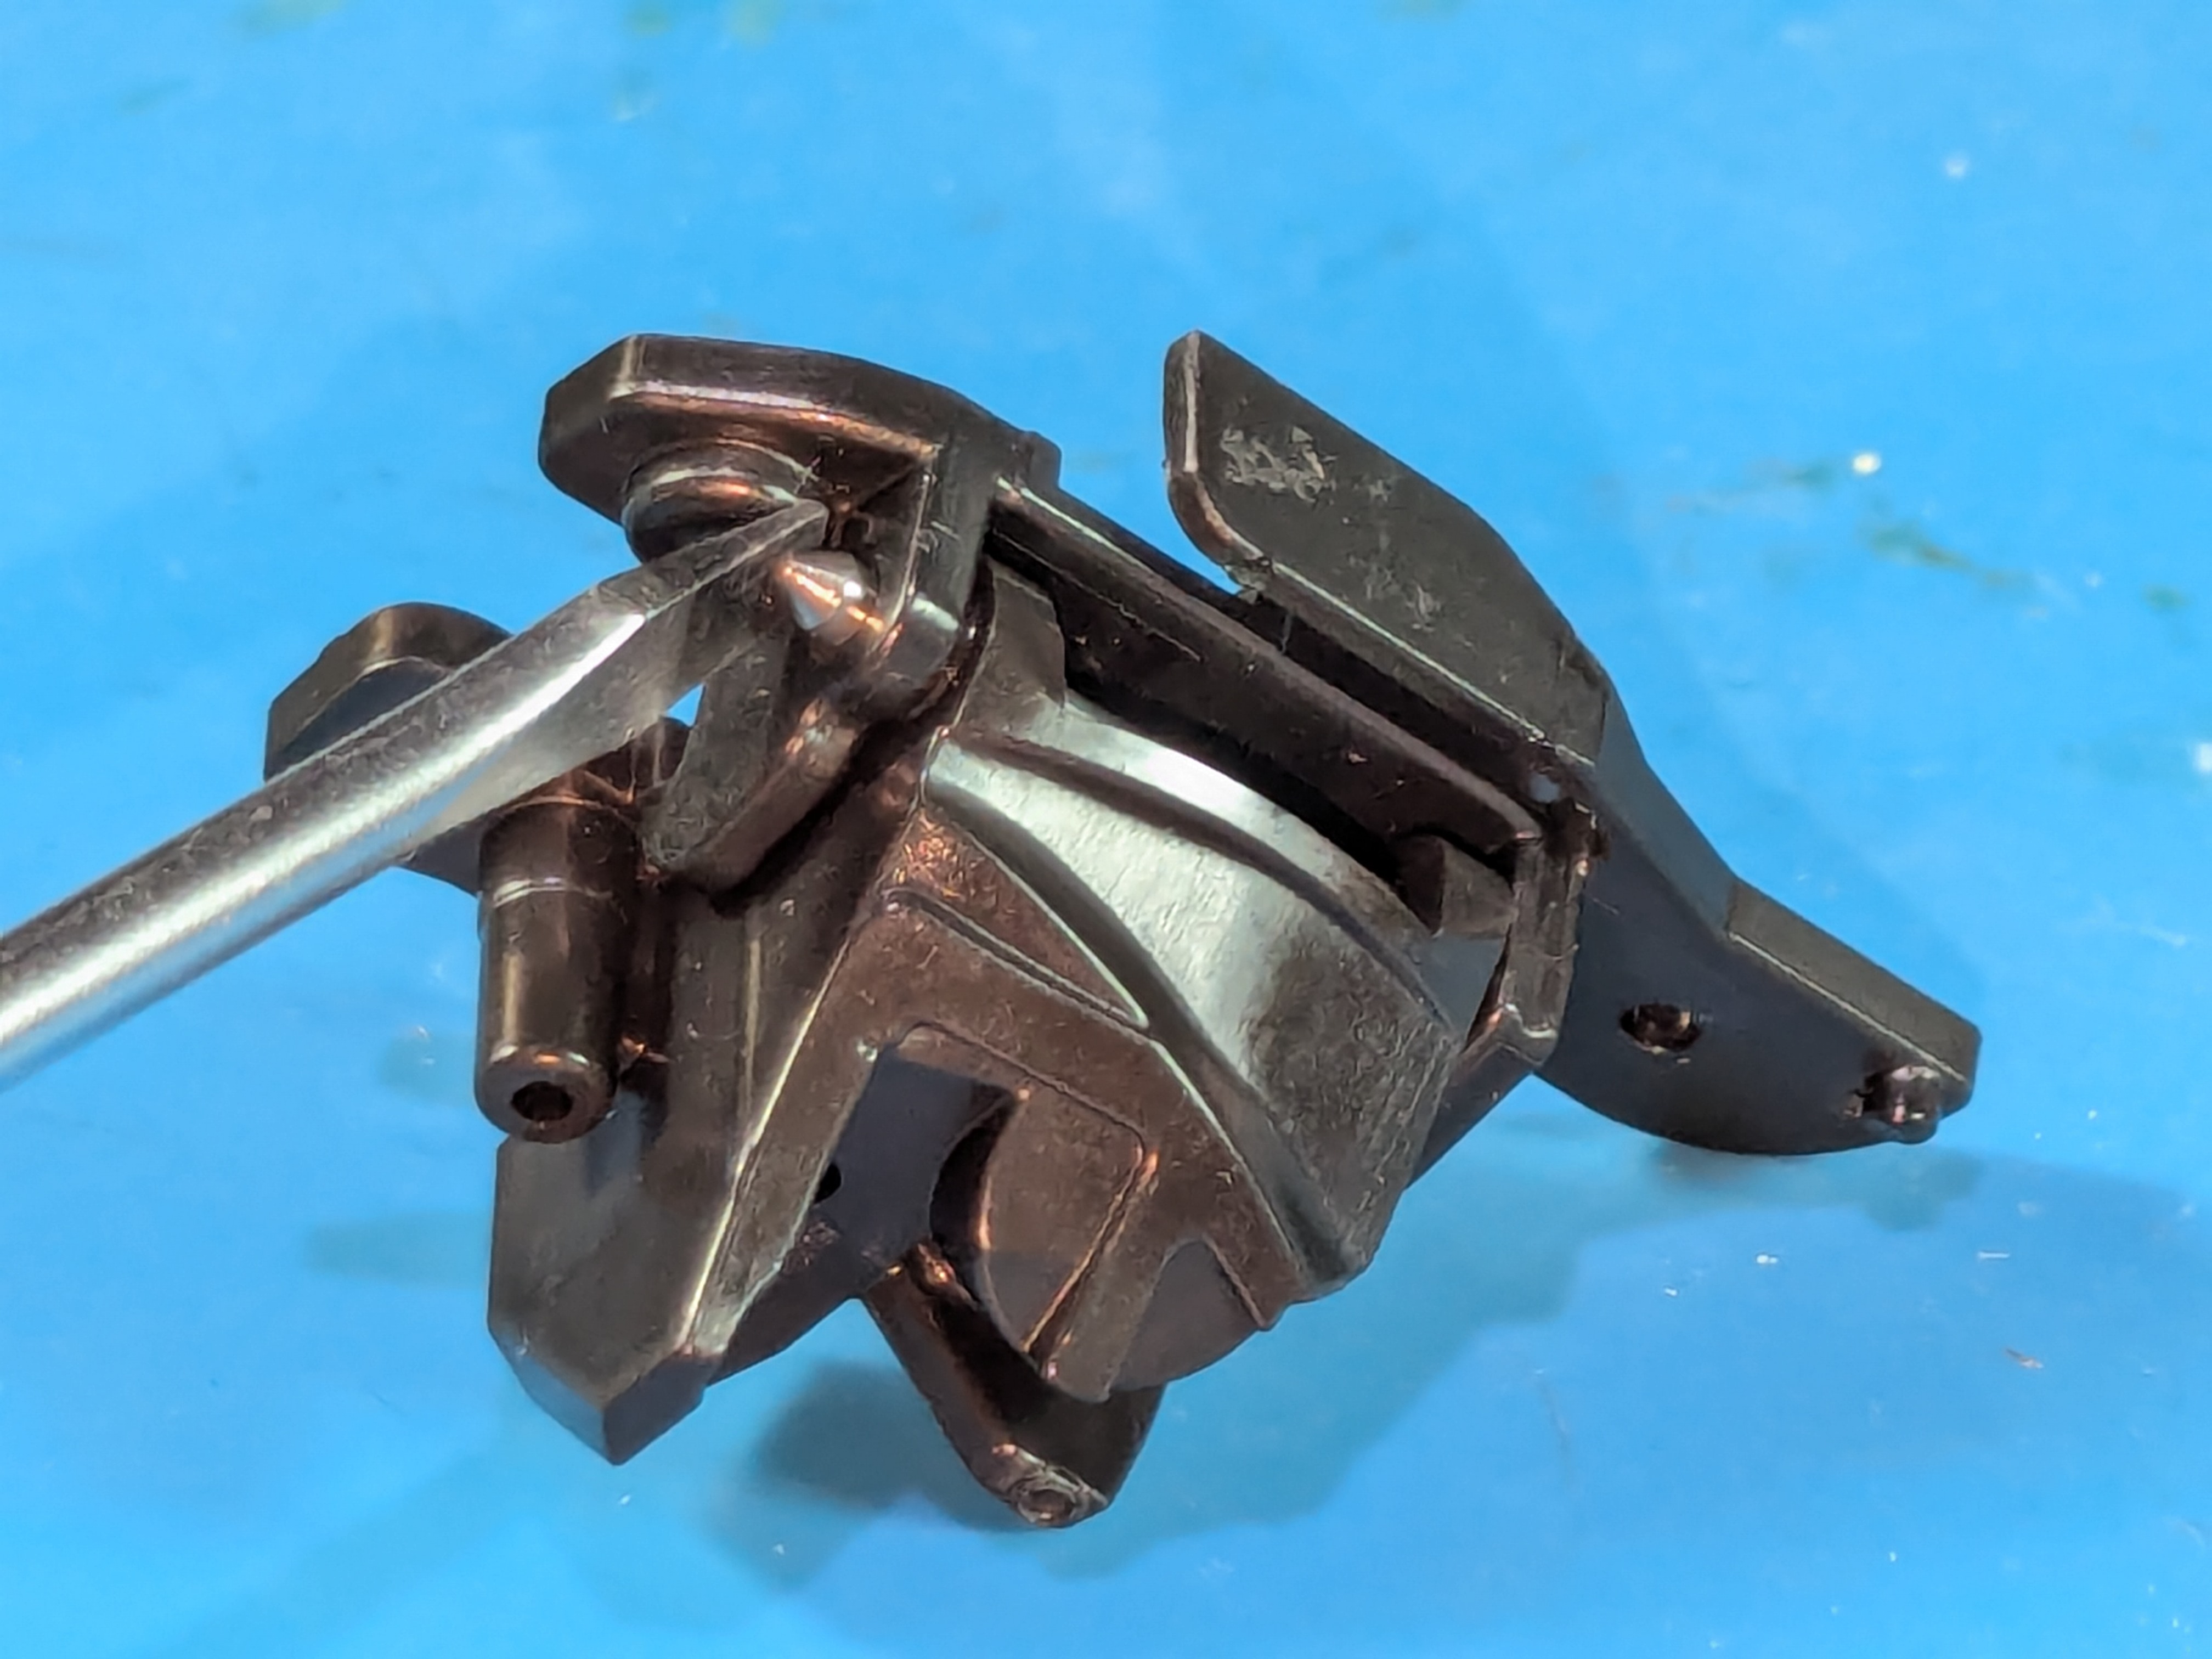
- When the bar is halfway out, use pliers to get it out
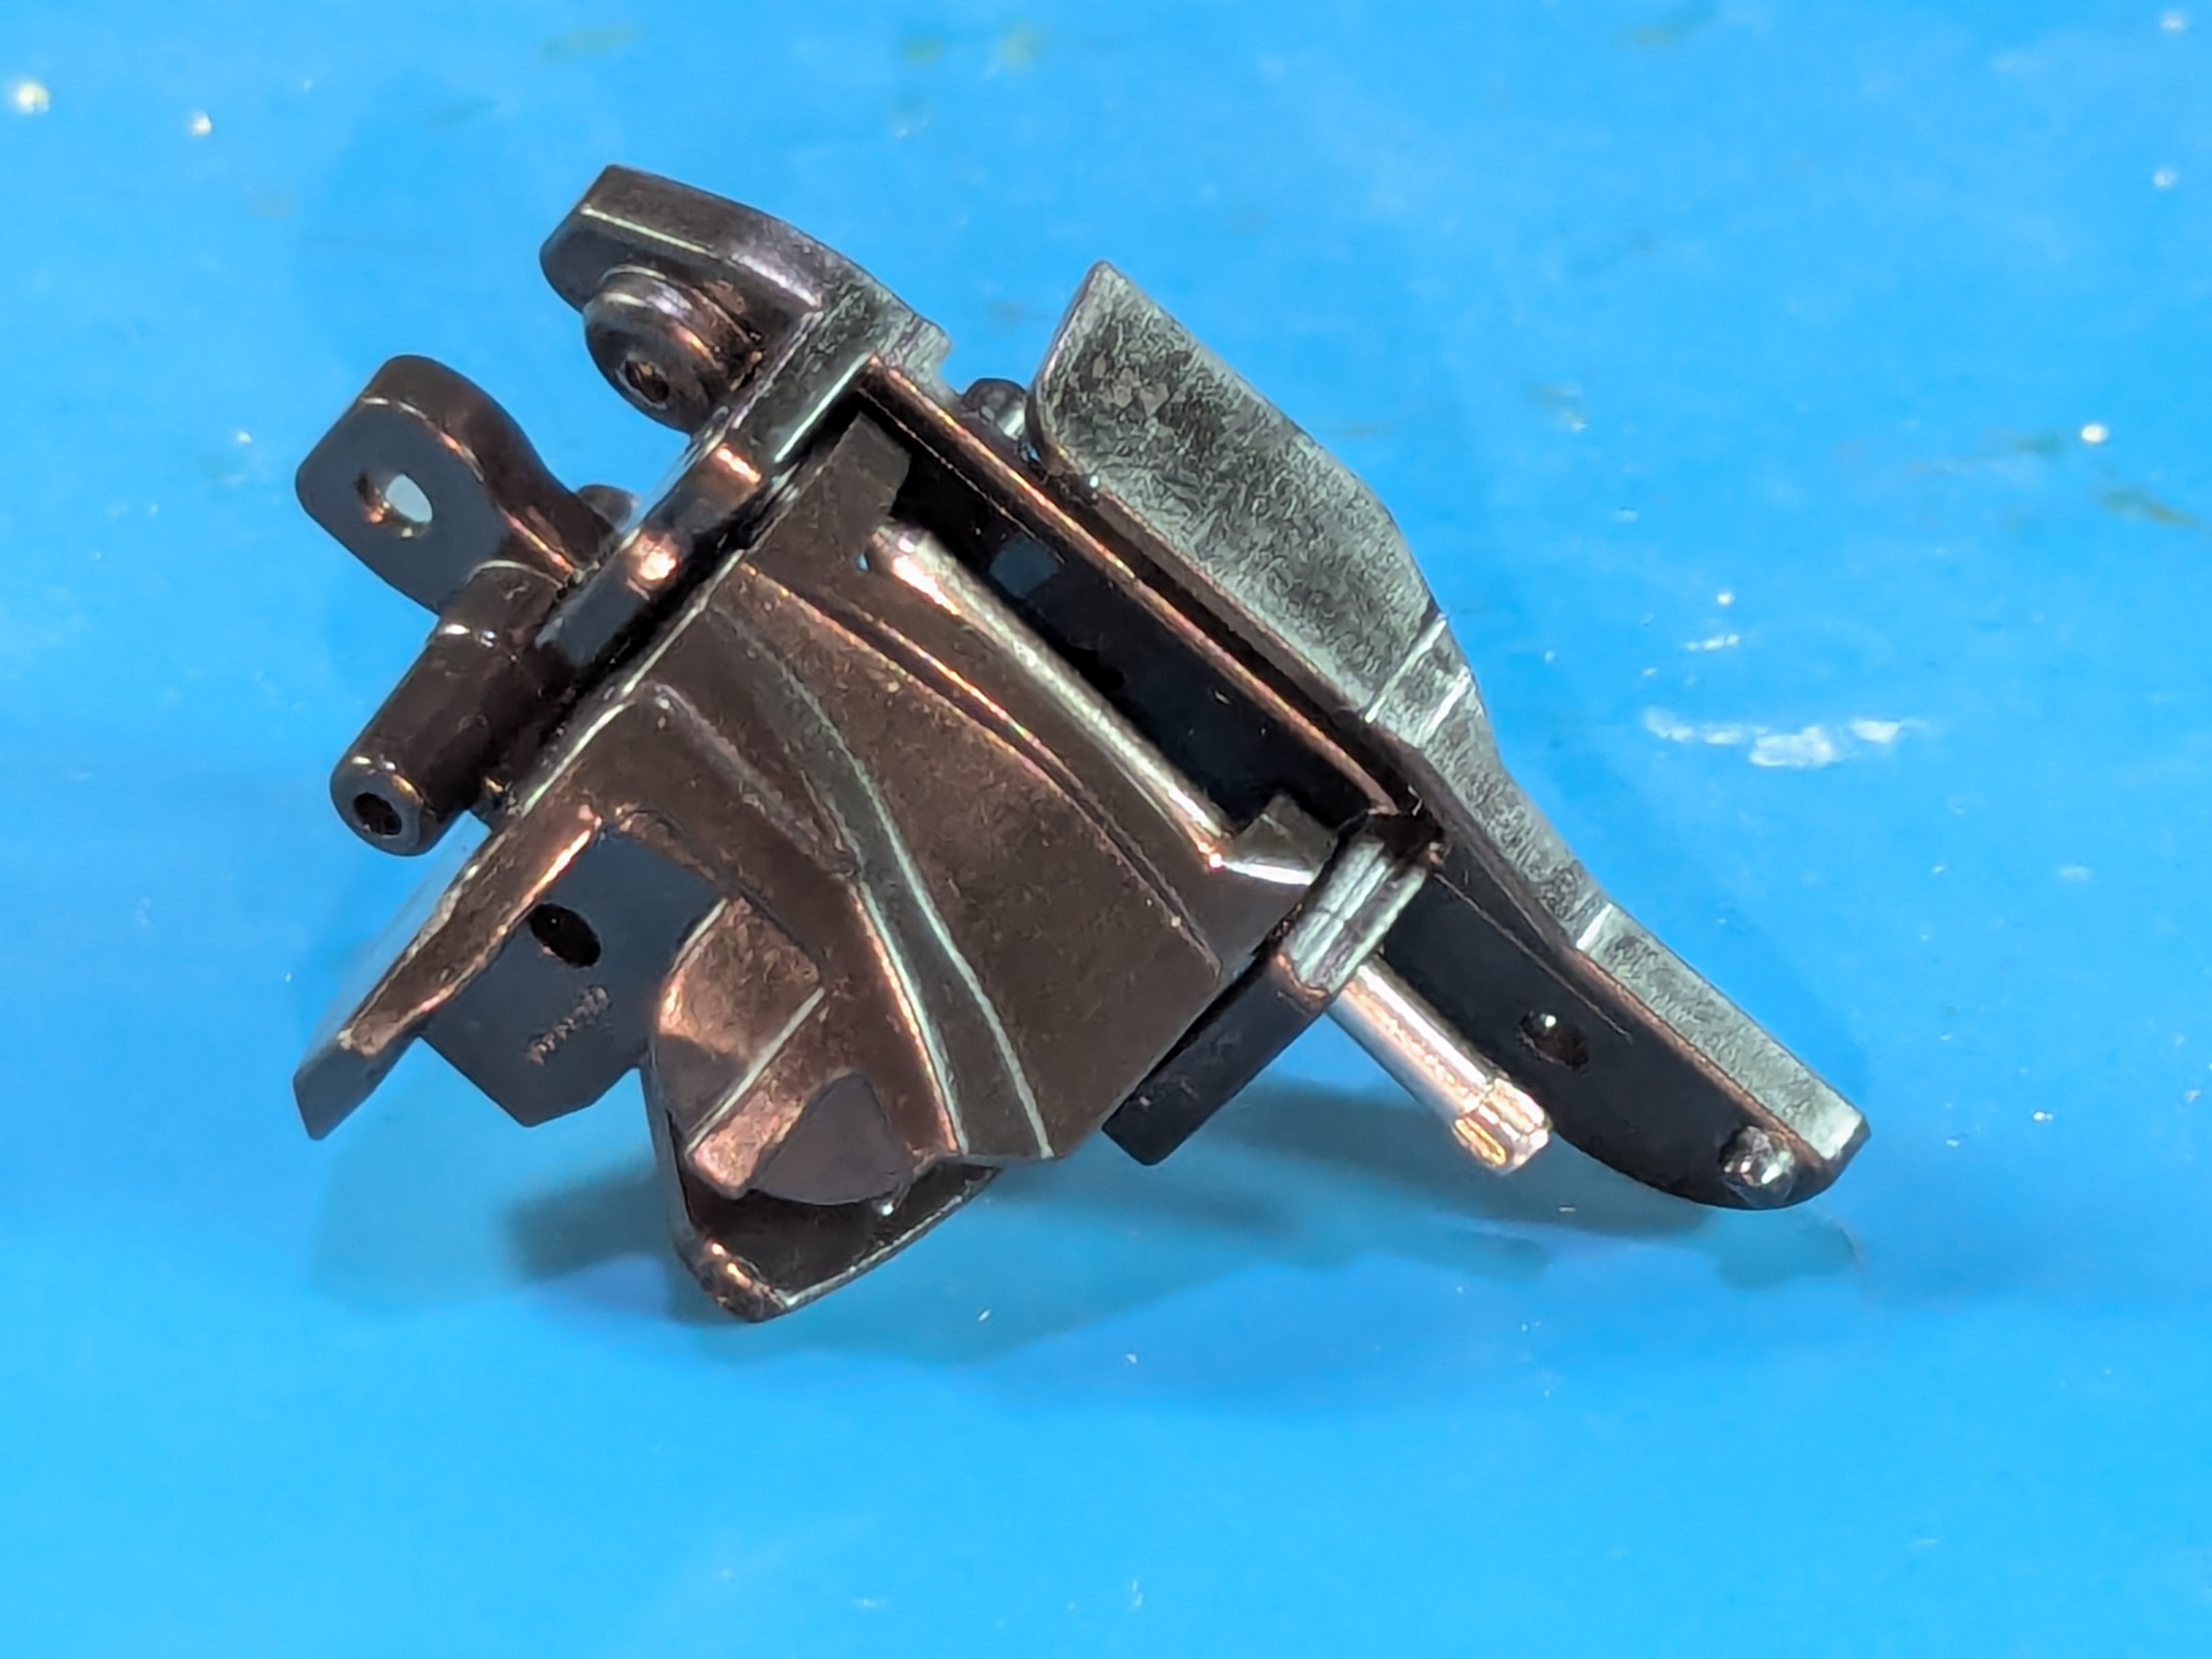
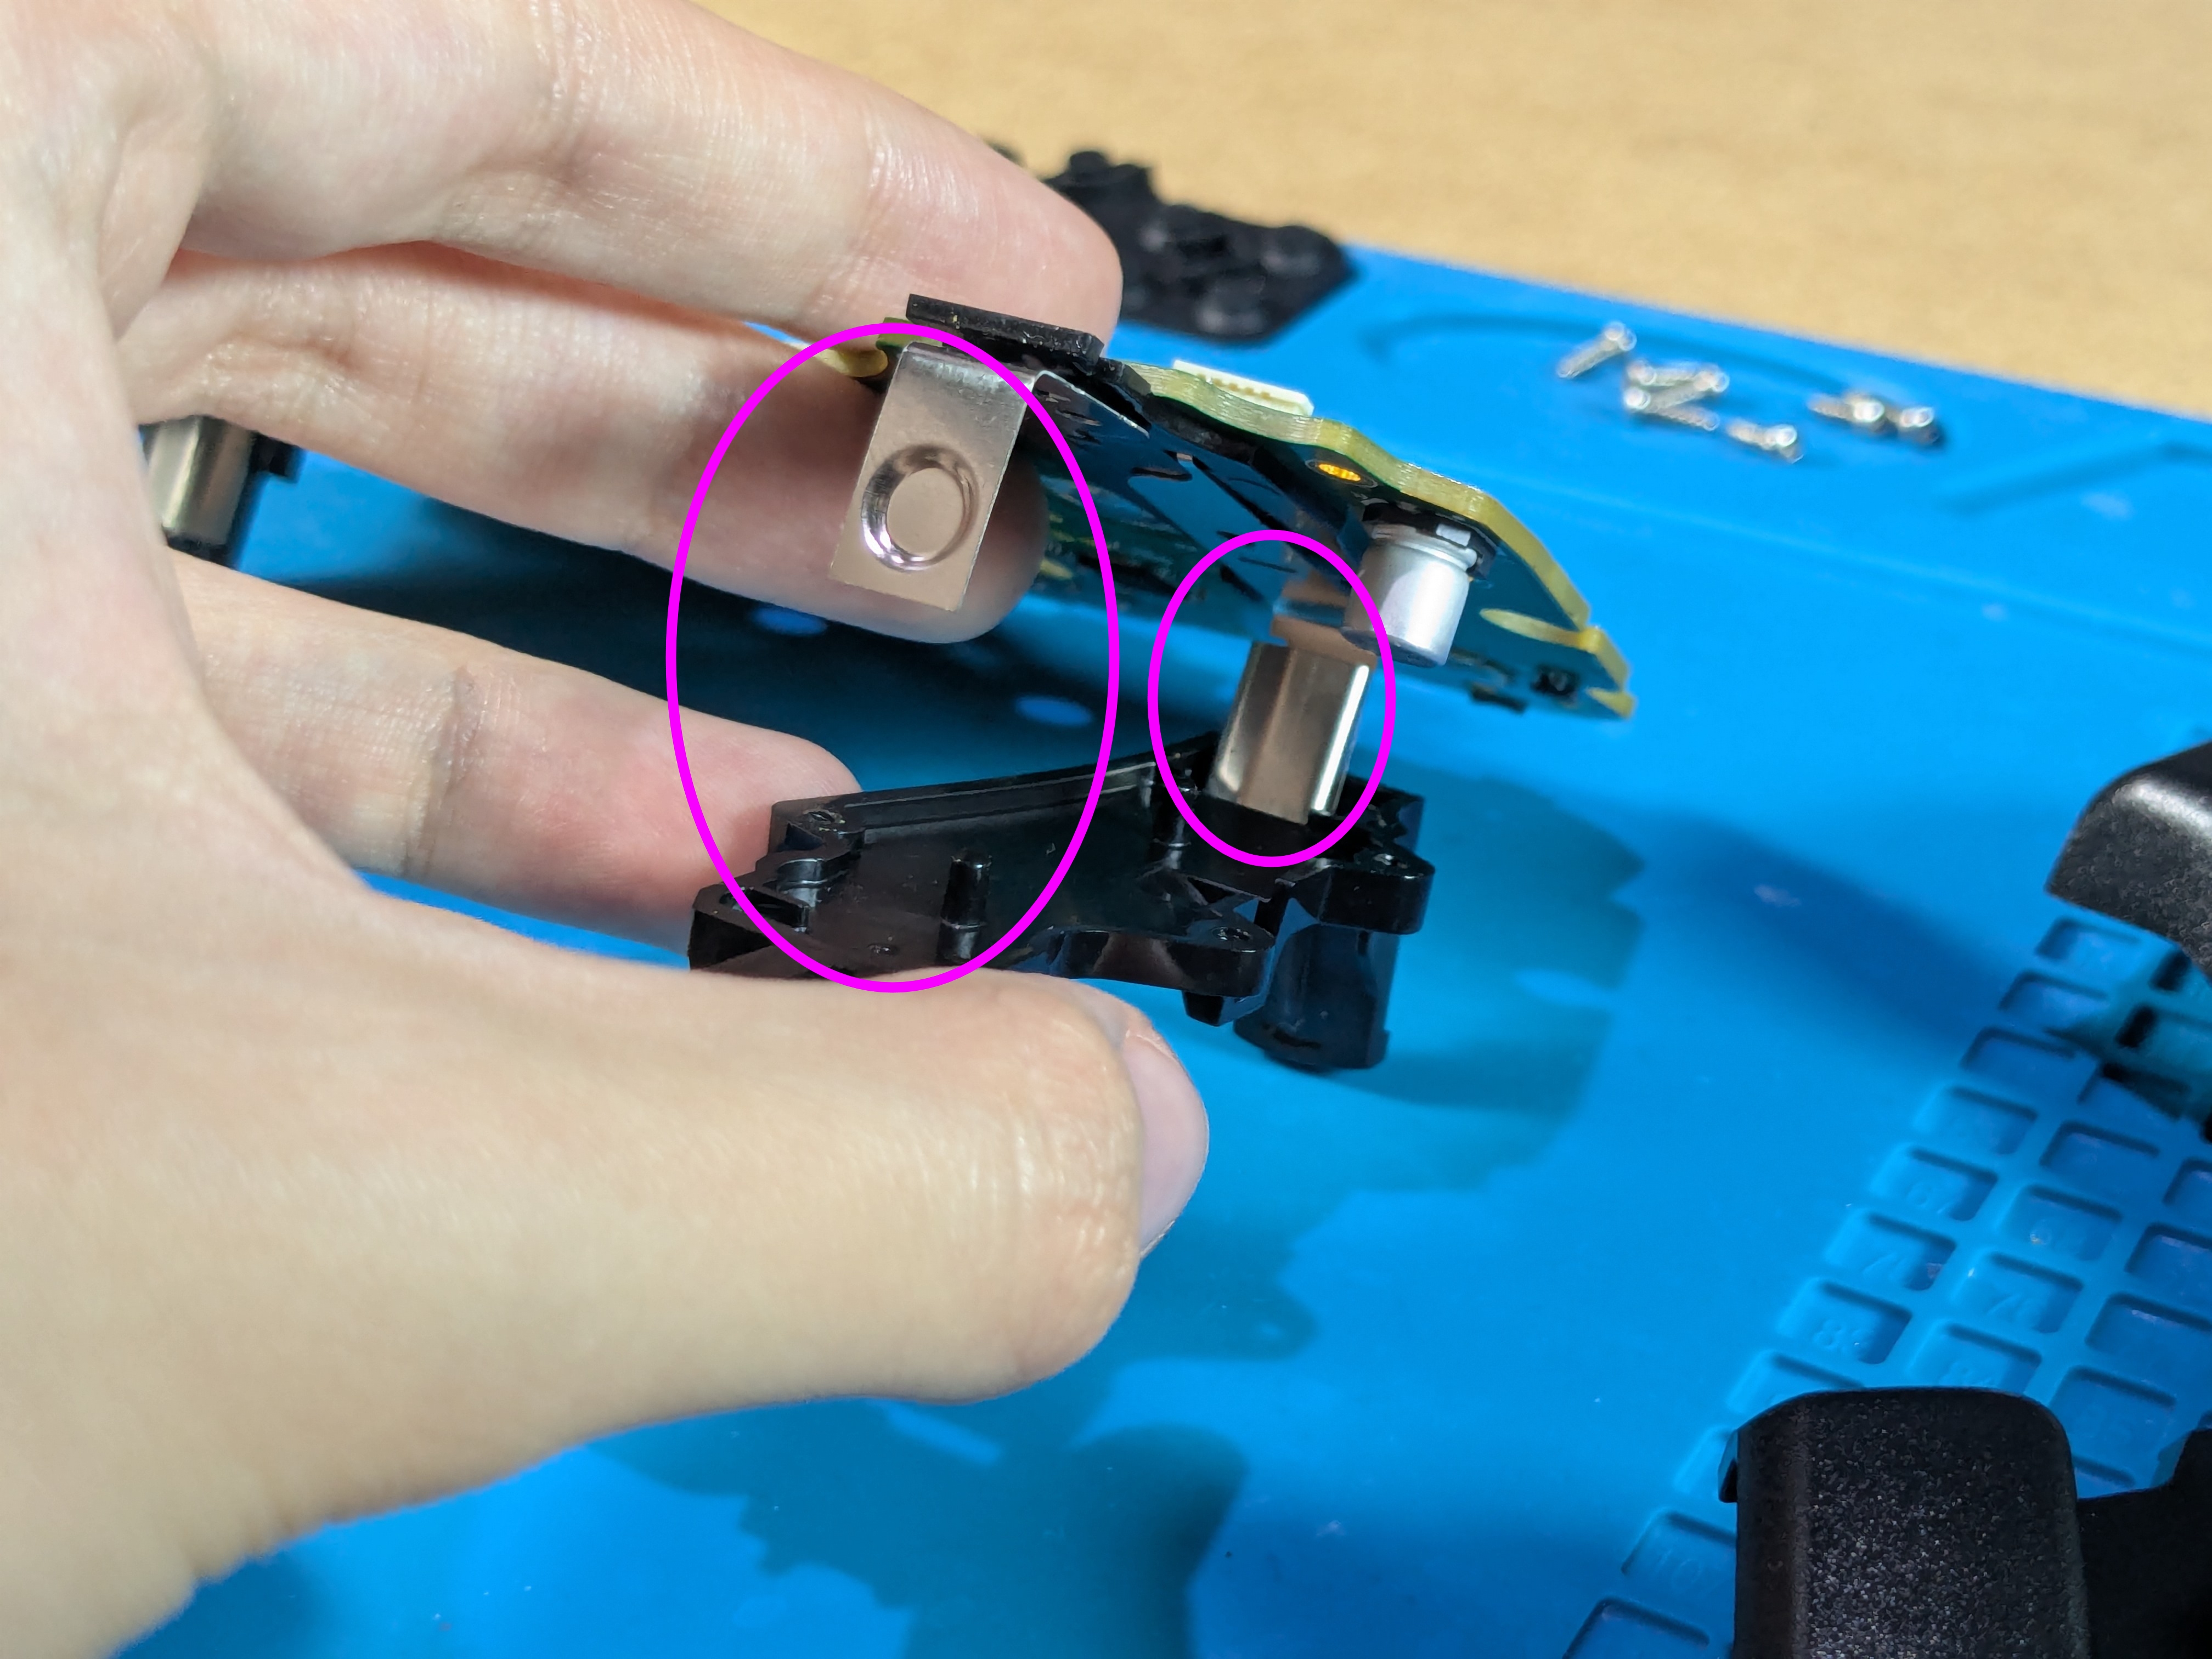
- Beware that there is a spring inside it, make sure not to lose it when pulling out the middle part
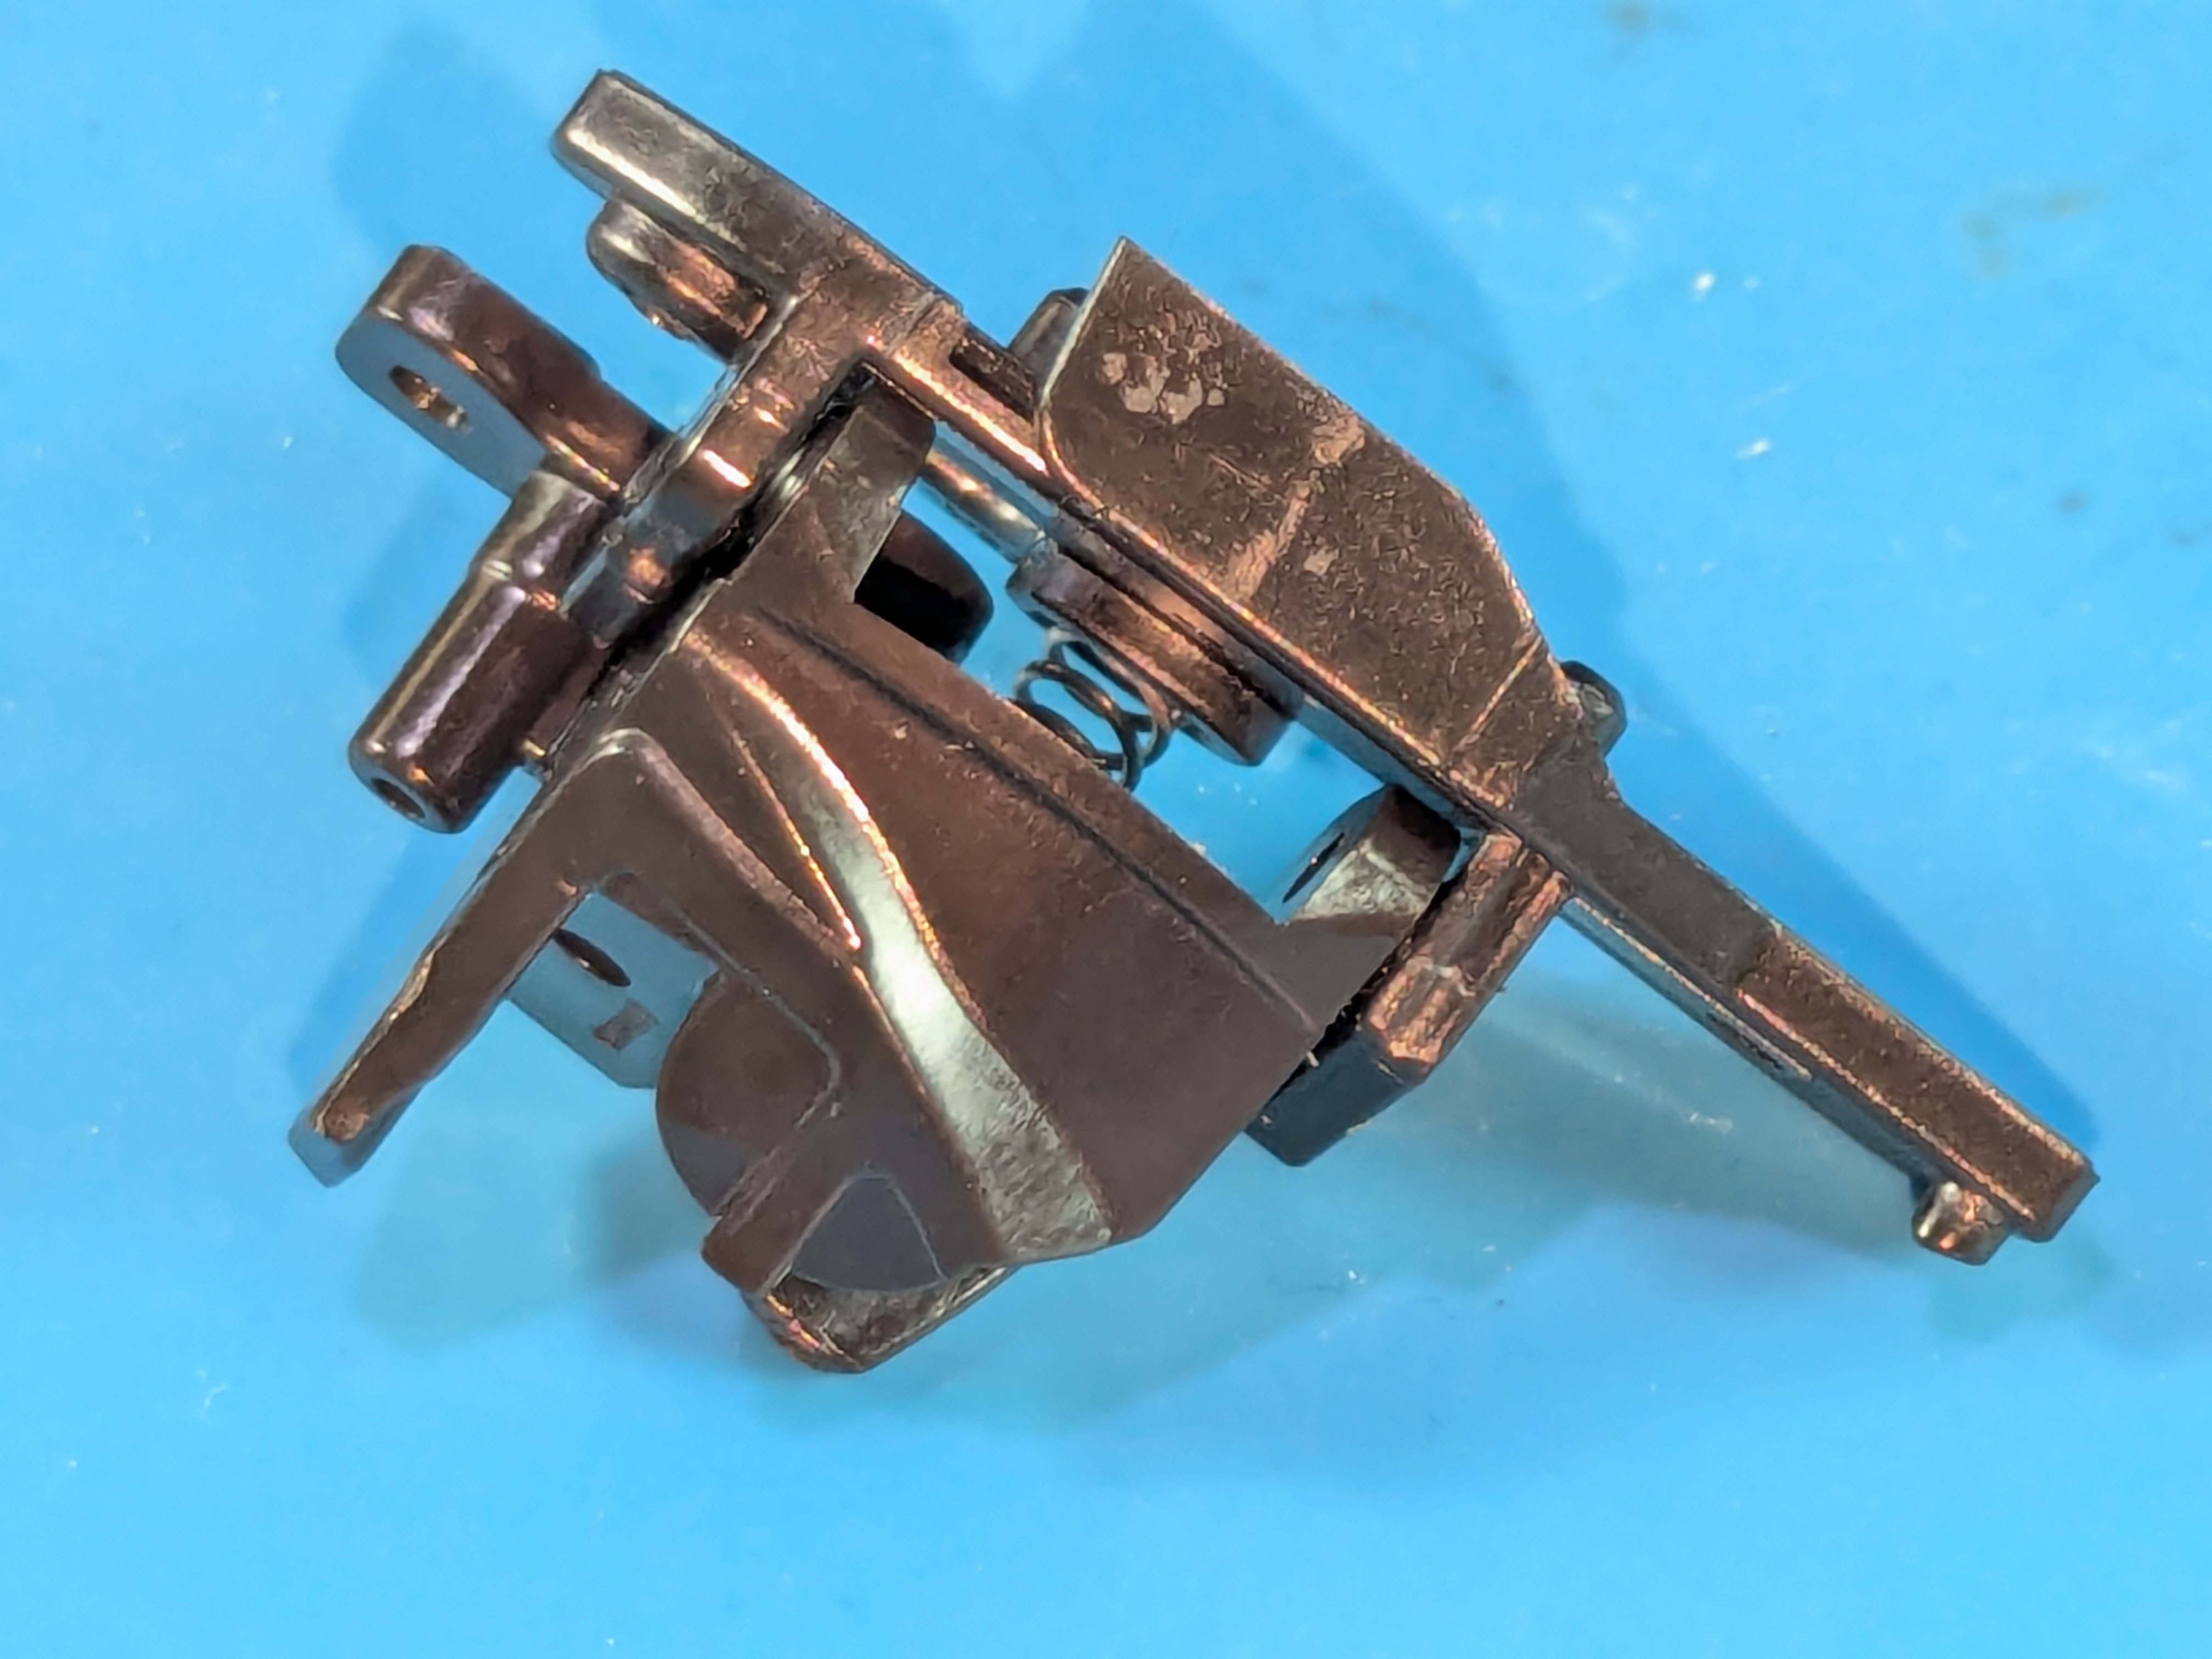

- The middle part features a tiny circular magnet on the side to make the trigger functional
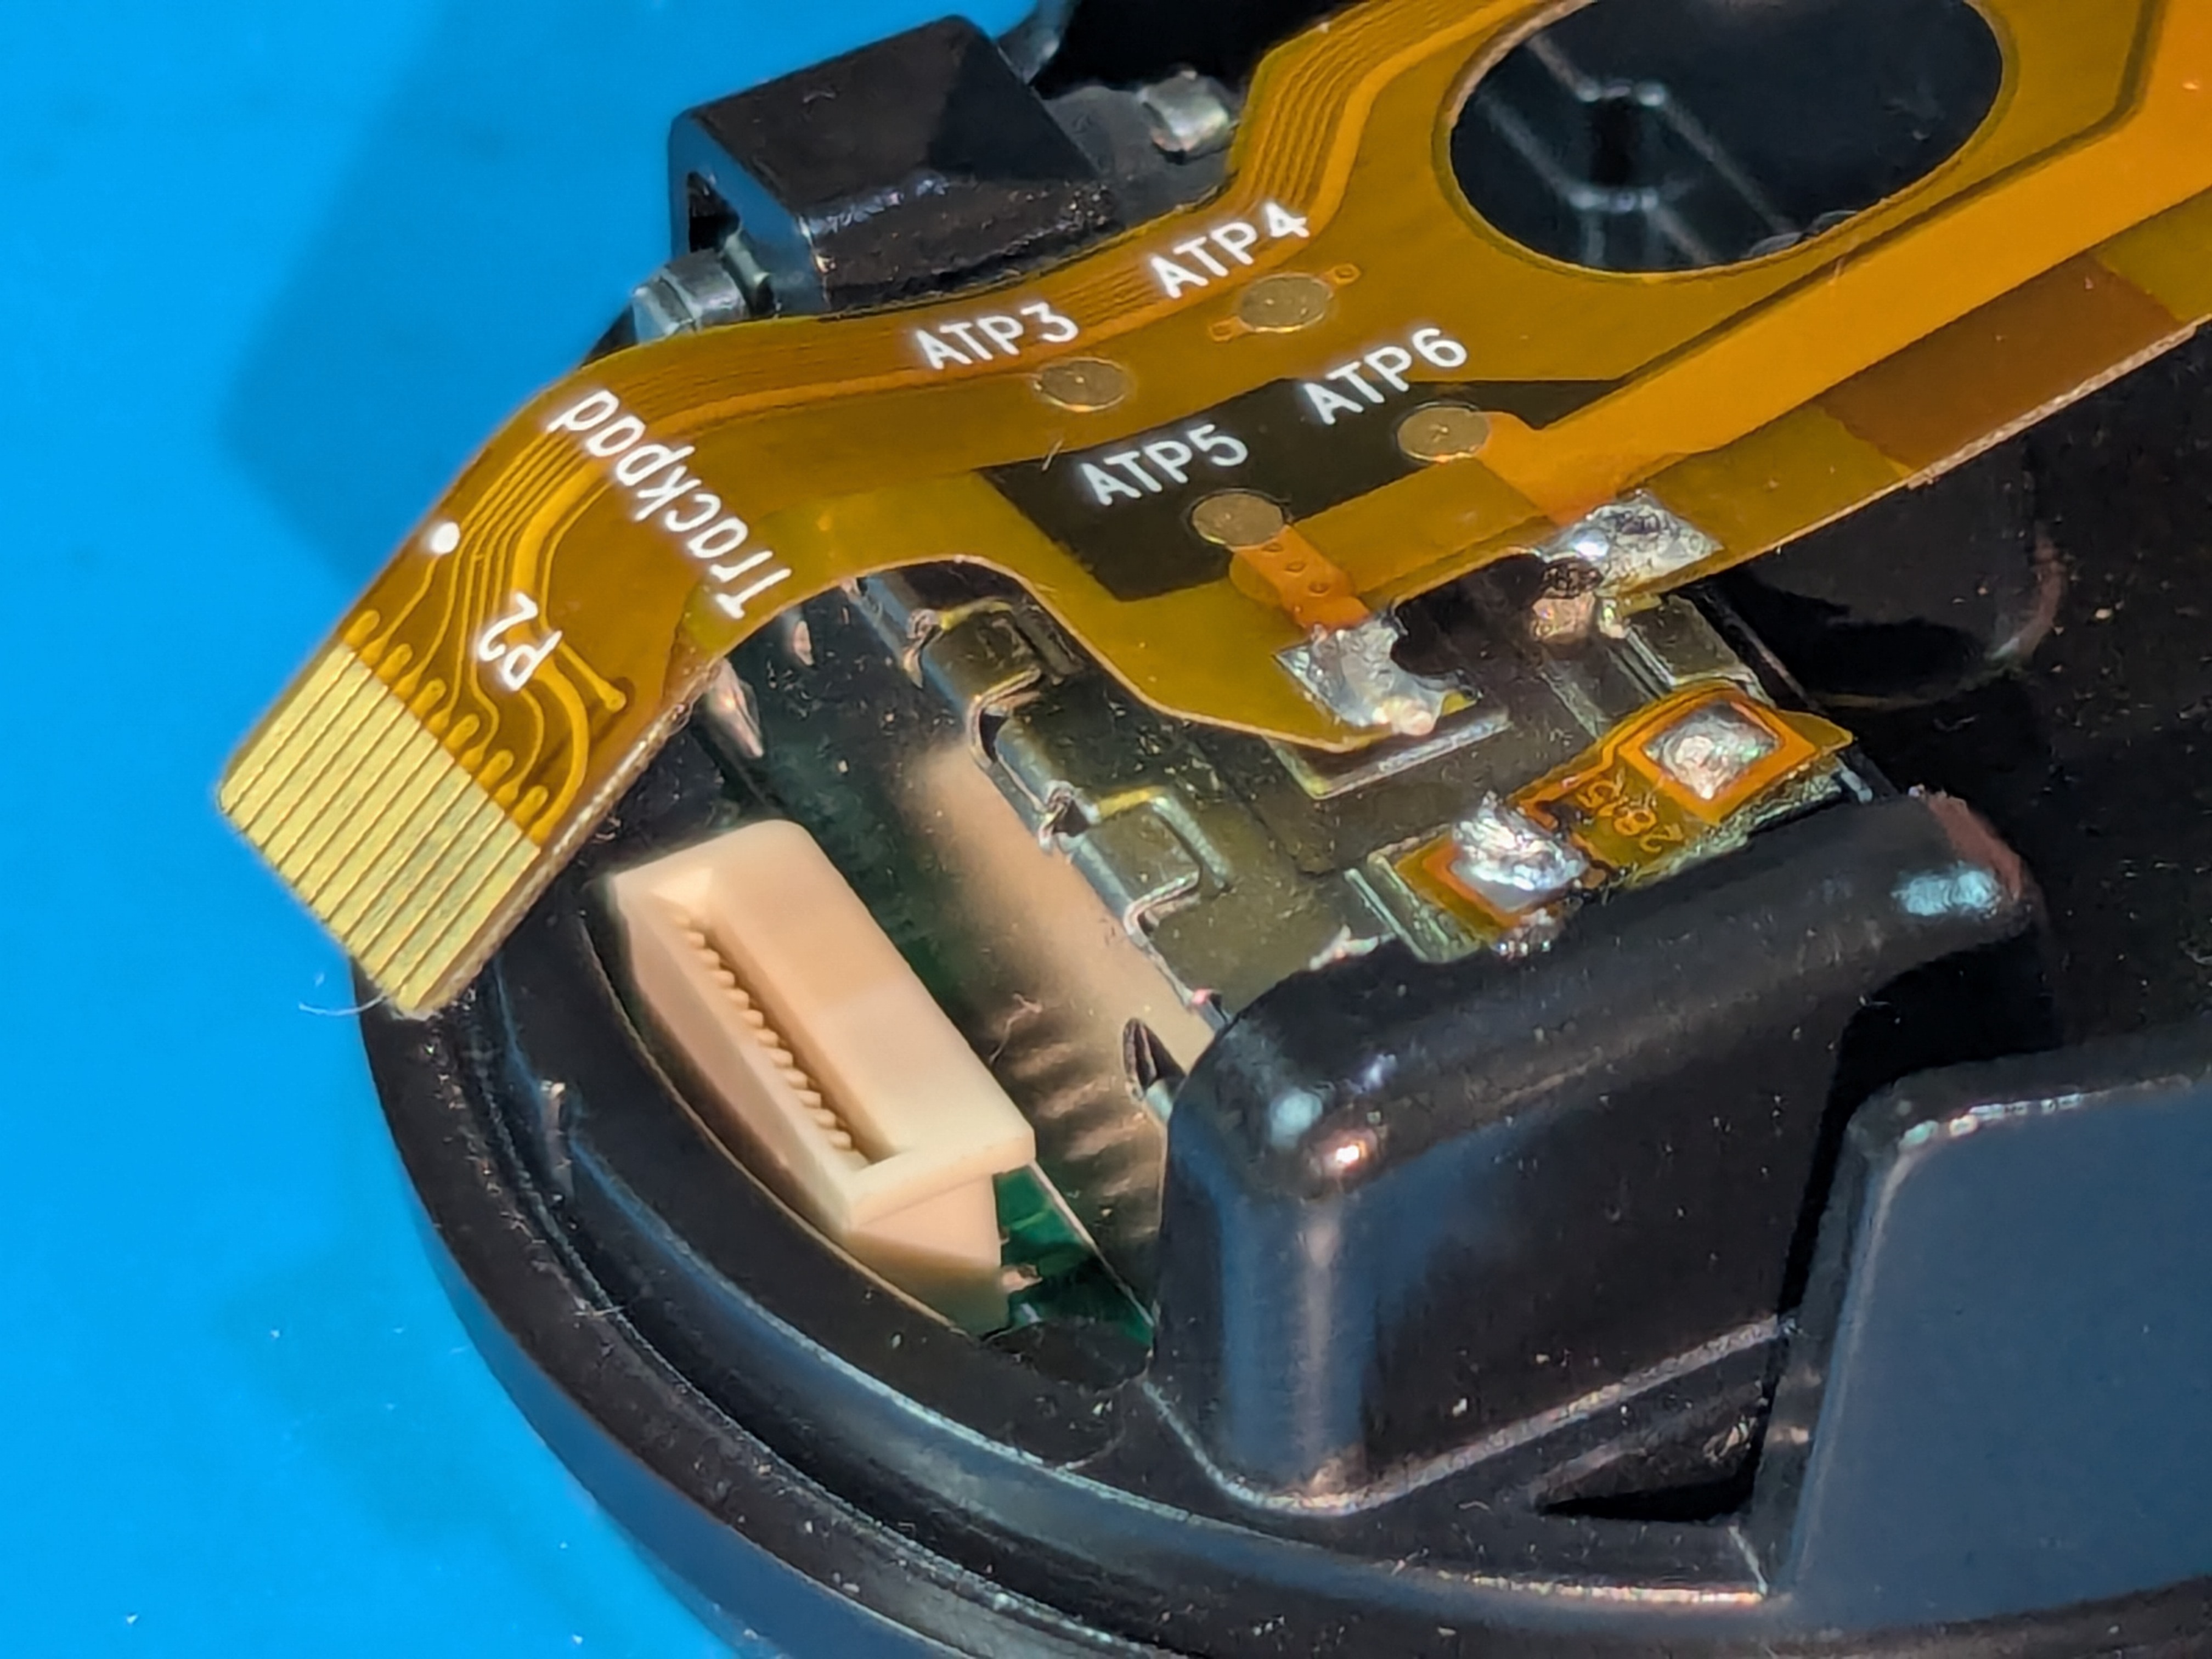
Disassembling The Trackpads
- First it is recommended to disconnect and desolder the ribbon cable to avoid tearing it
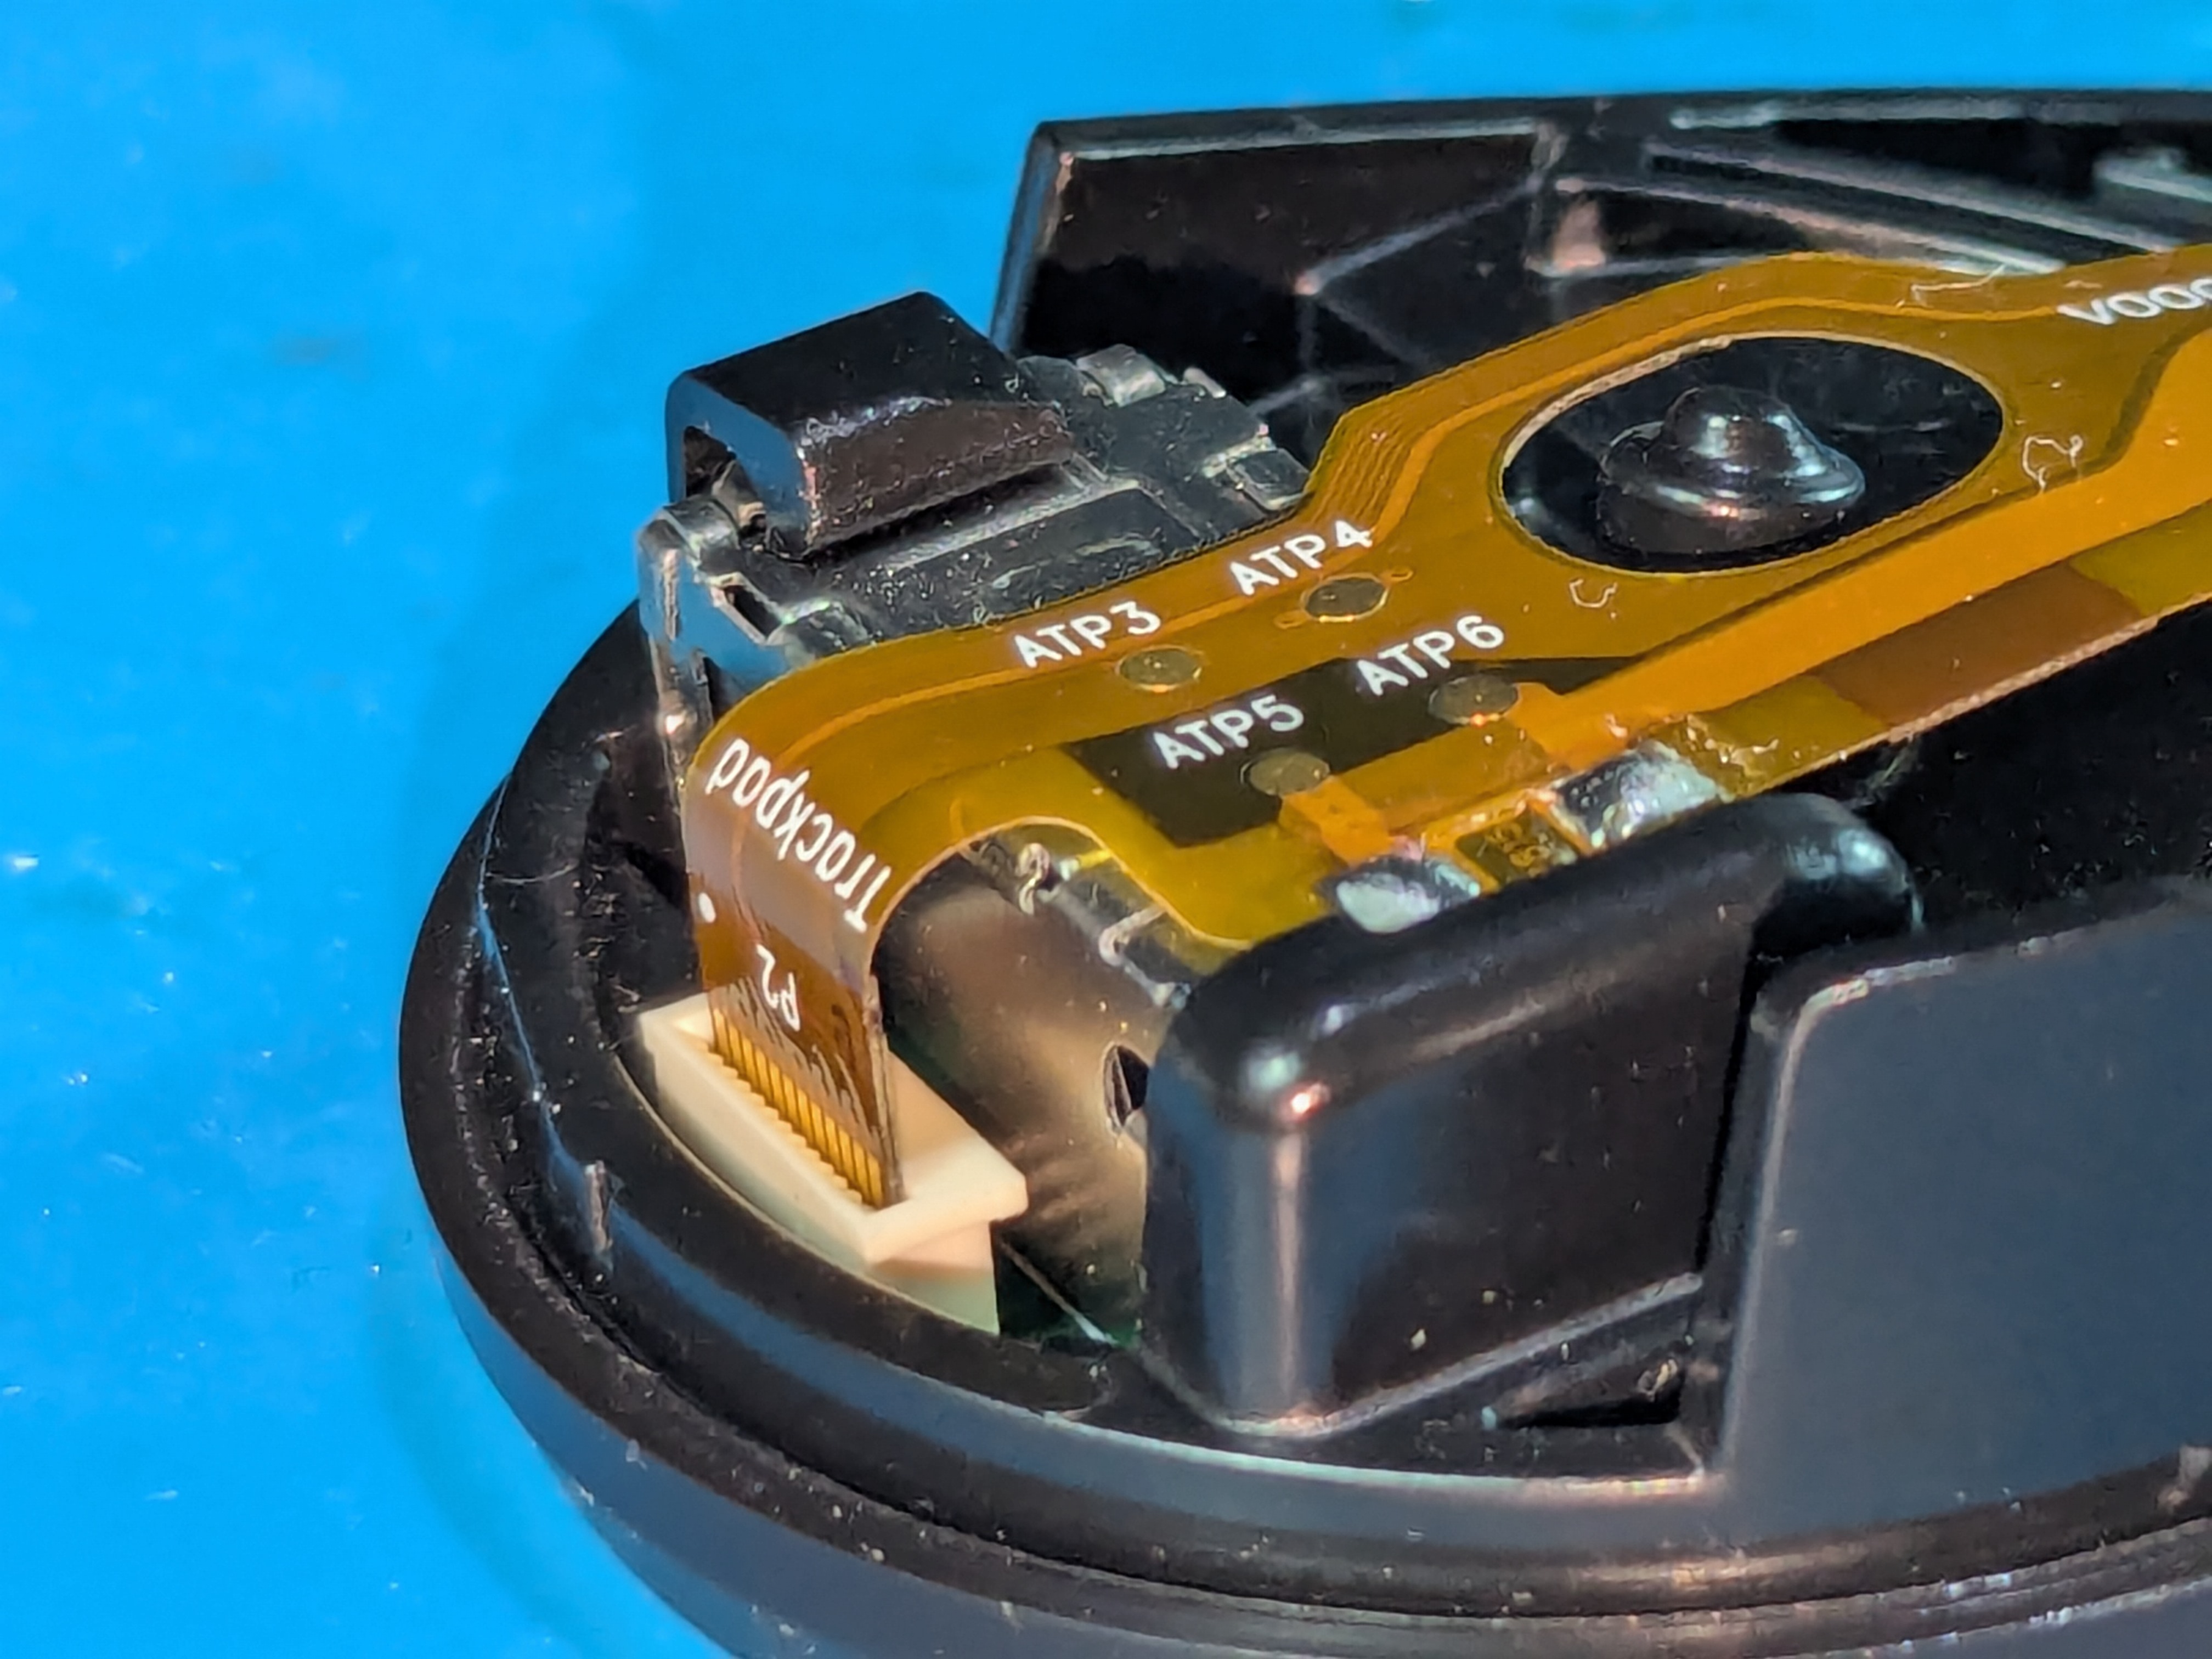
- The trackpads’ ribbon cables and the rumble motors’ cables are held in place by glue underneath them
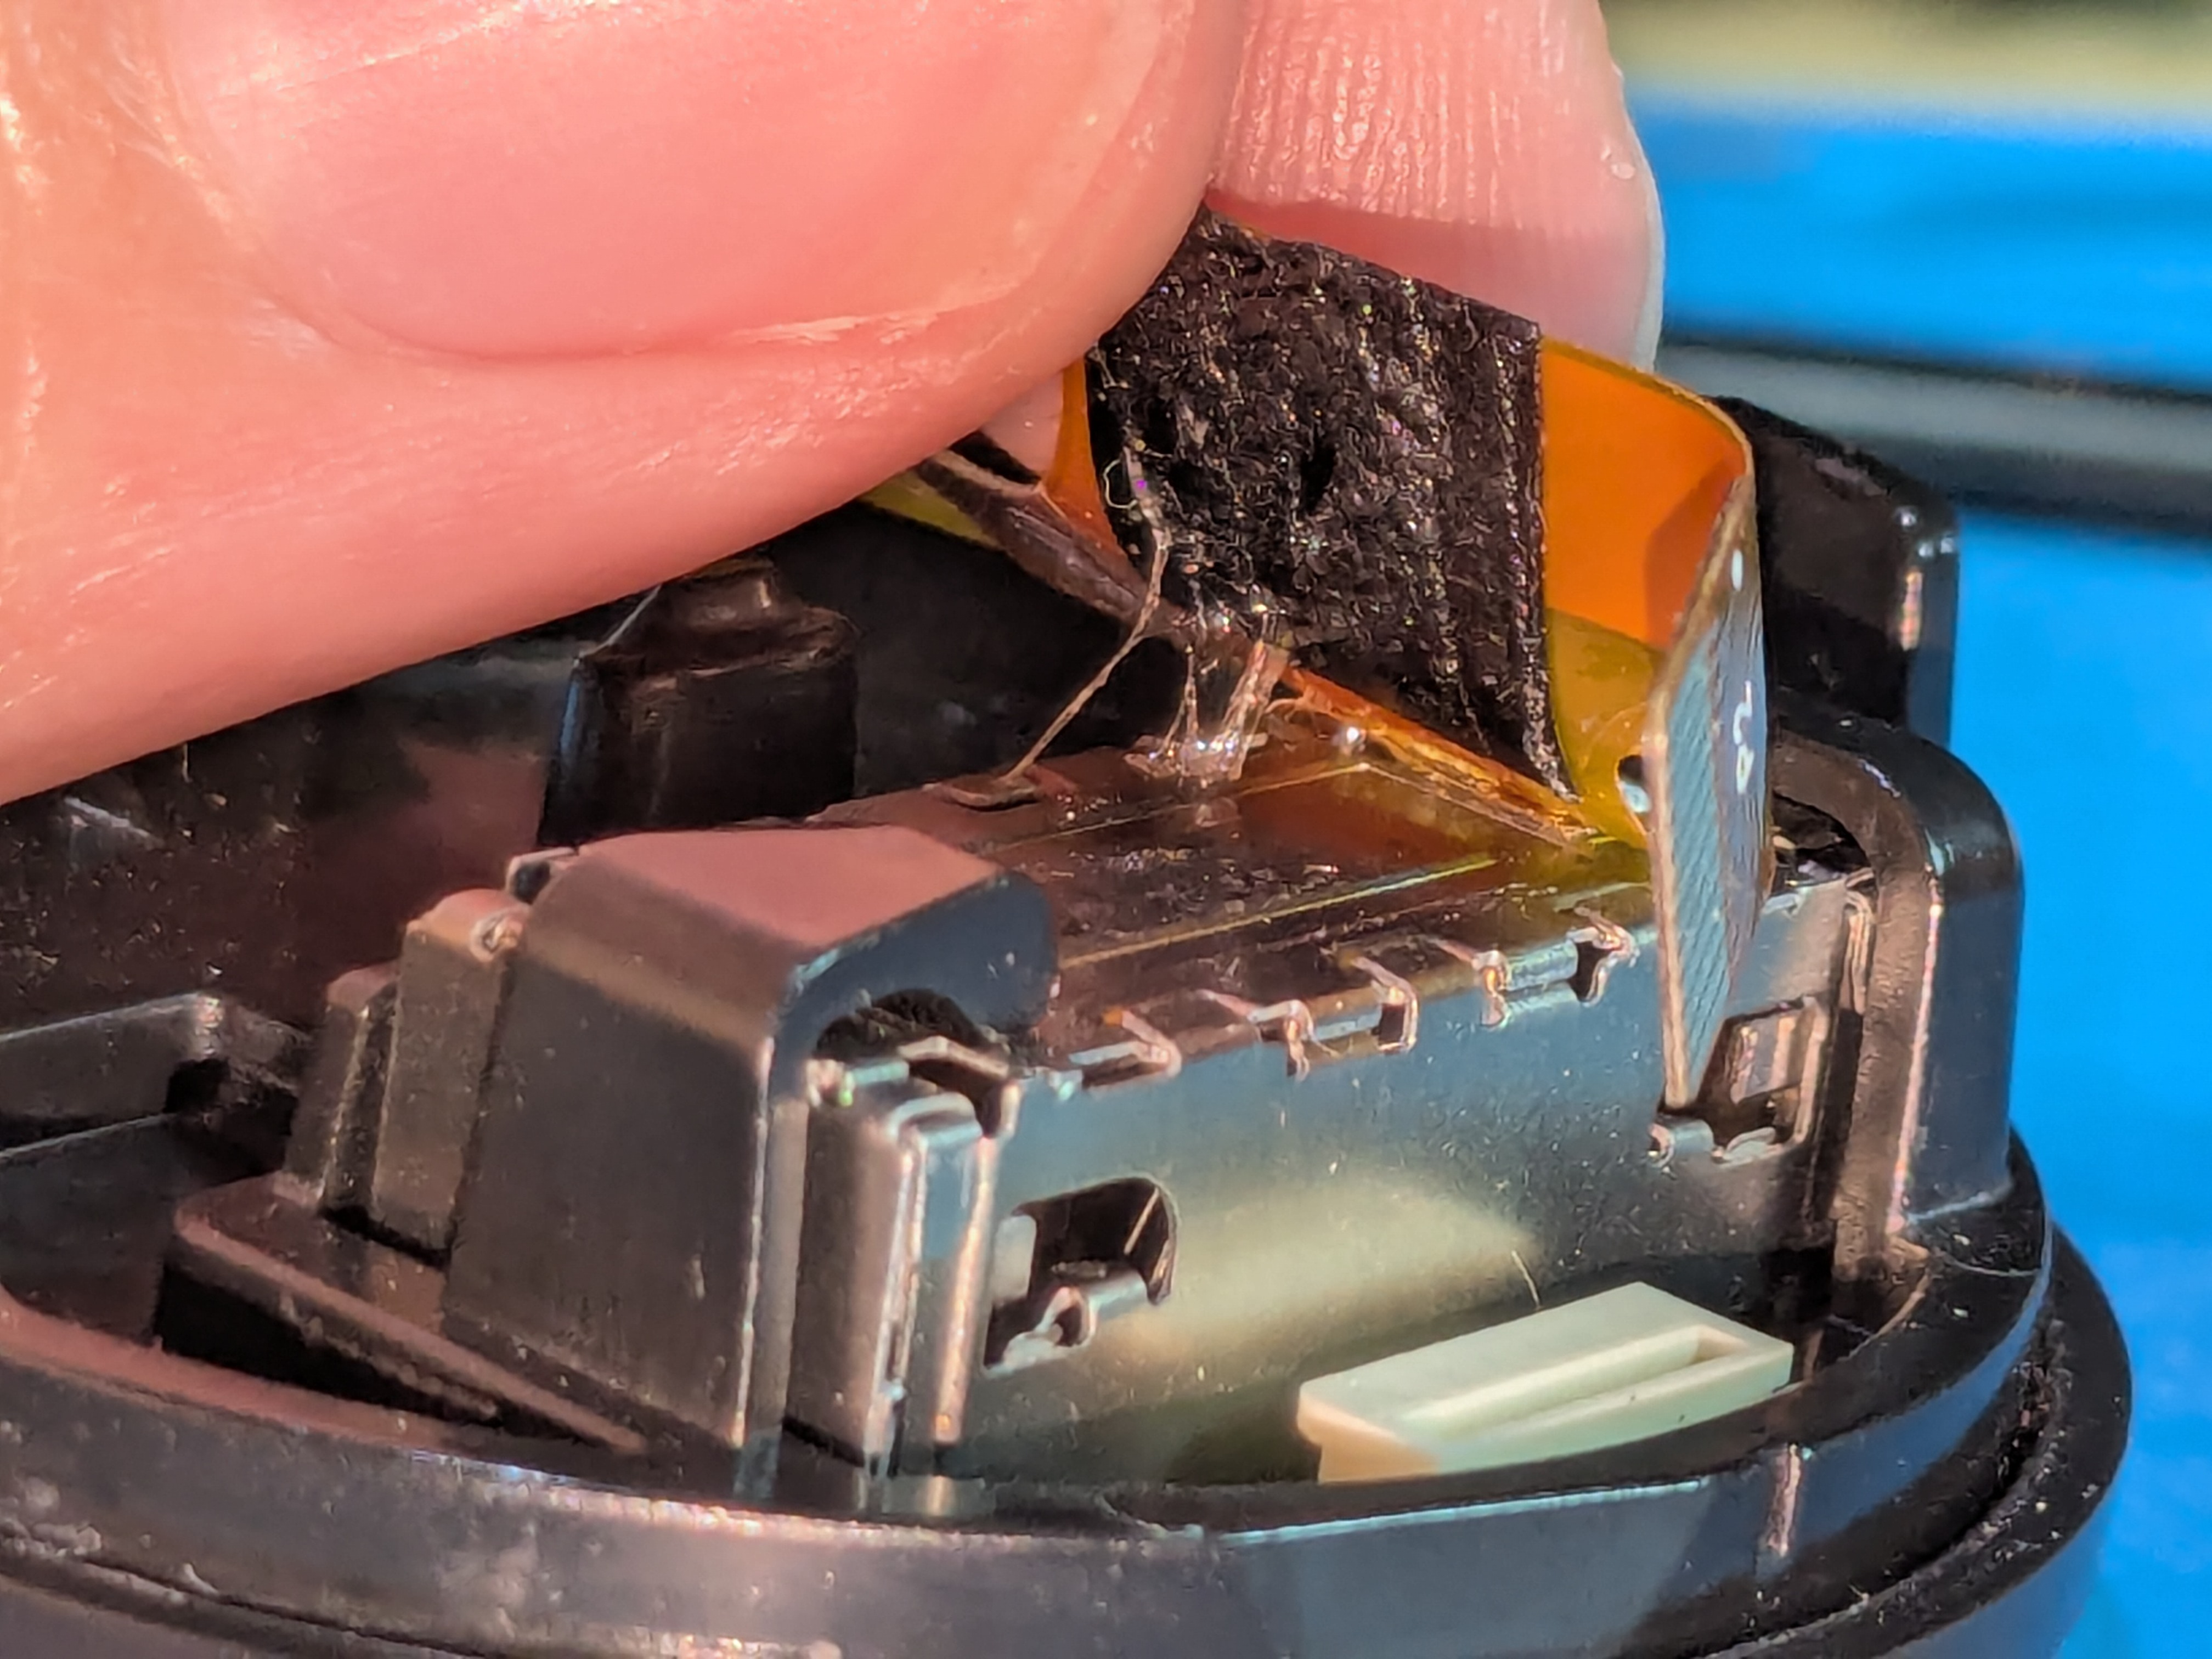
- Holding down the rumble motor’s cable with a spudger between the two solder points can be useful when desoldering

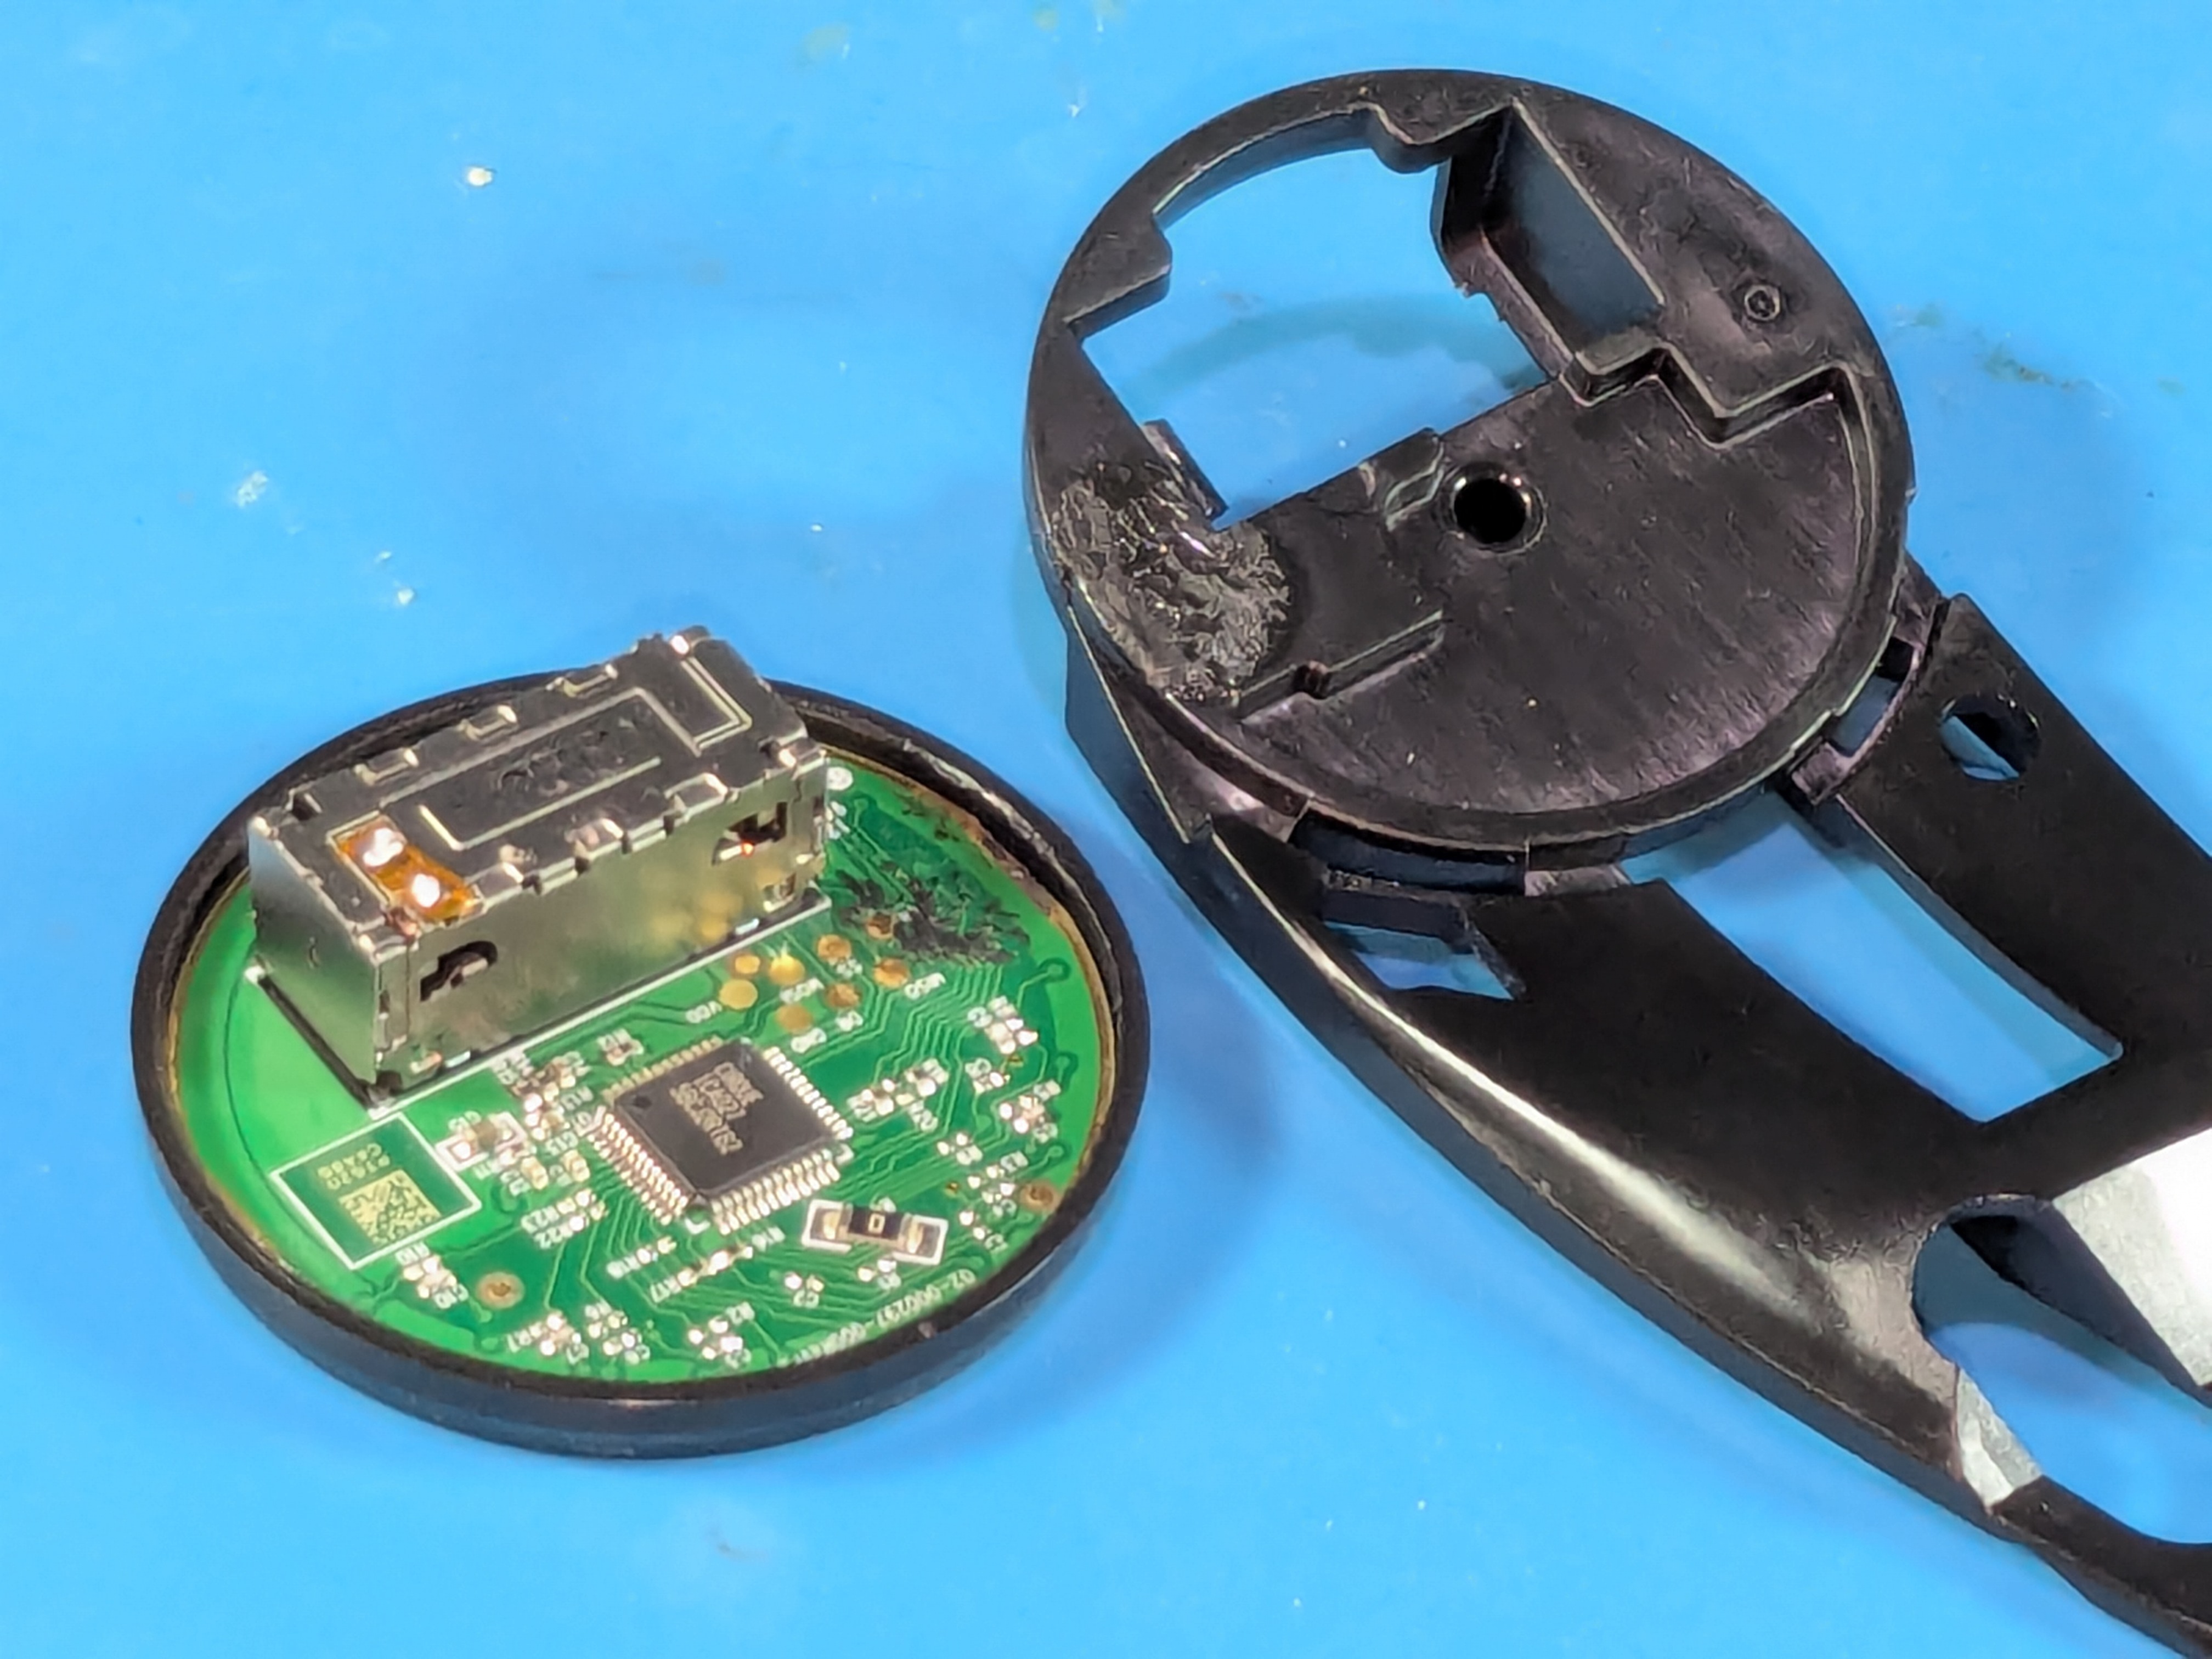
- Get off the trackpad from the trackpad arm by pressing on the inside edge of the trackpad
- The trackpad is held to the arm with glue on the left and right sides
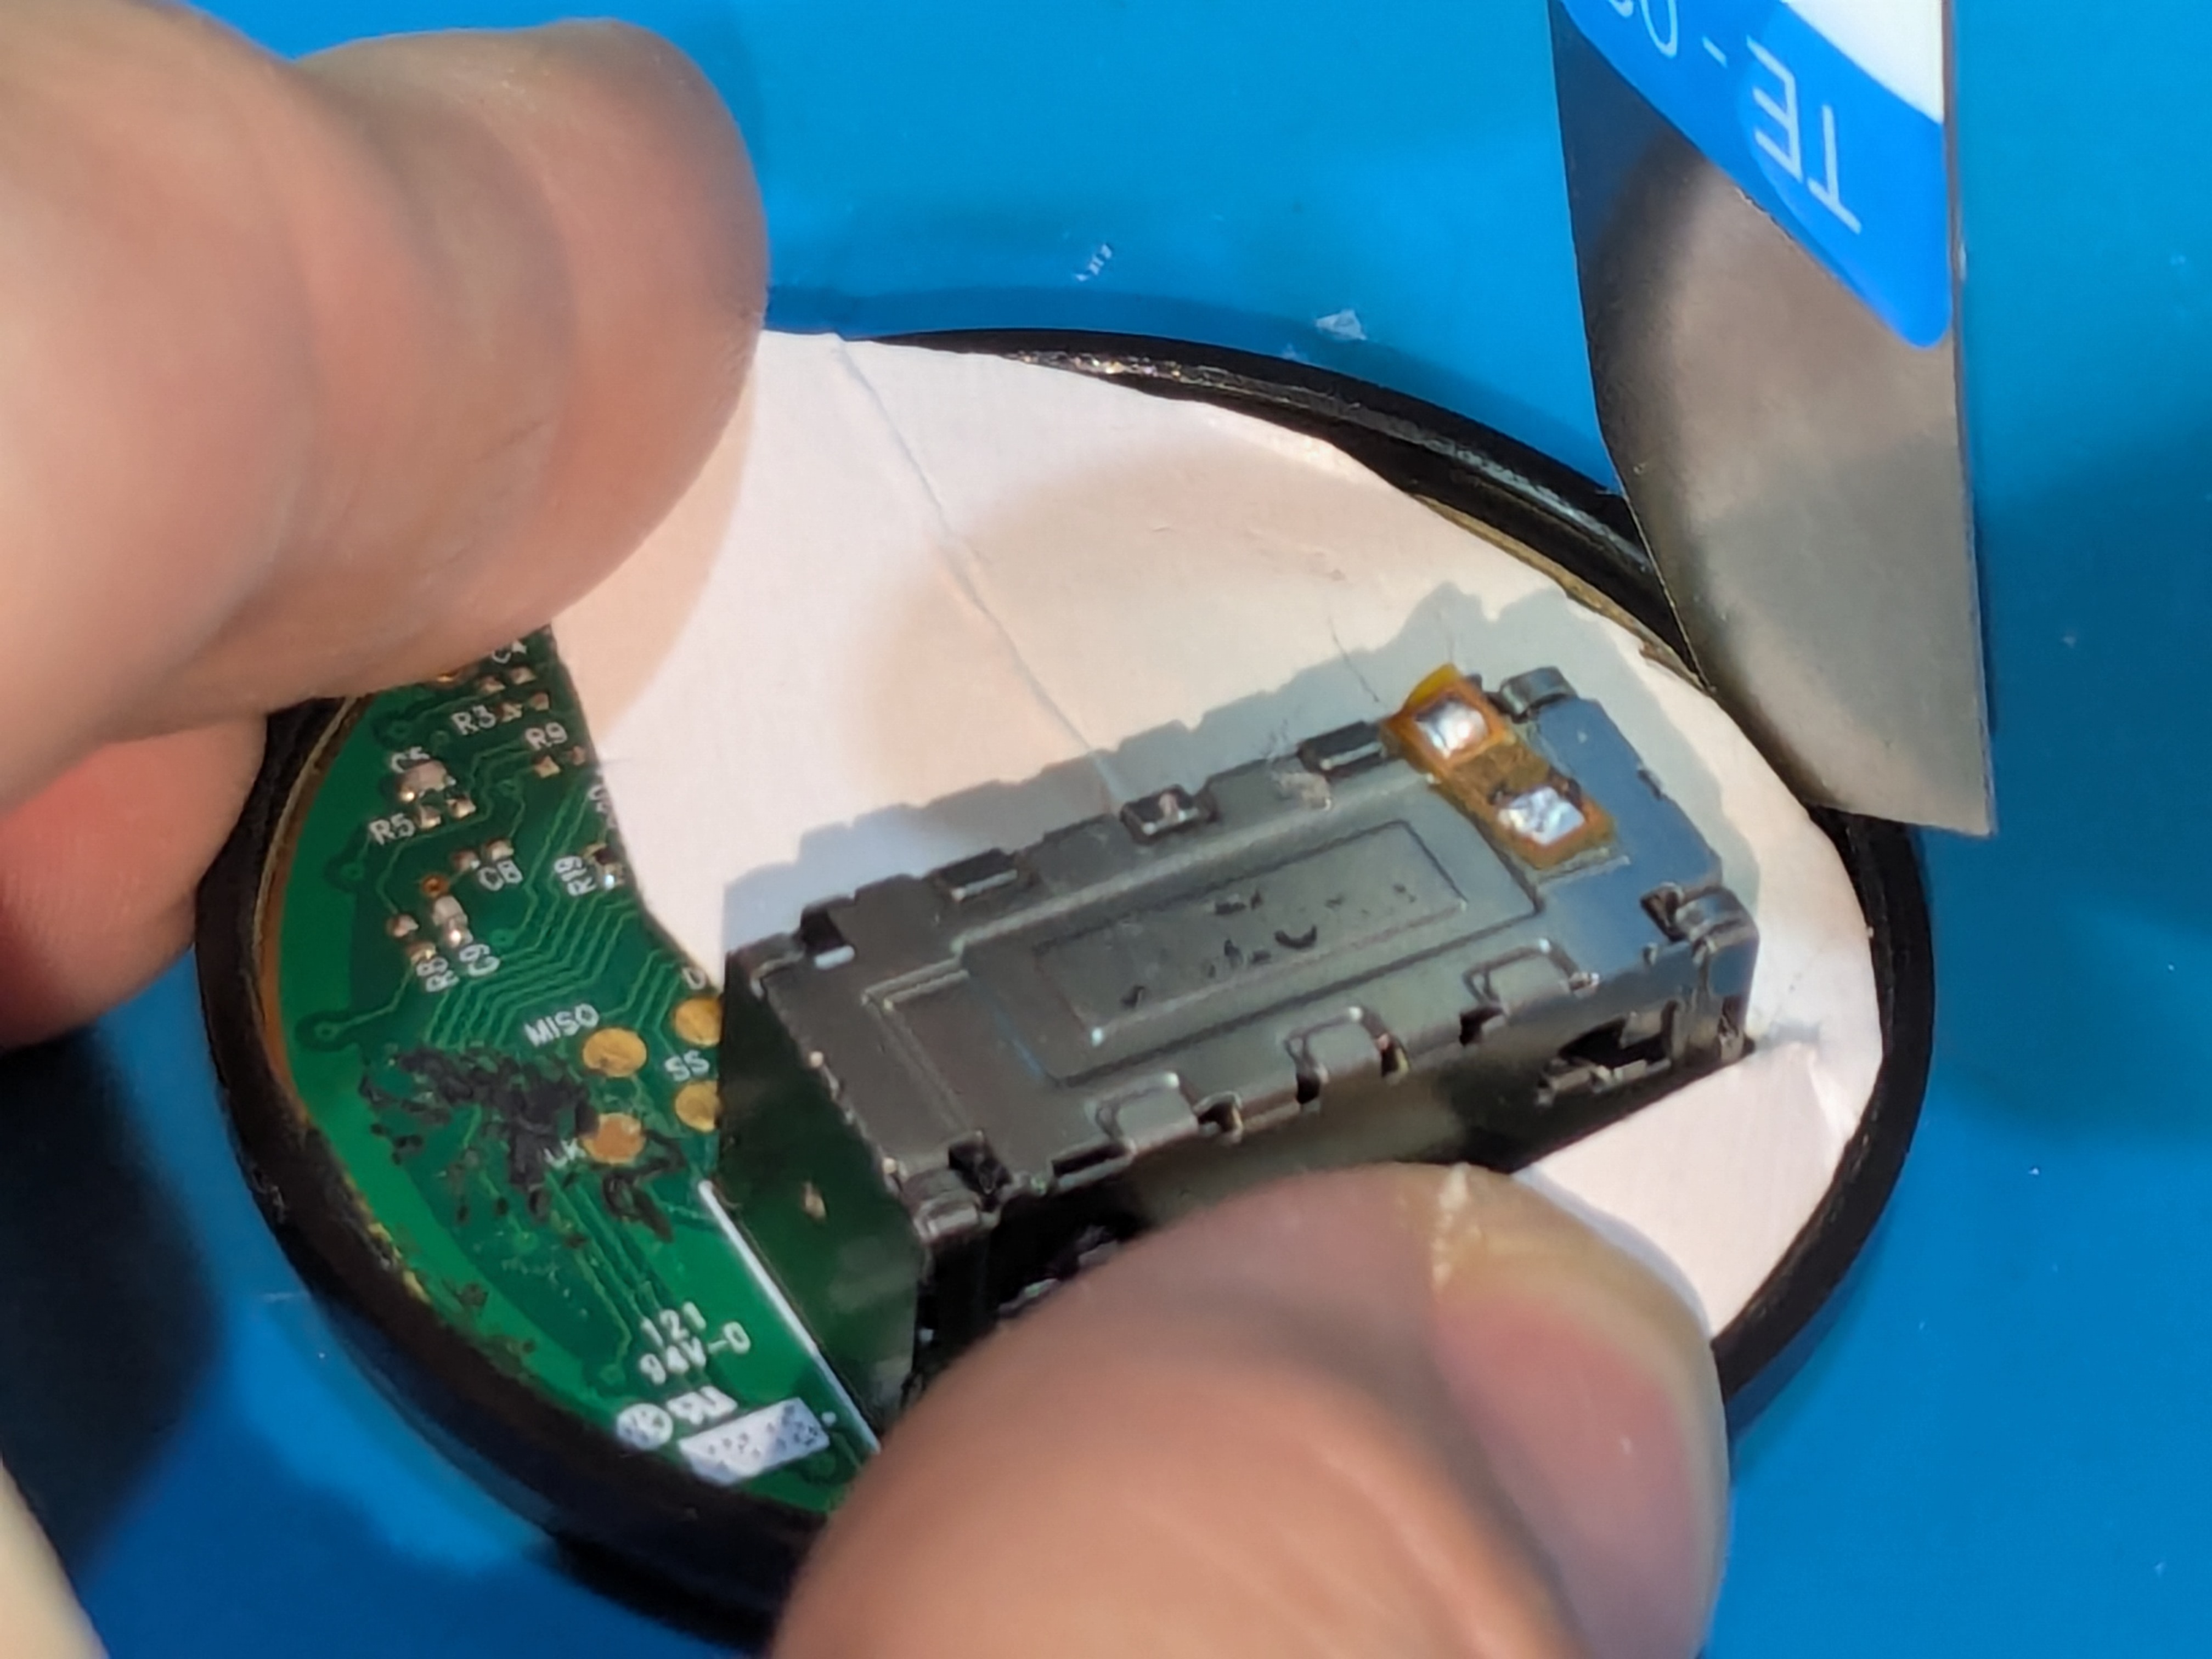
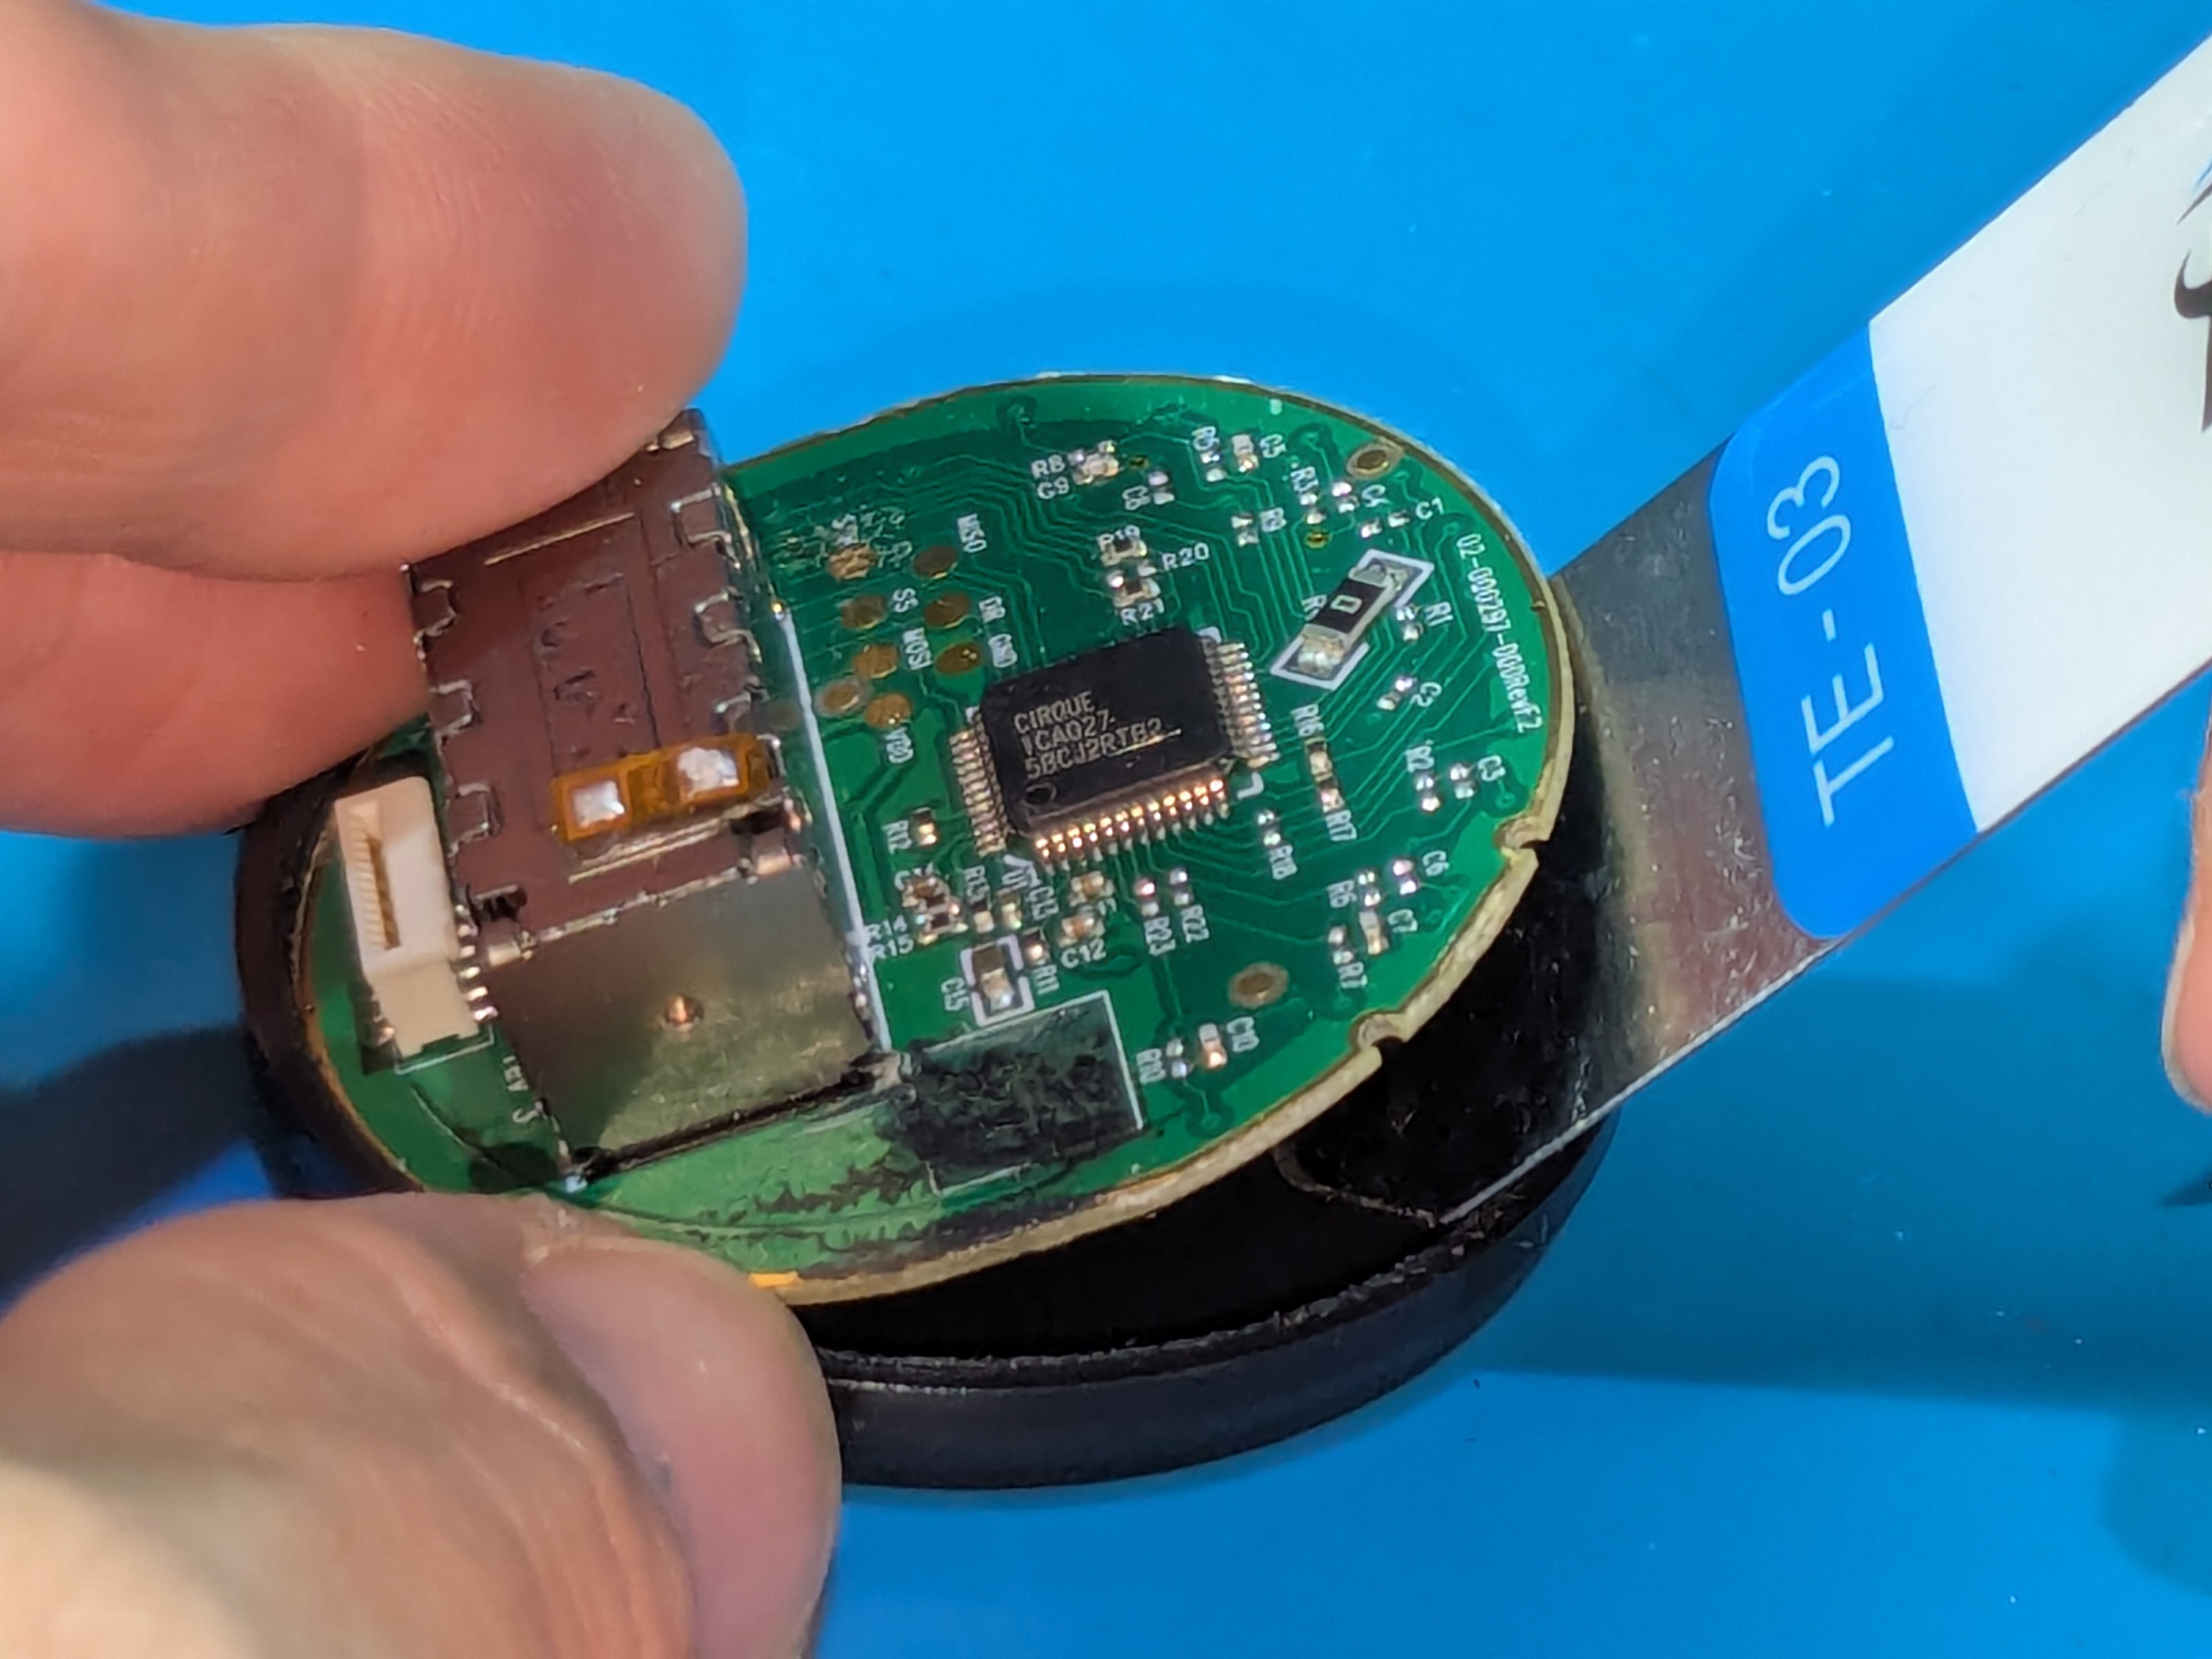
- After getting off the trackpad try cutting the glue that’s holding the trackpad cap in place and then prying it off
- There’s a flat side where it might be easier to start prying or cutting the glue
- If you can, try to use a thin plastic tool to do this
- If that doesn’t work be careful with metal ones to avoid damage
- You may also need to heat up the trackpad cap with a hairdryer or heat gun so the glue is weakened
- Don’t heat the trackpad up too much to avoid damage (eg. melting the plastics)
- Something to cover the board might be useful as well to avoid damage (eg. small piece of hard paper)
- It’s not recommended to take off the glue that holds the trackpad cap on
- The distance between the cap and the trackpad’s board (touch surface) needs to be thin so that it works correctly